background image

VI. Insert iPod

1.

 Ensure the correct inserts and height adjusters are installed for your iPod


(PLEASE NOTE: If the correct insert and height adjusters are not used 

you may damage or destroy your iPod and the iDive300)

2.

 Place iPod in the inserts with the iPod dock connector facing toward the cam knob.

3.

 Insert the connector cable into the dock connector of the iPod with the H2O Audio logo facing up.

4.

 Depending on your iPod model, press and hold the “Play / Pause” button or press the Power button  

to turn the iPod on.

5.


IMPORTANT:

 For touch-screen iPod models, to prevent the display screen from locking, access the 

General Settings to turn the Auto-Lock feature off. 

- Settings - General - Auto-Lock - “Never”

VII. Operation

Power On/Off

Press and hold the power button for 2 seconds to turn the iDive300 on/off.  

After turning the iDive300 on, all 3 LEDs on the back of the case should illuminate within a few seconds. 
If connected successfully only the Green LED should remain lit. 

iPod Authentication

Green LED indicates successful connection of the iPod.  

Red LED indicates a failed connection of the iPod. 
When the Red LED is illuminated, controls will be limited to adjusting the volume of the built-in 
amplifi er. 
 
Blue LED indicates that the authentication timed out. 
When the Blue LED is illuminated there is some limited function of the iPod controls. 

In case of a Blue LED

Restart the iDive300 by turning the power off then on. If this does not solve the problem:

1.

 Turn off the iDive300. 

2. 

Disconnect the connector cable from the iPod.

3.

 Ensure the iPod is on.

4.

 Reconnect the connector cable to the iPod.

5.

 Turn on the iDive300.

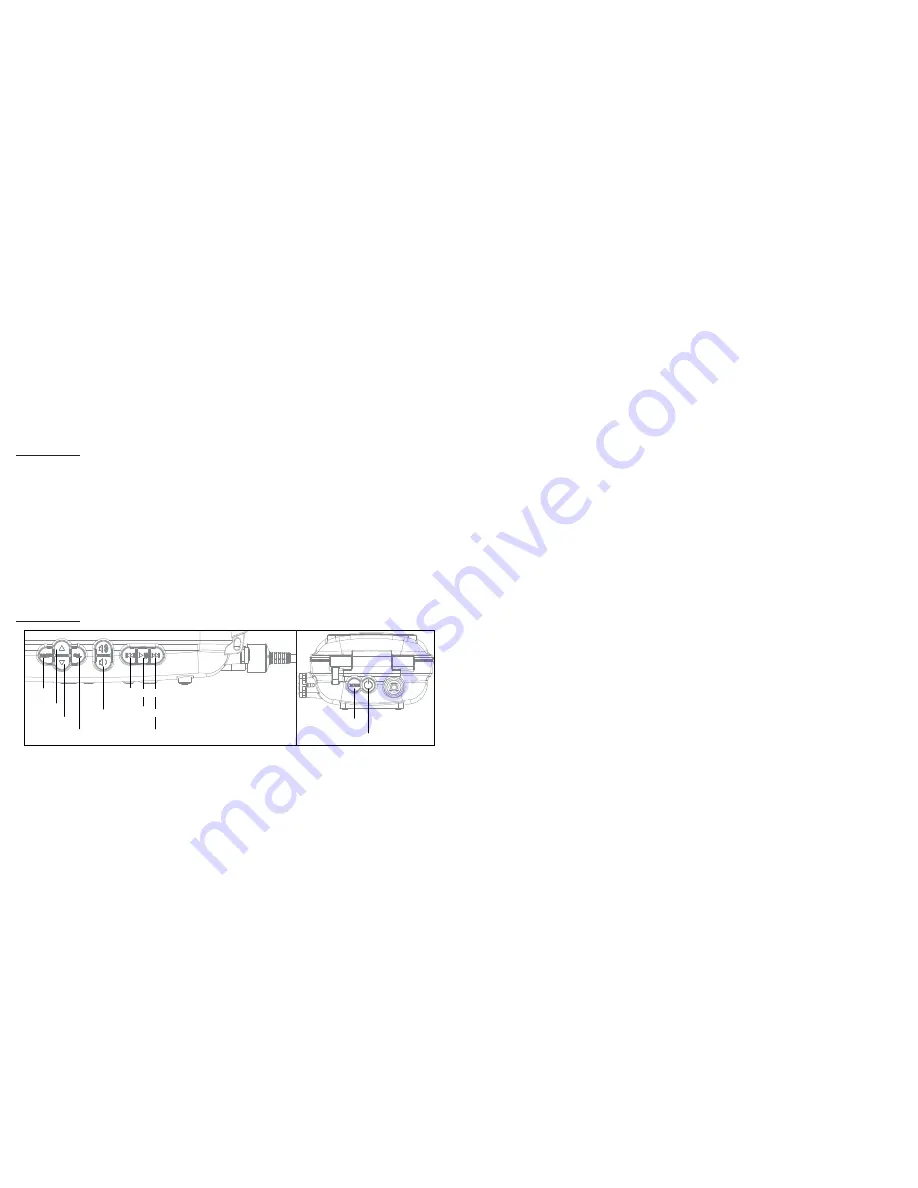
Menu

Next/Fast-forward

Previous/Fast-forward

Play/Pause

Select

Volume

Controls

Up

Mode

Power

Down

11

12

Содержание iDive300

Страница 1: ......

Страница 2: ...e e p D i v e W a t e r p r o o f C a s e S p e a k e r s D e p t h R a t i n g 3 0 0 f t 9 0 m iDV1 75 20080819 For updated manuals please visit our web site www h2oaudio com w w w H 2 O A u d i o c o m ...

Страница 3: ...Depth Rating 300ft 90m Cam Knob Lock Cam Knob Mask Clip Speaker LED lights Lanyard Hole iPod Control Buttons Connector Cable Battery Cover Insert Holes Height Adjuster Holes O ring 1 2 ...

Страница 4: ...1 Read the iDive300 instruction manual to familiarize yourself with the product 2 Unlock and open the case see page 6 and verify the blue O ring is clean and free of debris 3 Close and lock the case see page 7 4 Immerse the case without an iPod inside in water and soak for 30 min 5 Manipulate the iDive300 controls during submersion 6 Remove from the water and dry the exterior Visually inspect the ...

Страница 5: ...e O ring clean and free of sand dirt hair lint and other debris To clean the O ring 1 Remove the O ring from the case using the supplied O ring remover 2 Wash the O ring in warm fresh water strong detergents soaps and chemicals MUST NEVER be used to clean the case or the O ring 3 Allow O ring to air dry 4 Install O ring into the lid ensuring it is aligned properly with the round side of the O ring...

Страница 6: ...d height adjusters The inserts and height adjusters are used to securely hold your iPod in the correct location inside the case Consult the following chart to determine which inserts and height adjusters should be used with your iPod model Please note some iPod models will not require height adjusters iPod Model Upper Insert Letter Lower Insert Letter Height Adjuster Number iPod touch A B 1 iPhone...

Страница 7: ...d height adjusters Insert and height adjuster reference iPod touch iPhone iPhone 3G iPod nano 1st Gen iPod nano 2nd Gen iPod classic 160 Gb iPod classic 80 Gb iPod 5th Gen 30 Gb iPod 5th Gen 60 80 Gb iPod nano 3rd Gen A 1 1 B B B C C C C D D B 4 4 B B 3 3 B B 2 2 B A A Insert A Insert B Insert C Insert D Height Adjuster 1 Height Adjuster 2 Height Adjuster 3 Height Adjuster 4 9 10 ...

Страница 8: ...r 2 seconds to turn the iDive300 on off After turning the iDive300 on all 3 LEDs on the back of the case should illuminate within a few seconds If connected successfully only the Green LED should remain lit iPod Authentication Green LED indicates successful connection of the iPod Red LED indicates a failed connection of the iPod When the Red LED is illuminated controls will be limited to adjusting...

Страница 9: ...peakers iDive300 speakers feature specially designed clips for attachment to mask straps The mask clips are removable for users who wish to put the speakers inside a diving hood or under their mask strap IX General Storage Procedures For long term storage store in a cool dry place out of direct sunlight CAUTION The life of a O ring is typically one 1 year Contact H2O Audio for spare O rings and si...

Страница 10: ...or a Class B digital service pursuant to part 15 of the FCC Rules These limits are designed to provide reasonable protection against harmful interference in a residential installation This equipment generates uses and can radiate radio frequency energy and if not installed and used in accordance with the instructions may cause harmful interference to radio communications However there is no guaran...

Страница 11: ...h they were manufactured repaired by customer or any party without H2O Audio s written authorization or used in any manner inconsistent with H2O Audio s instructions Please refer to the care and maintenance instructions for more details Product Manuals are available for download on the H2O Audio website as well as packaged with the product Warranty claims involving personal property damage will be...

Страница 12: ...tions on how to return a product Proof of purchase from an Authorized Dealer will be required A copy of the original sales receipt and a copy of the owner s portion of the warranty card must accompany all correspondence regarding the equipment covered by this warranty agreement or in direct reference to this warranty FAQ s Q Will this product work with the original iPhone or 3G iPhone A Yes howeve...

Страница 13: ...ies have approximately 25 charge remaining Note the battery indicator of the iPod does not reflect the power remaining in the 3 AA batteries Notes Made for iPod means that an electronic accessory has been designed to connect specifically to iPod and has been certified by the developer to meet Apple performance standards Apple is not responsible for the operation of this device or its compliance wi...

Страница 14: ...oduced translated or formed into any electronic format without prior consent in writing H2O Audio is a registered trademark of H2O Audio Inc Apple and iPod are registered trademarks of Apple Inc Patents 6396769 6614722 6954405 7263032 Others Pending 11010 Roselle St Suite 150 San Diego CA 92121 Phone 1 800 708 6080 or 858 623 0339 Email support h2oaudio com ...

Отзывы: