background image

8

• 

Allow at least 12cm clear space between the back and sides of the unit and your wall 

or another appliance to ensure proper air circulation, which is necessary to cool the 

compressor and condenser.

• 

Before plugging in your new freezer, let it stand upright for approximately 2 

hours. 

This will allow the refrigerant gases to settle into the compressor and reduce 

the possibility of a malfunction in the cooling system.

• 

 Plug the unit into an exclusive, properly installed and earthed wall outlet. Do not 

under any circumstances cut or remove the third (ground) prong from the power 

cord. If in doubt about your setup, direct any questions concerning power and/or 

grounding to a certified electrician or an authorised service centre.

• 

Secure the freezer’s supply cord behind the unit. Do not leave it exposed or dangling 

to prevent injury and accidental disconnection from the power supply.

• 

After plugging the appliance into a wall outlet, allow the unit to cool down for 2 

to 3 hours before placing food in the freezer compartment.

Getting Started (Cont.)

Содержание GVAPP190

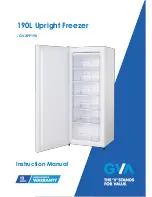
Страница 1: ...Instruction Manual 190L Upright Freezer GVAPP190...

Страница 2: ...2 Contents General Safety Instructions 3 Parts List 6 Getting Started 7 Instructions 9 Revising the Door Swing 11 Care and Maintenance 12 Responsible Disposal 13 Troubleshooting 14...

Страница 3: ...a potential hazard that can seriously injure you and others The instructions will tell you how to reduce the chance of injury and let you know what can happen if the instructions are not followed Rea...

Страница 4: ...l Plug the bar fridge into a 220 240V 50Hz 3 prong power outlet with a 15A fuse at the mains The outlet must be properly earthed to the ground Separate circuit Do not use an adaptor do not use an exte...

Страница 5: ...aning and maintenance Disconnect Unplug the bar fridge or disconnect power before cleaning or servicing Failure to do so can result in electrical shock injury or death Do not connect or disconnect the...

Страница 6: ...ch 1 Temperature control box 2 Upper drawer 3 Lower drawer 4 Adjustable legs 5 Magnetic gasket 6 Hole button of door 7 Bottom hinge 8 Door stopper 9 Top hinge cover N A M E S O F T H E P A R T S W S 1...

Страница 7: ...faces with lukewarm water using a soft cloth to remove any dust from transit and storage Dry the appliance thoroughly Your freezer has the capability of the door opening from the right or left side If...

Страница 8: ...g the unit into an exclusive properly installed and earthed wall outlet Do not under any circumstances cut or remove the third ground prong from the power cord If in doubt about your setup direct any...

Страница 9: ...rost when the ice is cm thick Once you have opened a packet of frozen food rewrap it airtight to prevent surface evaporation which causes drying or freezer burn Frozen food which has thawed accidental...

Страница 10: ...he freezer Securely tape down all loose items inside the freezer Turn the levelling feet up to the base to avoid damage Tape the door shut Protect the outside of the unit with a blanket or similar sof...

Страница 11: ...open the door from the other side follow the instructions below and opposite to reverse the door swing the numbers in brackets refer to the parts in the illustrations WARNING Ensure the upright freez...

Страница 12: ...parts In addition never use a sharp or metallic instrument to remove frost as it may damage the cooling system To scrape ice off surfaces use a plastic scraper Cleaning the freezer We recommend clean...

Страница 13: ...ding the disposal of electrical consumer goods and dispose of it appropriately for recycling and recovery of the refrigerant Contact your local authorities for advice on recycling facilities in your a...

Страница 14: ...e correct setting relative to your ambient conditions The door may have been kept open too long or is opened too frequently Warm air enters the freezer every time the door is opened Open the door less...

Страница 15: ...ure If the room temperature is hotter than usual the compressor has to work harder to maintain the correct temperature Excessive frost and ice has built up Ensure the door is not left open Check that...

Отзывы: