


28
Inserted USB device info
Displays USB version of the device that is attached, for example if a USB 2.0 device is
attached, 2.0 will be displayed. When no device is attached it will display ‘No Device’.
Disc:
Show the current disc.
Operation guide:
Operational buttons o n the remote
/ / /
, Menu and OK.
Multimedia main board keypress instruction:
The follows only list MM page and other relevant function, Menu, sleep and other system
function is not included.
/
Move Focus to left/right, it can circle move.
/
Turn up/down.
OK/Enter:
Enter submenu.
PHOTO
Multimedia PHOTO’s submenu layout:
27
Inserted USB device info
2.0 will be displayed. When no device is attached it will display 'No Device'.
Displays USB version of the device that is attached, for example if a USB 2.0 device is attached,
O
peration guide
Operational buttons on the remote ◄►
, Menu and OK.
▲▼
◄ ►
/
▲ ▼
/
OK
/
Enter
M
ultimedia main board keypress instruction:
T
he follows only list MM page and other relavant function, Menu, sleep and other systerm
function is not included.
E
nter submenu.
T
urn up/down.
M
ove Focus to left/right, it can circle move.
Return 200
*
200
1
UP
.
png
2
.
bmp
2
C:\
Resolution
1024x768
Size
200KBytes
Date
2010
/
08
/
08
Time
08
/
23
/
22
1
/
2
Delete Current Filt
1
.
bmp
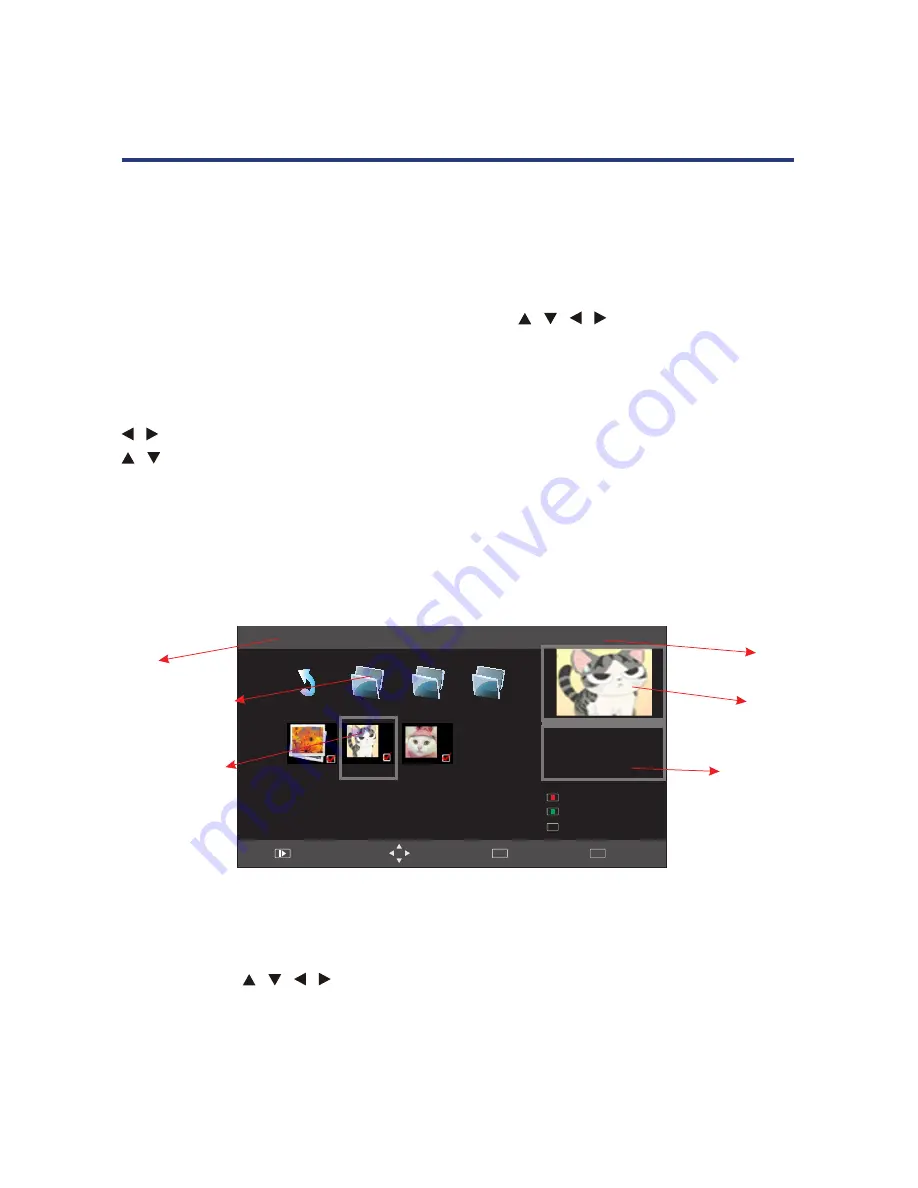
D
isc
F
ile folders in disc,
press ok to enter
P
icture overview
Page
Pr
eview
P
icture
information
PHOTO
M
ultimedia PHOTO
’
s submenu layout:
P
age
D
isc
S
how the current disc.
Indicates the total number of pages containing files. example as per picture - '1/2' represents page
1 of 2.
P
icture list
P
review window
Displays a preview of the highlighted picture in the Picture list.
U
se ◄►
▲▼
to scroll through the picture list. Press OK to select the picture, a tick will appear on the file.
Press PLAY to view picture in full screen.
Quit
EXIT
Move
Menu
MENU
Full
Screen
Add
/Remove all
Add
/
R
emove
to
playlist
OK
Page:
Indicates the total number of pages containing files. example as per picture - ‘1/2’
represents page 1 of 2.
Picture list:
Use
/ / /
to scroll through the picture list. Press OK to select the picture,
a tick will appear on the file.
Press PLAY to view picture in full screen.
Preview window:
Displays a preview of the highlighted picture in the Picture list.
Menu Operation
Содержание GVA22FLEDA
Страница 1: ...Instruction Manual 21 5 54cm FHD LED LCD TV with Built in DVD Player GVA22FLEDCA ...
Страница 44: ...44 Notes ...
Страница 45: ...45 Notes ...
Страница 46: ...46 Notes ...
Страница 47: ...47 Notes ...


