30
INSTALLATION INSTRUCTIONS
Before Using Your Wine Chiller
• Remove the exterior and interior packing.
• Check to be sure you have all of the following parts:
Model GZ-16
Model GZ-28
(4) Shelves
(6) Shelves
(1) Instruction Manual
(1) Instruction Manual
• Clean the interior surface with lukewarm water using a soft cloth.
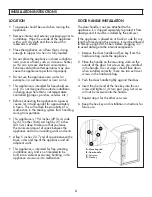
Installation of Your Wine Chiller
• This Wine Chiller is designed to be free standing installation only, it’s
better not built in.
• Place your Wine Chiller on a surface that is strong enough to
support it when it is fully loaded.
• Allow 5 inches of space between the back and sides of the wine
chiller, which allows the proper air circulation to cool the heat sink.
• Locate the Wine Chiller away from direct sunlight and sources
of heat (stove, heater, radiator, etc.). Direct sunlight may affect
the acrylic coating and heat sources may increase electrical
consumption. Extreme cold ambient temperatures may also cause
the unit not to perform properly.
• This Wine Chiller uses superconductor refrigeration technology
(no compressor) and is not designed for storage in hot areas like
garages, warehouses or outdoors since it is designed to operate at a
maximum of 30 degrees below the ambient temperature.
• Avoid locating the unit in moist areas.
• Plug the Wine Chiller into an exclusive, properly installed-grounded
wall outlet. Do not under any circumstances cut or remove the third
(ground) prong from the power cord. Any questions concerning
power and/or grounding should be directed toward a certified
electrician or an authorized service center.
• After plugging the Wine Chiller into a wall outlet, allow the
unit to cool down for 2-3 hours before placing any items in the
compartment.