background image


LR 67014 we 

18 


□  Switch off at the wall socket then remove the plug from the 

socket when not in use or before cleaning. 

□  Switch  off  and  unplug  before  fitting  or  removing 

tools/attachments, after use and before cleaning. 

□  Never  immerse  the  appliance,  the  charging  cable  or  the 

mains plug in water or other liquids. 

□  Never  use  the  appliance  and  the  power  supply  near  hot 

surfaces. 

□  Never use the appliance outdoors and always store it in a 

dry place. 

□  Use only original accessories recommended by the supplier 
□  Do not place the unit on the following places: 

-  Direct sunlight facing air  purifier, heated place. (it may 

cause  deformation,  deterioration,  discoloration  and 
malfunction); 

-  Close to televisions, radios and other similar equipment. 

(please let the unit more than 1 meter away). 

□  Keep  this  appliance  away  from  pollen,  dust  and  other 

residues.  

□  It is recommended to put this appliance on a flat ground in 

the room. 

□  In order to make effective air circulation in the room, there 

should be a gap of at least 30cm all around the appliance 

□  Do not place anything on the product. Do not put magnets 

and metal object. Otherwise, it may cause malfunction. 

□  Do not block the air inlet and outlet.  
□  Do not lift or move the appliance while it is working 
□  Never pull the cord in order to move or store the appliance. 

It may cause a short circuit or damage the power cord. 

□  Do not damage the power cord or plug. Do not cut or twist 

the appliance power cord. If the power cord is damaged, it 
must  be  replaced  by  the  manufacturer,  the  maintenance 
department or a competent qualified electrician (*) to avoid 
any danger. 

□  Do  not  use  beyond  the  rated  power.  Otherwise,  the 

appliance could overheat and cause fire accidents.  

Содержание LR 67014 we

Страница 1: ...1 LR 67014 we Luftreiniger Air purifier Purificateur d air Purificador de aire Luchtreiniger LR 67014 we 220V 240V 50Hz 60 Hz 80W I B Version 201030 ...

Страница 2: ...lass 4 Vorderseite 5 Oberseite 6 Lufteinlass 7 Bedienfeld 8 Griff 9 Luftauslass 10 Seitenansicht 11 Rückseit EN 1 Control Panel 2 Front Panel 3 Air Inlet 4 Front Side 5 Top Side 6 Air Inlet 7 Control Panel 8 Handle 9 Air Outlet 10 Side View 11 Rear Side ...

Страница 3: ...0 Vue de côté 11 Côté arrière ES 1 Panel de control 2 Panel frontal 3 Entrada de aire 4 Lado delantero 5 Parte superior 6 Entrada de aire 7 Panel de control 8 Mango 9 Salida de aire 10 Vista lateral 11 Lado trasero NL 1 Bedieningspaneel 2 Voorwand 3 Luchtinlaat 4 Voorzijde 5 Top 6 Luchtinlaat 7 Bedieningspaneel 8 Handgreep 9 Luchtuitlaat 10 Zijaanzicht 11 Achterkant ...

Страница 4: ...er durchgeführt werden es sei denn sie sind älter als 8 Jahre und beaufsichtigt Lassen Sie Ihr Gerät und sein Netzkabel nie unbeaufsichtigt und in Reichweite von Kindern jünger als 8 Jahre oder unverantwortlichen Personen wenn es an der Steckdose hängt oder wenn es abkühlt Die Netzspannung muss mit der auf dem Gerät vermerkten Spannung übereinstimmen Das Gerät darf nur zu Haushaltszwecken verwende...

Страница 5: ...der das Gerät noch das Ladekabel oder den Stecker in Wasser oder eine andere Flüssigkeit Das Gerät darf nicht in der Nähe von Wärmequellen verwendet werden Das Gerät darf nur im Innenbereich verwendet werden und nur in einer trockenen Umgebung aufbewahrt werden Verwenden Sie nur vom Hersteller empfohlenes Originalzubehör Stellen Sie das Gerät nicht an folgenden Orten auf Stellen mit direkter Sonne...

Страница 6: ...s Andernfalls kann das Gerät überhitzen und einen Brand verursachen Berühren Sie den Netzstecker nicht mit nassen Händen da dies zu einem elektrischen Schlag führen kann Stecken Sie keine Finger oder Metallgegenstände in den Luftaustrittsspalt Dies kann einen Stromschlag verursachen oder Sie verletzen Lassen Sie kein Wasser entflammbares Reinigungsmittel oder andere Flüssigkeiten in das Gerät flie...

Страница 7: ...rationen hören oder einen brennenden Geruch wahrnehmen schalten Sie das Gerät sofort aus Andernfalls kann es zu Stromschlägen Funkenbildung oder Verbrennungen kommen Bitte reinigen Sie den Netzstecker regelmäßig Vergessen Sie vor der Reinigung nicht den Netzstecker zu ziehen Anschließend können Sie Ihr Gerät mit einem trockenen Tuch abwischen Wenn Sie Ihr Gerät längere Zeit nicht benutzen ziehen S...

Страница 8: ... Geräusche oder Vibrationen von Ihrem Gerät ausgehen schalten Sie es sofort aus und wenden Sie sich an einen qualifizierten Elektriker Das Gerät darf nur von einer qualifizierten Elektrofachkraft installiert oder deinstalliert werden Fachmann anerkannter Kundendienst des Lieferanten oder des Importeurs der für derartige Reparaturen zuständig ist Für eventuelle Reparaturen wenden Sie sich bitte an ...

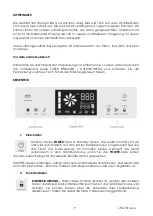
Страница 9: ... die Verpackung welche wir zum Schutz der Filter beigesteuert haben BEDIENFELD 1 Einschalten Drücken Sie die POWER Taste im Standby Modus Das Gerät schaltet sich ein und wird automatisch auf den letzten Betriebsmodus programmiert bis auf den Timer und Ruhezustand Im normalen Modus wechselt das Gerät automatisch in den Standby Modus wenn Sie die POWER Taste erneut drücken Gleichzeitig wird der aktu...

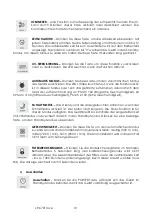
Страница 10: ...g an PM2 5 60 langsame Geschwindigkeit 60 PM2 5 150 mittlere Geschwindigkeit PM2 5 150 hohe Geschwindigkeit SCHLAFMODUS Das Display und die Anzeigeleuchten erlöschen wenn der Schlafmodus aktiviert ist Der Motor läuft langsam Die Timer Funktion ist für diesen Modus verfügbar Das Gerät bleibt bis zum Ende der eingestellten Zeit im Schlafmodus und wechselt danach in den Standby Modus Drücken Sie eine...

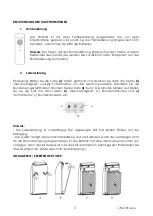
Страница 11: ...Geschwindigkeit und c Schlafmodus um das Gerät einzustellen Nachdem Sie die Stunden eingestellt haben drücken Sie die Taste a Auto Die Minuten blinken auf Stellen Sie sie die Zeit mit den Tasten b Geschwindigkeit Stunden Minuten und c Schlafmodus Stunden Minuten ein Hinweis Die Zeiteinstellung ist unabhängig Die angezeigte Zeit hat keinen Einfluss auf die Reinigung Das Gerät verfügt über eine Puff...

Страница 12: ...lterwechsel Erinnerungsfunktion die auf 1500 Stunden eingestellt ist Ersetzen Sie die Filter 2 und 3 wenn die Anzeige CHANGE aufleuchtet Drücken Sie die Kindersicherungstaste 5 Sekunden lang um diese Funktion zurückzusetzen Reinigung und Wartung 1 Vorfilter Alle 15 Tage Verwenden Sie einen Staubsauger um Staub von der Filteroberfläche zu entfernen oder waschen Sie ihn mit Wasser und trocknen Sie i...

Страница 13: ... und reinigen Sie die Linse mit dem trockenen Wattestäbchen Abb 2 Beleuchten Sie wenn Sie nicht klar sehen können Hinweis Bitte stellen Sie vor der Reinigung sicher dass die Stromversorgung unterbrochen ist Zögern Sie nicht dieses Gerät mit Licht zu beleuchten wenn Sie nicht klar sehen können TIPPS Ziehen Sie vor der Reinigung und Wartung den Netzstecker aus der Steckdose Öffnen Sie die Maschine n...

Страница 14: ... 2 Der Partikelsensor ist verschmutzt Reinigen Sie den Sensor Das Gerät ist laut Ist der Negativionengenerator staubig Reinigen Sie den Generator Der Geruch des Luftauslasses ist unangenehm 1 Ist der Filter verschmutzt Reinigen Sie den Filter 2 Wurde der Filter schon lange nicht mehr gewechselt Ersetze Sie den Filter Das Gerät befindet sich nicht im Modus Nachtwache Befindet sich der Luftreiniger ...

Страница 15: ...chtbeachtung der Gebrauchsanweisung entstehen Schäden welche durch Verschleiß oder infolge normaler Abnützung entstanden sind Ebenso weisen wir darauf hin dass die Gewährleistung bei Fremdeingriff erlischt Hierbei wird der Verkäufer im Fall eines Schadens keine Haftung übernehmen Unter www ggv service de können Sie im Falle eines Mangels an unserem Gerät innerhalb der Garantiezeit eine schnelle un...

Страница 16: ...EN GEWÄHRLEISTUNGSFRIST Reparaturen können kostenpflichtig von entsprechendem Fachpersonal oder Reparaturservice ausgeführt werden Die Bedienungsanleitung ist auf einfache Nachfrage auch verfügbar in elektronischem Format bei dem Kundendienst ...

Страница 17: ... than 8 years old or irresponsible persons when it is plugged into the wall or when it is cooling down Check that the mains voltage matches the voltage noted on the appliance before using the appliance Use the appliance for household purposes only as described in this manual Never leave your device unattended during use Close supervision is necessary when any appliance is used by or near children ...

Страница 18: ...the unit more than 1 meter away Keep this appliance away from pollen dust and other residues It is recommended to put this appliance on a flat ground in the room In order to make effective air circulation in the room there should be a gap of at least 30cm all around the appliance Do not place anything on the product Do not put magnets and metal object Otherwise it may cause malfunction Do not bloc...

Страница 19: ...e the remote control Do not place the appliance in similar places Unstable surfaces Products may drop overturn injure yourself leak out electrocute yourself or catch fire Where the temperature or the humidity is very high e g the bathroom Kitchen and other places prone to soot emissions chimneys Do not use air purifier as an aromatherapy appliance Chemical residues may accumulate in the machine th...

Страница 20: ...e socket Otherwise it may damage the power cord electrocute yourself cause short circuit or catch on fire If the switch appliance does not work the power cord or plug abnormally heat or you hear abnormal sound or vibration coming from your appliance please immediately turn it off and contact a competent qualified electrician Only a competent qualified electrician is allowed to install or uninstall...

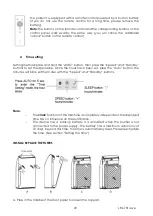
Страница 21: ...in standby mode The appliance will switch on and will be automatically programmed on the last operating mode except timer and sleep mode In normal mode the appliance will put itself into standby mode if you press the POWER button It will save the current operating mode at the same time NOTE This air purifier include a safety shutdown function The appliance will not switch on if the front panel is ...

Страница 22: ... SLEEP MODE The display and indicator lights switch off when the sleep mode is activated The engine runs slowly The timer function is available for this mode the unit will remain in sleep mode until the end of the set time after which it will switch to the standby mode Press any key to exit the sleep mode SPEED MODE Press this button to exit automatic mode and manually set the engine speed low 500...

Страница 23: ...d and Standby buttons to set the appliance Once the hours have been set press the auto button the minutes will blink set them also with the Speed and Standby buttons Note The clock function of this machine is completely independent the displayed time has no influence on the purification The device has a backup battery it is activated when the purifier is not connected to the power supply The batte...

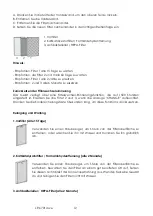
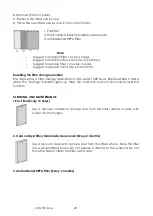
Страница 24: ...The device has a filter change reminder function set at 1500 hours Replace filters 2 and 3 when the change indicator lights up Press the child lock button 5 seconds to reset this function CLEANING AND MAINTENANCE 1 Pre Filter Every 15 days Use a vacuum cleaner to remove dust from the filter surface or wash with water dry thoroughly 2 Cold catalyst filter formaldehyde removal Every 2 months Use a v...

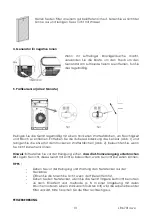
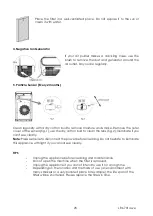
Страница 25: ...or fig 1 use the dry cotton bud to clean the lens fig 2 Illuminate if you can t see clearly Note Please ensure to disconnect the power before cleaning Do not hesitate to illuminate this appliance with light if you cannot see clearly TIPS Unplug the appliance before cleaning and maintenance Do not open the machine when the filter is removed Unplug the appliance if you do not intend to use it for a ...

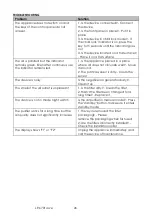
Страница 26: ...ir does not circulate well Move it around 2 The particle sensor is dirty Clean the sensor The device is noisy Is the negative ion generator dusty Clean it up The smell of the air outlet is unpleasant 1 Is the filter dirty Clean the filter 2 Hasn t the filter been changed for a long time Replace it The device is not in mode night watch Is the air purifier in manual mode Press the standby button mak...

Страница 27: ...e has been modified or if attempts have been made to repair the appliance In such case the vendor cannot be held responsible in case of accidents On website www ggv service de you can find a quick and easy solution to register a complaint in case of a defect within the warranty period Just log on to the service portal www ggv service de designate the appliance and then you will be guided through t...

Страница 28: ... et qu ils soient supervisés Ne laissez jamais votre appareil et son câble d alimentation sans surveillance et à la portée des enfants de moins de 8 ans ou des personnes non responsables lorsque celui ci est sous tension ou pendant sa phase de refroidissement Vérifiez que la tension du secteur correspond à la tension indiquée sur l appareil avant de l utiliser Utilisez l appareil uniquement à des ...

Страница 29: ...c Utilisez uniquement les accessoires recommandés par le fournisseur Ne placez pas l appareil aux endroits suivants Purificateur d air avec exposition directe aux rayons du soleil endroit chauffé elle peut provoquer des déformations des détériorations des décolorations et des dysfonctionnements Près des téléviseurs radios et autres équipements similaires veuillez laisser l appareil à plus d un mèt...

Страница 30: ...oigts ou des objets métalliques dans l interstice de sortie d air Vous risqueriez de vous électrocuter ou de vous blesser Ne laissez pas de l eau des détergents inflammables ou d autres liquides s écouler dans l appareil Cela pourrait causer un choc électrique ou brûler le purificateur d air Ne plongez jamais l appareil dans l eau ou tout autre liquide pour quelque raison que ce soit Ne le mettez ...

Страница 31: ...ent vous brûler Veuillez nettoyer régulièrement la fiche secteur Avant le nettoyage n oubliez pas de débrancher la fiche secteur Vous pouvez ensuite essuyer votre appareil à l aide d un chiffon sec Si vous n avez pas l intention d utiliser votre appareil pendant une longue période veuillez débrancher la fiche secteur Avant de procéder à l entretien débranchez la fiche d alimentation L appareil peu...

Страница 32: ...nez le immédiatement et contactez un électricien qualifié compétent Seul un électricien qualifié et compétent est autorisé à installer ou désinstaller la machine Service qualifié compétent service après vente du fabricant ou de l importateur ou une personne qualifiée reconnue et habilitée à faire ce genre de réparation afin d éviter tout danger Dans tous les cas veuillez retourner l appareil auprè...

Страница 33: ...fourni pour protéger les filtres PANNEAU DE CONTRÔLE 1 Allumage Appuyez sur la touche POWER en mode standby L appareil s allumera et sera automatiquement dans le dernier mode utilisé excepté les modes minuteur et veille Pendant à peu près 1 5 min le purificateur va se calibrer par la suite il affichera l état actuel de l air en mode automatique adaptez la vitesse de filtrations aux conditions En m...

Страница 34: ...ir PM2 5 60 vitesse lente 60 PM2 5 150 vitesse medium PM2 5 150 vitesse élevée MODE VEILLE L écran et les voyants lumineux s éteignent lorsque le mode veille est activé Le moteur fonctionne au ralenti La fonction minuterie est disponible pour ce mode l appareil restera en mode veille jusqu à la fin du temps réglé après lequel il passera en mode Standby Appuyez sur n importe quelle touche pour quit...

Страница 35: ...lage appuyez longuement sur la touche AUTO ensuite appuyez sur Vitesse et Veille pour régler Une fois les heures réglées appuyez sur la touche auto les minutes clignotent réglez les également avec les touches Vitesse et Veille Remarque L heure de l appareil fonctionne complètement indépendamment l heure affichée n influe en rien sur la purification L appareil dispose d une batterie de secours elle...

Страница 36: ...ppel de changement de filtre L appareil a une fonction de rappel de changement de filtre fixé à 1500h Remplacez les filtres 2 et 3 quand le voyant changement s allume Appuyez sur la touche sécurité enfant pour réinitialiser cette fonction NETTOYAGE ET ENTRETIEN 1 Préfiltre tous les 15 jours Utilisez un aspirateur pour enlever la poussière de la surface du filtre ou lavez à l eau séchez abondamment...

Страница 37: ... 1 utilisez le coton tige sec pour nettoyer la lentille fig 2 Eclairez si vous ne voyez pas clairement Remarque Veuillez vous assurer de débrancher l appareil avant de le nettoyer N hésitez pas à éclairer cet appareil avec de la lumière si vous ne pouvez pas voir clairement Conseils Débranchez l appareil avant le nettoyage et l entretien N allumez pas la machine si le filtre est retiré Débranchez ...

Страница 38: ...ir ne circule pas bien Déplacez le 2 Le capteur à particules est sale Nettoyez le capteur L appareil est bruyant Le générateur d ions négatifs est poussiéreux Nettoyez le L odeur de la sortie d air est désagréable 1 Le filtre est il sale Nettoyez le filtre 2 le filtre n a t il pas été changé depuis longtemps Remplacez le L appareil n est pas en mode veille la nuit Le purificateur d air est il en m...

Страница 39: ...vient caduque lorsque le produit a été modifié ou des tentatives de réparation ont visiblement été faites Ces manipulations dégagent dans le même temps la responsabilité du vendeur en cas d accidents Sur le site web www ggv service de vous trouverez une solution rapide et facile si notre produit présente un défaut durant la période de garantie Connectez vous au Service Portal www ggv service de dé...

Страница 40: ...dos No deje de vigilar su aparato y el cable y no lo deje nunca a cargo de niños menores de 8 años o de personas no responsables cuando está enchufado a la toma de corriente o se está enfriando Verifique que la tensión de la red eléctrica corresponda a la tensión que está indicada en el aparato antes de utilizarlo Utilice el aparato solo para usos domésticos como está indicado en este modo de empl...

Страница 41: ...fe de alimentación en el agua o en otro liquido Nunca utilice el aparato y la toma de corriente cerca de superficies calientes Nunca utilice el aparato al aire libre y siempre ordénelo en un lugar seco Utilice solo accesorios originales que están recomendados por el fabricante No ponga el aparato en los siguientes lugares Purificador de aire con exposición directa al sol habitación calentada puede...

Страница 42: ...calentarse y provocar un incendio No toque el enchufe del cable de alimentación con las manos mojadas ya que podría provocar una descarga eléctrica No ponga los dedos u objetos metálicos en la ranura de salida de aire Si lo hiciera podría sufrir una descarga eléctrica o lesionarse No permita que el agua detergentes inflamables u otros líquidos entren en el aparato Esto podría causar una descarga e...

Страница 43: ...pie regularmente el enchufe de la red eléctrica Antes de la limpieza no olvide desenchufar el aparato A continuación puede limpiar el dispositivo con un paño seco Si no piensa utilizar el aparato durante un largo periodo de tiempo desenchufe el cable de alimentación Antes de realizar el mantenimiento desenchufe el aparato El aparato puede encenderse repentinamente provocar una descarga eléctrica y...

Страница 44: ... un electricista cualificado y competente está autorizado a instalar o desinstalar el aparato Servicio técnico cualificado servicio técnico del fabricante o del importador o una persona cualificada reconocida y habilitada a fin de evitar cualquier peligro En cualquier caso devuelva el aparato al servicio técnico ...

Страница 45: ...e su primer uso véase INSTALAR CAMBIAR LOS FILTROS Luego retire el embalaje que le proporcionamos para proteger los filtros PANEL DE CONTROL 1 Encendido Apriete el botón POWER en el modo de espera El aparato se encenderá y se encontrará automáticamente en el último modo utilizado excepto los modos de temporizador y de espera Durante aproximadamente 1 minuto y medio el purificador de aire se calibr...

Страница 46: ...e botón para activar el modo automático del aparato El testigo luminoso se enciende cuando la función está activada En este modo el volumen de aire filtrado se adapta automáticamente a la contaminación del aire PM2 5 60 velocidad lenta 60 PM2 5 150 velocidad media PM2 5 150 alta velocidad MODO DE ESPERA La pantalla y las luces indicadoras se apagan cuando se activa el modo de espera El motor funci...

Страница 47: ...ustar la hora Método de ajuste apriete y mantenga apretado el botón AUTO luego apriete los botones Velocidad y Modo de espera para ajustar Una vez ajustadas las horas apriete el botón auto los minutos parpadean ajústelos también con los botones Velocidad y Modo de espera Nota El tiempo de funcionamiento del aparato es completamente independiente el tiempo indicado no influye en la purificación El ...

Страница 48: ...ener los filtros 2 y 3 cada 60 días Sustituir el filtro 1 cada 2 años Sustituir los filtros 2 y 3 cada 6 meses Reinicialización del mensaje de aviso para cambiar el filtro El dispositivo cuenta con una función de mensaje de aviso para cambiar el filtro configurado a las 1500 horas Sustituir los filtros 2 y 3 cuando se encienda el indicador change Apriete el botón seguridad para niños para restable...

Страница 49: ...ndo se oye un ruido de crujido que proviene del aparato utilice el cepillo para limpiar el polvo alrededor del generador cerca de la salida de aire Haga esto regularmente 5 Sensor de partículas cada 2 meses Limpie regularmente con un bastoncillo de algodón seco para eliminar la humedad y el humo quite la cubierta exterior del sensor Imagen 1 utilice el bastoncillo de algodón seco para limpiar la l...

Страница 50: ...fe el aparato si no va a utilizarlo durante mucho tiempo Dependiendo de la ubicación y de los métodos de uso un ambiente con muchos fumadores o un lugar muy contaminado por ejemplo la vida útil de los filtros se reducirá Por favor reemplace los filtros a tiempo ...

Страница 51: ... en un lugar donde el aire no circula bien Desplace el aparato 2 El sensor de partículas está sucio Limpie el sensor El aparato hace demasiado ruido Está polvoriento el generador de iones negativos Límpielo El olor que sale del aparato es desagradable 1 Está sucio el filtro Limpie el filtro 2 No se ha cambiado el filtro durante mucho tiempo Reemplácelo Por la noche el aparato no se pone en modo de...

Страница 52: ...ado o si usted ha intentado reparar el aparato En este caso el vendedor no puede hacerse responsable en caso de accidente En el sitio web www ggv service de se puede encontrar una solución rápida y fácil para levantar una denuncia en caso de defecto en el plazo establecido para la garantía Solo tiene que acceder al portal de servicio www ggv service de identificar el aparato y luego se le guiará a...

Страница 53: ...aat uw toestel en zijn snoer nooit zonder toezicht en binnen het bereik van kinderen jonger dan 8 jaar of van ontoerekeningsvatbare personen wanneer het onder spanning staat of wanneer het aan het afkoelen is Voor het gebruik van het aparaat controleer of de netspanning overeenkomt met de spanning die op het apparaat is genoteerd Gebruik het apparaat alleen voor huishoudelijke doeleinden zoals bes...

Страница 54: ...pparaat niet op de volgende plaatsen Direct zonlicht tegenover luchtreiniger verwarmde plaats het kan vervorming verslechtering verkleuring en storingen veroorzaken Dicht bij televisies radio s en andere soortgelijke apparatuur laat het apparaat meer dan 1 meter verwijderd Houd dit apparaat uit de buurt van pollen stof en andere resten Het wordt aanbevolen om dit apparaat op een vlakke ondergrond ...

Страница 55: ... verbranden Dompel het apparaat om welke reden dan ook nooit onder in water of een andere vloeistof Plaats het nooit in de vaatwasser Dit product mag niet worden gebruikt als dagelijkse ventilator stofzuiger of afzuigkap Gebruik dit apparaat niet in de buurt van gastoestellen verwarmingsapparaten of kachels Gebruik dit apparaat niet in een vochtige omgeving of bij hoge temperaturen bijv Badkamer t...

Страница 56: ... stekker uit het stopcontact Het apparaat kan plotseling starten en elektrische schokken veroorzaken en uzelf verwonden Steek de stekker veilig in het stopcontact Gebruik uw apparaat niet als de stekker of het stopcontact beschadigd is Houd de isolatiedelen uit de stekker om de stekker uit het stopcontact te trekken Gebruik het netsnoer niet om de stekker uit het stopcontact te trekken Anders kan ...

Страница 57: ...UV lamp Voor het eerste gebruik Haal het product uit de verpakking en verwijder het voorpaneel voor het eerste gebruik zie FILTERINSTALLATIE VERVANGING en verwijder de verpakking die we hebben meegeleverd om de filters te beschermen BEDIENINGSPANEEL 1 Schakel Druk op de AAN UIT knop in de standby modus Het apparaat wordt ingeschakeld en automatisch geprogrammeerd naar de laatste bedrijfsmodus beha...

Страница 58: ...op om de automatische modus van het apparaat in te schakelen Het LED lampje gaat branden wanneer de functie actief is In deze modus wordt het gefilterde luchtvolume automatisch aangepast aan het niveau van luchtvervuiling PM2 5 60 lage snelheid 60 PM2 5 150 gemiddelde snelheid PM2 5 150 hoge snelheid SLAAPMODUS Het display en de indicatielampjes gaan uit wanneer de slaapmodus is geactiveerd De mot...

Страница 59: ...ntgrendelen op de afstandsbediening 4 Tijdinstelling Instelling Houd de a AUTO knop ingedrukt en druk vervolgens op b Speed knop en c Sleep mode om de eenheid in te stellen Druk na het instellen van de uren op de a Auto De minuten knipperen stel de tijd in met b Snelheid uren minuten en c Slaapmodus uren minuten Let op De tijdsinstelling is onafhankelijk De weergegeven tijd heeft geen invloed op d...

Страница 60: ... en 3 om de 60 dagen te onderhouden Aanbevolen om filter 1 om de 2 jaar te vervangen Aanbevolen om 2 en 3 elke 6 maanden te vervangen Herinnering filtervervanging Het apparaat heeft een filtervervangingsherinneringsfunctie ingesteld op 1500 uur Vervang filters 2 en 3 wanneer de CHANGE indicator oplicht Druk 5 seconden op de knop Kinderslot om deze functie te resetten Reiniging en onderhoud 1 Voorf...

Страница 61: ...uchtreiniger een knetterend geluid maakt gebruikt u de borstel om het stof rond de generator bij de luchtuitlaat te verwijderen Doe dit regelmatig 5 Deeltjes sensor om de 2 maanden Reinig het apparaat regelmatig met een droog wattenstaafje om vocht en rook te verwijderen Verwijder de buitenste afdekking van de sensor fig 1 en reinig de lens met het droge wattenstaafje fig 2 Licht op als u niet dui...

Страница 62: ...n vlakke ondergrond De lucht is vuil maar het display blijft groen Zelfs na langdurig gebruik blijft het display rood 1 Staat het apparaat op een locatie waar de lucht niet goed kan circuleren Anders gezegd 2 De deeltjessensor is vuil Reinig de sensor Het apparaat is luid Is de negatieve ionengenerator stoffig Reinig de generator De geur van de luchtuitlaat is onaangenaam 1 Is het filter vuil Rein...

Страница 63: ...org kan ook geen aanspraak worden gemaakt indien het toestel gewijzigd werd of indien er pogingen tot herstelling werden uitgevoerd In dit geval kan de verkoper ook niet aansprakelijk worden gehouden in geval van ongevallen Via onze website www ggv service de kan u bij een defect aan uw apparaat tijdens de garantieperiode een snelle en eenvoudige oplossing vinden Meld u aan bij het serviceportaal ...

Страница 64: ...LR 67014 we 64 DEUTSCH 4 ENGLISH 16 FRANCAIS 27 ESPANOL 39 NEDERLANDS 53 LR 67014 we ...

Отзывы: