background image

12 


CARBON FILTER-not supplied 

Activated carbon filter can be used to trap odors. Normally the activated carbon filter 
should be changed at three or six months according to your cooking habit. The 
installation procedure of activated carbon filter is as below. 

1.

  Remove the grease filter(s). 


2.

  Hook the carbon filter over the pins that are located at the end of the motor. 


3.

  Turn the carbon filter anticlockwise, until you feel it click into place. 


Repeat this process for the second carbon filter. You need to place a carbon filter at 

either end of the motor. 

Refit the motor access panel and fully tighten the screws that you removed 

previously. 

※Refit the lower and upper chim ney sections to the m ain body of the hood.


NOTE:  

  Make sure the filter is securely locked. Otherwise, it would loosen and cause 

dangerous.  

  When activated carbon filter attached, the suction power will be lowered.  


Содержание ATALA 1000 BI

Страница 1: ...Gunter Hauer Instruction Manual Cooker hood ATALA 1000 BI ATALA 1060 BI ...

Страница 2: ...Content Safety information 3 Installation 5 Start using your cooker hood 8 Troubleshooting 10 Maintenance and cleaning 10 Environmental note 12 ...

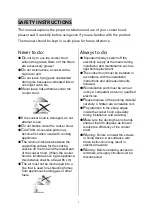
Страница 3: ...oker hood is located above a gas appliance this distance shall be at least 65 cm The air must not be discharged into a flue that is used for exhausting fumes from appliances burning gas or other fuels Always to do Important Always switch off the electricity supply at the mains during installation and maintenance such as light bulb replacement The cooker hood must be installed in accordance with th...

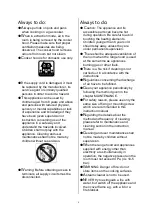
Страница 4: ...areful to avoid touching the heating elements Children younger than 8 years old should stay away unless they are under permanent supervision There shall be adequate ventilation of the room when the range hood is used at the same time as appliances burning gas or other fuels There is a fire risk if cleaning is not carried out in accordance with the instructions Regulations concerning the discharge ...

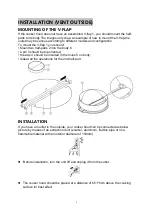
Страница 5: ... into the body 6 a pin 3 should be top oriented the axis 4 should be inserted in the holes 5 on body repeat all the operations for the 2nd half part INSTALLATION If you have an outlet to the outside your cooker hood can be connected as below picture by means of an extraction duct enamel aluminum flexible pipe or non flammable material with an interior diameter of 150mm Before installation turn the...

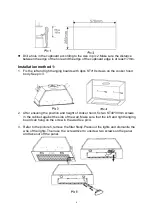
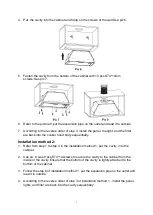
Страница 6: ...ws on the cooker hood body See pic 3 2 After ensuring the position and height of cooker hood fix two ST40 30mm screws in the cabinet against the side of the wall Make sure that the left and right hanging board can hang on the screw in the wall See pic 4 3 Refer to the picture 5 remove the filter firstly Press out the lights and dismantle the wrie of the lights Then use the screwdriver to unscrew t...

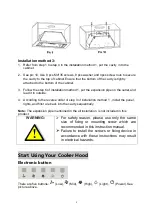
Страница 7: ...ood body sequentially Installation method 2 1 Refer from step 1 to step 4 in the installation method 1 put the cavity into the cabinet 2 See pic 9 Use 8 pcs ST4 14screws to secure the cavity to the cabinet from the inside of the cavity Ensure that the bottom of the cavity is tightly attached to the bottom of the cabinet 3 Follow the step 6 of installation method 1 put the expansion pipe on the out...

Страница 8: ... to outside 4 According to the reverse order of step 3 of installation method 1 install the panel lights and filter are back into the cavity sequentially Note The expansion pipe mentioned in the all installation is not included in this product WARNING For safety reason please use only the same size of fixing or mounting screw which are recommended in this instruction manual Failure to install the ...

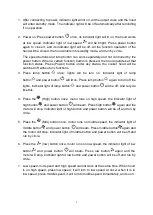
Страница 9: ...Press lamp button again to turn off the lights Indicator light of lamp button and power button will be off And recycle like this 4 Press the High button once motor runs on high speed the indicator light of high button and power button will beam Press high button again and the motor will stop Indicator light of high button and power button will be off and run by circle 5 Press the Mid button once m...

Страница 10: ...rrect distance The Range hood inclines The fixing screw not tight enough Tighten the hanging screw and make it horizontal NOTE Any electrical repairs to this appliance must conform to your local state and federal laws Please contact the service centre if in any doubt before undertaking any of the above Always disconnect the unit from the power source when opening the unit MAINTENANCE AND CLEANING ...

Страница 11: ...ld detergents or products containing abrasives as this will affect the appliance appearance and potentially remove any printing of artwork on the control panel and will void manufactures warrantee GREASE MESH FILTERS The mesh filters can be cleaned by hand Soak them for about 3 minute in water with a grease loosening detergent then brush it gently with a soft brush Please do not apply too much pre...

Страница 12: ...ocated at the end of the motor 3 Turn the carbon filter anticlockwise until you feel it click into place Repeat this process for the second carbon filter You need to place a carbon filter at either end of the motor Refit the motor access panel and fully tighten the screws that you removed previously Refit the lower and upper chimney sections to the main body of the hood NOTE Make sure the filter i...

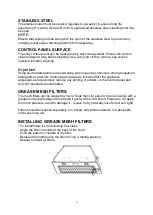
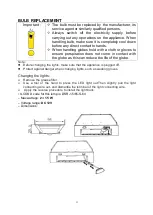
Страница 13: ...ion does not come in contact with the globe as this can reduce the life of the globe Note Before changing the lights make sure that the appliance is plugged off Protect against danger when changing lights such as wearing gloves Changing the lights Remove the grease filter Use a tool or the hand to press the LED light out Then slightly pull the light connecting wire out and dismantle the terminal o...

Страница 14: ... information please contact your local or regional authorities NOTE The following shows how to reduce total environmental impact e g energy use of the cooking process 1 Install the cooker hood in a proper place where there is efficient ventilation 2 Clean the cooker hood regularly so as not to block the airway 3 Remember to switch off the cooker hood light after cooking 4 Remember to switch off th...

Страница 15: ...Mühlenstrasse 8a Berlin 14167 Germany www gunter hauer eu e mail info gunter hauer de ...

Отзывы: