background image

used in accordance with the instructions, may cause harmful 

interference to radio communications.


However, there is no guarantee that interference will not 

occur in a particular installation. If the equipment does cause 

harmful interference to radio or television reception, which 

can be determined by turning the equipment off and on, the 

user is encouraged to try to correct the interference by one or 

more of the following measures:


Reorient or relocate the receiving antenna. 

Increase the separation between the equipment and 

receiver. 

Connect the equipment into an outlet on a circuit 

different from that to which the receiver is connected. 

Consult the dealer or an experienced radio/TV technician 

for help.     


 Rev 0.0 

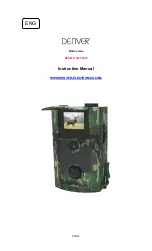
Содержание WF-037a

Страница 1: ...Scouting Camera User s Manual Model WF 037a...

Страница 2: ...Open view image with major parts indication...

Страница 3: ...Bottom view Side view with major parts indication...

Страница 4: ...stereo or CD player may cause damage to it This camera is a precision electronic device Do not attempt to service this camera yourself as opening or removing covers may expose you to dangerous voltage...

Страница 5: ...rchasing this product CDROM Contented with Ulead PE 8 and driver User Manual 1 5M USB cable 1 5M TV out cable for TV RCA Jack Strap Installation 1 Preparation CDROM Contains Scouting Camera driver and...

Страница 6: ...en from your PC to completely install the driver and application program Restart windows Successful installation will create Ulead Photo Explorer icon on you desktop Power off the unit Connect your ca...

Страница 7: ...your computer dosen t run automatically please click Start button and choose Run and then browse the CD drive and click Setup Operation manual of Ulead Photo Explorer is contained on the provided CDR...

Страница 8: ...t cover Slide the power switch to OFF Open the battery door Put the battery with correct directions Close the battery door Alkaline batteries should be used and please make sure the batteries polarity...

Страница 9: ...ard slot till the end and in the correct direction as shown To remove the SD memory card by press the SD card to the end the SD memory will eject from the SD card slot Slide the power switch to on An...

Страница 10: ...the slot then the camera will bypass the built in memory and utilize the compact flash memory The front counter display will show the number of images on the built in memory unless the expansion card...

Страница 11: ...the SD card prior use in Scouting Camera New cards are good to use straight from the package Display Controls and Programming 1 Status Icons on TFT display...

Страница 12: ...Capture mode It shown the capture mode that you have selected o 1P Single image capturing per PIR triggering o 2P Two images continuous capturing per PIR triggering o 3P Three images continuous captur...

Страница 13: ...on during Video capturing and resolution is 100K pixels Batteries Status It shows the battery status o Full It shows the batteries are full o Half It shows the batteries are half o Low It shows the ba...

Страница 14: ...display mode to Preview By pressing and hold the CONFIRM button 2 seconds to switch the TFT display mode to Preview the TFT display will show the image what you pointed Change the display mode to Pla...

Страница 15: ...ng TFT in preview status 3 1 Set the Capturing mode Power on the unit press the MENU button to call out the menu Press UP or DN to move the highlight to CAPTURE MODES Then press the CONFIRM button to...

Страница 16: ...Resolutions Power on the unit press the MENU button to call out the menu Press the UP or DN to move the highlight to RESOLUTION Then press the CONFIRM button to into the resolution settings Press the...

Страница 17: ...ONFIRM to into the setting Press UP or DN button to set the time out time on minutes Press CONFIRM again to confirm the setting Then press MENU again to exit the setting 3 4 Set TV output system Power...

Страница 18: ...nit press the MENU button to call out the menu Press the UP or DN button to move the highlight to DATE AND TIME Press CONFIRM to enter the setting Press UP or DN to select the TIME or DATE Press the C...

Страница 19: ...ne image During the image playback Press the UP or DN button to select the image which want to delete Press MENU to call out the menu Press UP or DN to select DELETE Press CONFIRM to confirm the delet...

Страница 20: ...om unit Once Delete Delete All or format has been selected the data or images will be deleted from memory and you will not be able to return again Getting started 1 Mounting the Camera with the suppli...

Страница 21: ...ting suggestions Camera should be mounted between 4 to 6ft from the ground depending on the subject matter you are trying to capture on the camera Avoid mounting camera directly facing east or west Th...

Страница 22: ...proper weather resistance please make sure that both door lockers are securely locked in place 3 Testing the camera coverage area One of Scouting Camera s many features is the ability to test the cov...

Страница 23: ...indicator light on the front will blink on when you have intruded the coverage area Adjust the camera position as needed and repeat testing until the desired coverage area is achieved When you have co...

Страница 24: ...ng you one minute to leave the coverage area The camera will enter PIR detection mode 4 Using the camera in PIR detection mode Mount the camera to tree or other sturdy object using either two supplied...

Страница 25: ...deo based on your program setting The camera will then time out between 1 60 minutes also based on your setting The time between motion detection and the camera taking the pictures may vary due to lig...

Страница 26: ...not appear on the AVI video clips 5 Viewing the images The Scouting Camera offers the user three different options for viewing the images 5 1 Viewing the image on a handheld LCD TV video monitor Slide...

Страница 27: ...memory you are viewing It also displayed captured data and time Using the UP and DN buttons navigate through the images one at one times 5 2 Viewing the images on your home TV equipped with an RCA in...

Страница 28: ...y you are viewing It also displayed captured data and time Using the UP and DN buttons navigate through the images one at one times 5 3 Viewing the images on your computer using the provided software...

Страница 29: ...amera as mass storage device and found under MY COMPUTER Clip to open this device and using the provided application program to view the image or edit the image Using the external power 1 To use the e...

Страница 30: ...eg F 5 to 40 deg C 20 85 relative humidity non condensing 2 Special care instructions The camera is designed to be weather resistant Never attempt to t immerse he unit to water or any other liquid Thi...

Страница 31: ...t mix new and old batteries Do not open the camera for unauthorized services This could cause serious damage to the unit and will valid the warranty Troubleshooting and Hints 1 Monitor resolution adju...

Страница 32: ...Please select to High Colour 16 bit or True Colour 24 bit Then choose High Colour or True Colour from the list box Click O K If need to update the monitor driver please do it to change to the new set...

Страница 33: ...pec and system compatibility 1 System Requirements and Compatibility Windows 98 98se 2000 Me XP P 450MHz or equivalent processor 128MB SDRAM or above VGA Video Card with 32MB RAM for minimum Colour 16...

Страница 34: ...cklight Built in 16M flash memories for image storage Ext memory support SD memory card up to 512M Resolution Options VGA 1 3M 2 0M 4 Capturing Options Manual Single Continuous AVI Image performance f...

Страница 35: ...with IR coating Effective viewing Angle 52 deg PIR detection angle 48 deg Adjustable PIR detection range up to 9 meter Low power consumption Standby current 1mA Capture current 150mA Interface type U...

Страница 36: ...odification to this unit not expressly approved by the party responsible for compliance could void the user s authority to operate the equipment NOTE This equipment has been tested and found to comply...

Страница 37: ...sion reception which can be determined by turning the equipment off and on the user is encouraged to try to correct the interference by one or more of the following measures Reorient or relocate the r...

Отзывы: