67
ENGLISH
INTERACTIVE PORTAL (HBBTV)
----------------------------------------------------
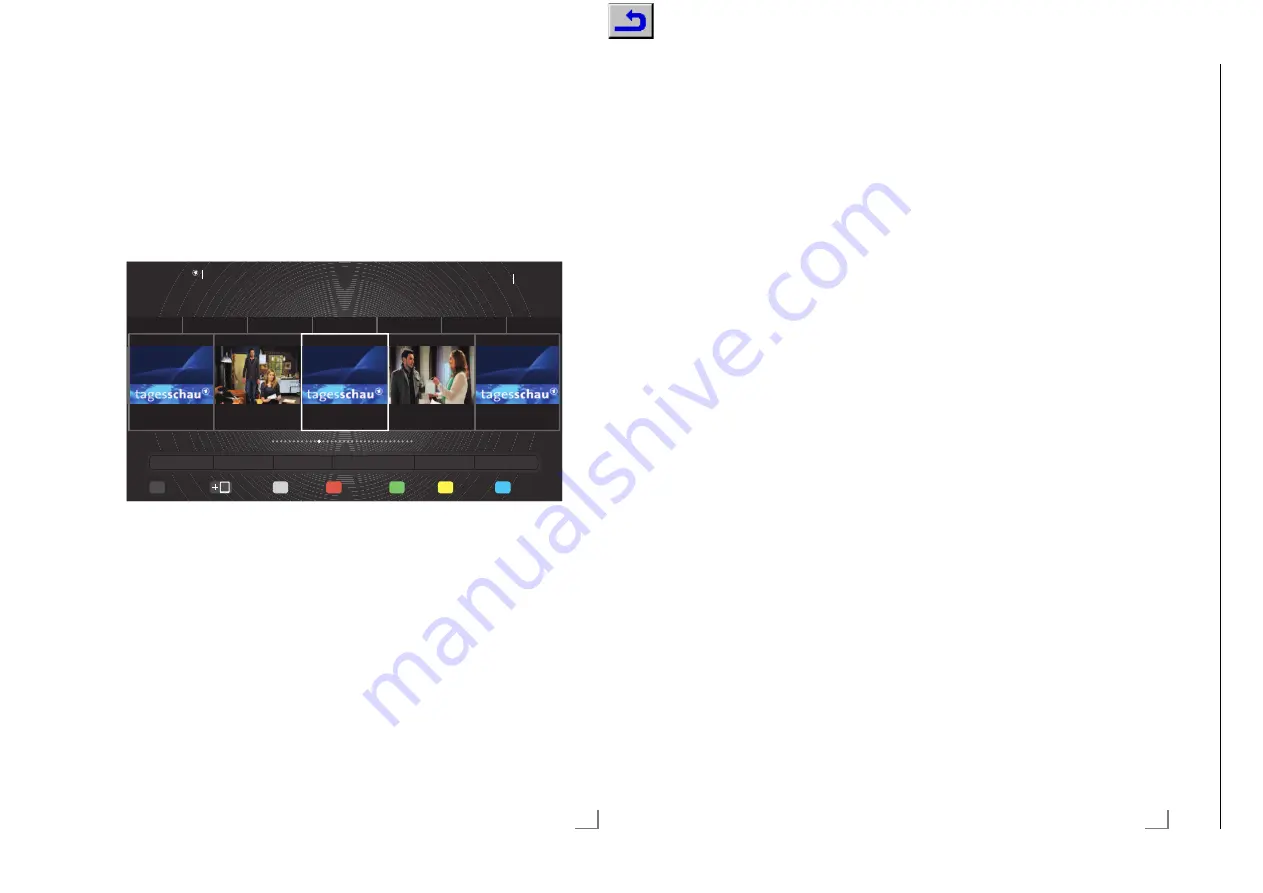
What is HbbTV?
HbbTV provides next generation interactive tele-
text broadcast with its modern structure, content
and high definition (HD) image and videos.
To receive HbbTV broadcast, your television
must be connected to the Internet.
Using HbbTV
When you switch to a TV program that supports
HbbTV, an info message will appear stating that
HbbTV broadcast is available.
1
Press
»
y
« (red) to open HbbTV.
– Information regarding the services will ap-
pear on the screen. Additionally, colored
buttons necessary for browsing the menus
will also appear.
Note:
7
The range of subjects and selection of indi-
vidual subjects depend on the programme
provider.
7
Numeric buttons »1« through »0« are used
for additional functions.
2
Press »
yy
« (green), »
yyy
« (yellow) or »
yyyy
«
(blue) to select the desired topic field.
This service provided by ARD includes “Das Er-
ste1Mediathek” along with teletext restructured
graphically with high definition images. ZDF
service includes “ZDF mediathek” and other pro-
gramme information (as of July 2012).
This feature is only available in countries where
the service is provided.
3
Select the option you want with »
V
«, »
Λ
«,
»
<
« or »
>
« in the selected topic field and
confirm with »
OK
«.
4
Press »
y
« (red) to close HbbTV.
Additional functions for video
indexes
1
Start playback with »
8
«.
2
Pause playback with »
!
«.
3
Resume playback with »
8
«.
4
Rewind by »
3
« forward by »
4
«.
5
Stop playback with »
7
«.
Das Erste Heute
03.03
Di 04.03
Gestern
Heute
Morgen
Sa 08.03
So 09
Heute 14:00 - 14:10
Das Erste
Tagesschau
Das Erste
Rote Rosen (1677)
Das Erste
Tagesschau
Das Erste
Strum der Liebe
(1938)
Das Erste
Tagesschau
Do. 15:08
Heute 14:10 - 15:00
Heute 15:00 - 15:10
Heute 15:10 - 16:00
Heute 16:00 - 16:10
MEIN TV
TIPPS
TV START
ALLE SENDER
THEMEN
SUCHE
Videotext
Mediathek
Extras
Ausblenden
Startleiste
Radio
TV
0
71
ENGLISH
CONVENIENCE FUNCTIONS
------------------------------------------------------------
Functions in the “About” menu
1
Open menu with »
MENU
« button.
2
Activate the menu item »Settings« with
»
OK
«.
3
Select the menu item »TV Settings« with »
>
«
or »
<
« and press »
OK
« to confirm.
4
Select the line »About« with »
V
« or »
Λ
«
and press »
OK
« to confirm.
Note:
7
Additional operations are explained in the
following sections.
Product information
1
From the »About« menu use »
V
« or »
Λ
«
to select the line »Product Information« and
press »
OK
« to confirm.
– Software version information of the pro-
duct is displayed.
2
Press
»
BACK
<
« to go back one menu
level or press »
EXIT
« to end the setting.
Software update (OAD)
(only for digital television channels)
1
From the »About« menu use »
V
« or »
Λ
«
to select the line »Software Updates« and
press »
OK
« to confirm.
2
Select the option »OAD« with »
<
« or »
>
«
and press »
OK
« to confirm.
– The search for new software is being car-
ried out.
Note:
7
If no new software is available the menu au-
tomatically switches off.
3
If new software is available, press »
yy
«
(green) to install the software.
– The new software will be loaded.
Warning:
7
Television will restart after update. Do not
turn your television's power off during up-
dates.
Note:
7
For automatic checking of software update,
select from »Source Setup« menu
,
»Ad-
vanced Settings« the line »OAD« with »
V
«
or »
Λ
«. Use »
<
« or »
>
« to select »On«.
Software update (Internet)
(only for digital television channels)
1
From the »About« menu use »
V
« or »
Λ
«
to select the line »Software Updates« and
press »
OK
« to confirm.
2
Select the option »Internet« with »
<
« or »
>
«
and press »
OK
« to confirm.
– The search for new software is being car-
ried out.
Note:
7
If no new software is available the menu au-
tomatically switches off.
3
If new software is available, press »
yy
«
(green) to install the software.
– The new software will be loaded.
Warning:
7
Television will restart after update. Do not
turn your television’s power off during up-
dates.
Software update (USB)
1
Plug the memory stick in one of the »
USB
«
sockets at the side of the television.
2
From the »About« menu use »
V
« or »
Λ
«
to select the line »Software Updates« and
press »
OK
« to confirm.
3
Select the option »USB« with »
<
« or »
>
«
and press »
OK
« to confirm.
– The software on the USB memory stick is
installed.
Chassis J5
GR
UNDIG Ser
vice
1 - 62
Chassis KY
GR
UNDIG Ser
vice
1 - 62
Содержание NWS000
Страница 5: ...GRUNDIG Service Chassis KY 1 5 32 65 ...
Страница 107: ...GRUNDIG Service Chassis KY 2 37 Netzteil Power Supply DPS 110A Ansicht von der Bestückungsseite View of Component Side ...
Страница 108: ...GRUNDIG Service Chassis KY 2 38 Netzteil Power Supply DPS 110A Ansicht von der Lötseite View of Solder Side ...
Страница 110: ...GRUNDIG Service Chassis KY 2 40 Netzteil Power Supply DPS 243AP Ansicht von der Bestückungsseite View of Component Side ...
Страница 111: ...GRUNDIG Service Chassis KY 2 41 Netzteil Power Supply DPS 243AP Ansicht von der Lötseite View of Solder Side ...


