background image

38 ENGLISH

Set the Clock

1

  In Standby mode, press and hold CLOCK 

button.

2

  Press the  /  buttons on the remote control 

to select 12/24 hour format, then press the OK 
button on the remote control to confirm. The hour 
digits will flash.

3

  Press the  /  buttons on the remote control 

to adjust the hour digits while flashing, then press 
the OK button on the remote control to confirm. 
Then the minute digits will flash.

4

  Press the  /  buttons on the remote control to 

adjust the minute digits while flashing, then press 
the OK button on the remote control to confirm.

Note:


Each activated state will be cleared if any 
buttons are not pressed within 15 seconds.

Time Display


Press the CLOCK button to show the current 
time on the display for a few seconds.

Set the alarm Timer


The clock must be correctly set for the timer to 
operate correctly.

1

  In Standby mode, press and hold ALARM 

button. Then the hour digits flash.

2

  Press the  /  buttons on the remote control 

to adjust the hour digits, and then press the OK 
button on the remote control to confirm, the 
minute digits will flash on the display. 

3

  Press the  /  buttons on the remote control 

to adjust the minute digits, and then press the OK 
button on the remote control to confirm, the mode 
will flash on the display.

4

  Press the  /  buttons on the remote control to 

select:
  - BUZZER (to wake to a buzzer sound)
  - FM (to wake your selected FM Radio Station)
  - DISC (to wake to your CD music)
  - USB (to wake to your USB music)

5

  Press the OK button on the remote control to 

confirm, the display will show the volume level. 

6

  Press the  /  buttons on the remote control 

to adjust the volume, and then press the OK 
button on the remote control to confirm,   will 
show on the display. 

Activate and Deactivate the Alarm Timer


After setting the alarm timer, press the ALARM 
button on the remote control to view the alarm 
settings.


The alarm is active when   is shown on the 
display.


To deactivate the alarm, press the ALARM 
button twice. The   will disappear on the 
display. Press the ALARM button twice again 
to activate the alarm timer.


When the alarm rings, press the SNOOZE 
button on remote control. The alarm repeats 
ringing 9 minutes later.


When the alarm rings, press   button to turn 
off the alarm.

Tips:


Each enabled state will be cleared if a button 
is not pressed within 15 seconds.


When the alarm rings, press the   button on 
the remote control or on the unit. The alarm 
stops but the alarm settings remain.

Set Clock/Alarm while in ON mode

1

  In ON mode, press MENU button on the 

remote control to entering system menu setup.

2

 Press  /  buttons on the remote control to 

select CLOCK or ALARM setting, and then press 
OK button to confirm.

3

 Press /  buttons to setup and confirm with  

OK button.

SETTINGS __________________________________

Содержание MS 300

Страница 1: ...Micro HiFi System MS 300 DE EN FR User Manual 01M GHF1050 4820 01 ...

Страница 2: ...2 DEUTSCH 09 28 ENGLISH 29 45 FRANÇAIS 46 64 ...

Страница 3: ...3 3 4 2 1 3 6 7 5 9 5 3 1 2 4 11 11 10 6 7 8 14 15 16 16 13 12 A ...

Страница 4: ...4 B 17 21 23 24 25 26 27 18 19 20 22 1 2 6 8 10 11 12 13 14 15 16 7 5 3 4 9 ...

Страница 5: ...5 1 2 3 4 5 ALARM OK OK 12 00 12 00 TV CLOCK OK OK ...

Страница 6: ...6 6 or FM D ISC U SB SDC AR D C ASSETTE AU X BT or or Auto Off A or or or BT 5 2 if 1 ANDROID IPHONE BLUETOOTH ON Grundig MS 300 no device found PO P C LASSIC R O C K f l at 1 20 90 60 30 1 5 O FF ...

Страница 7: ...7 7 or U SB 2 2 1 or 87 5 1 3 or or SDC AR D 2 or disc 1 3 or 2 1 2 or C ASSETTE 3 or ...

Страница 8: ... FM EN USB SD CARD DISC FM FR USB SD CARD DISC FM DE CASSETTE EN CASSETTE FR CASSETTE DE ANSCHLÜSSE EINSTELLUNGEN BETRIEB BLUETOOTH EN CONNECTIONS SETTINGS OPERATION BLUETOOTH FR CONNEXIONS RÉGLAGES FONCTIONNEMENT BLUETOOTH ...

Страница 9: ...t sollte nicht in der Nähe von Wasser oder Feuchtigkeit verwendet werden Das Blitzsymbol mit Pfeilspitze in einem gleichseitigen Dreieck soll den Benutzer auf das Vorhandensein einer nicht isolierten gefährlichen Spannung innerhalb des Gehäuses des Produkts aufmerksam machen die so groß sein kann dass die Gefahr eines Stromschlagsfür Personen besteht Das Ausrufezeichen in einem gleichschenkligen D...

Страница 10: ...rmeiden Ziehen Sie bei Gewittern oder bei längerer Nichtbenutzung den Netzstecker Überlassen Sie alle Wartungsarbeiten qualifiziertem Personal Eine Wartung ist erforderlich wenn das Gerät in irgendeiner Weise beschädigt wurde z B wenn das Netzkabel oder der Netzstecker beschädigt ist Flüssigkeit verschüttet wurde oder Gegenstände in das Gerät gefallen sind das Gerät Regen oder Feuchtigkeit ausgese...

Страница 11: ...ionsgefahr bei falschem Austausch der Batterie Nur durch den SICHERHEIT UND AUFSTELLUNG__________________ gleichen oder einen gleichwertigen Typ ersetzen Warnung Die Batterie Batterien oder Batteriesatz darf nicht übermäßiger Hitze wie Sonneneinstrahlung Feuer oder ähnlichem ausgesetzt werden Bevor Sie dieses System in Betrieb nehmen überprüfen Sie die Spannung dieses Systems um festzustellen ob s...

Страница 12: ... am Gerät führen kann Legen Sie alle Batterien korrekt ein und wie auf dem Gerät gekennzeichnet Alte und neue Batterien dürfen nicht gemischt werden Mischen Sie keine alkalische standardmäßige Kohlenstoff Zink oder wiederaufladbaren Batterien Ni Cd Ni MH etc Entfernen Sie die Batterien wenn das Gerät für längere Zeit nicht benutzt wird Zu hoher Schalldruck oder zu hohe Lautstärken von Kopfhörer ka...

Страница 13: ... Nicht in Kinderbetten Betten Kutschen oder Laufgittern verwenden Diese Beutel ist kein Spielzeug Entsorgen Sie den Beutel und alle anderen Verpackungsmaterialien unmittelbar nach der Entnahme des Produkts Verwenden Sie diesen Beutel nicht wieder Um den Laserabtaster sauber zu halten berühren Sie ihn nicht und schließen Sie stets das CD Fach Bewegen Sie das Gerät während der Wiedergabe nicht Währe...

Страница 14: ...us Lassen Sie die CD s niemals in einem in vollem Sonnenlicht geparkten Auto liegen Reinigung Verwenden Sie zum Reinigen der CD ein sauberes weiches fusselfreiesTuch von der Mitte aus in einer geraden Linie nach außen arbeitend Verwenden Sie keine Lösungsmittel wie Benzin Verdünner handelsübliche Reinigungsmittel oder antistatische Sprays für Vinyl Schallplatten Hörsicherheit Hören Sie mit einer m...

Страница 15: ...tten bis zum Ende vor Beendet die Wiedergabe Aufnahme der Kassette und öffnet das Kassettenfach Aufnahme und Wiedergabe pausieren 11 Lautsprecher links rechts Die Lautsprecher dürfen nicht blockiert oder abgedeckt werden Um eine Beschädigung der Lautsprechereinheiten zu vermeiden berühren Sie diese bitte nicht direkt 12 Lautsprecherausgänge R L Buchsen 13 AUX Buchse 14 ANT Buchse 15 AC Buchse 16 L...

Страница 16: ...einen vorhergehenden nächsten gespeicherten Sender Vorheriger Titel Nächster Titel Im FM Modus kurzes Drücken für 0 05 MHz Frequenzwechsel ein langes Drücken führt zum vorherigen nächsten verfügbaren Sender OK Bestätigen Sie eine Auswahl 12 A B Wiederholen Sie einen bestimmten Abschnitt innerhalb eines Titels Kapitels 13 POP ROCK Wählen Sie Equalizer EQ Effekt 14 Erhöhen Verringern des Lautstärkep...

Страница 17: ...ten Sie darauf die Batterien mit der richtigen positiven und negativen Polarität einzulegen Verwenden Sie Batterien desselben Typs Verwenden Sie niemals verschiedene Batterietypen zusammen VORBEREITUNGEN____________________________ Es können entweder wiederaufladbare oder nicht wiederaufladbare Batterien verwendet werden Beachten Sie die Vorsichtsmaßnahmen auf ihren Etiketten Seien Sie vorsichtig ...

Страница 18: ...hörsicherheit Verwenden Sie die LINE IN AUX Buchse Verwenden Sie ein RCA zu 3 5 mm Audiokabel nicht mitgeliefert um die Audioausgangsbuchsen des Fernsehers mit der AUX Buchse am Gerät zu verbinden Verwenden Sie ein RCA zu 3 5 mm Audiokabel nicht mitgeliefert um die Audioausgangsbuchsen des Fernsehers mit der AUX Buchse am Gerät zu verbinden Anschließen der FM Antenne Schließen Sie ein Ende der FM ...

Страница 19: ...ng die Taste OK auf der Fernbedienung die Minutenziffern blinken auf der Anzeige 3 Drücken Sie die Tasten auf der Fernbedienung um die Minutenziffern einzustellen und drücken Sie dann zur Bestätigung die OK Taste auf der Fernbedienung der Modus blinkt auf dem Display 4 Drücken Sie die Tasten auf der Fernbedienung zur Auswahl BUZZER zum Einschalten eines Summertons FM zum Einschalten Ihrer ausgewäh...

Страница 20: ... Gerät DerAlarm hört auf aber dieAlarmeinstellungen bleiben erhalten Einstellen von Uhr Alarm im ON Modus 1 Drücken Sie im ON Modus die MENU Taste auf der Fernbedienung um das Systemmenü Setup aufzurufen 2 Drücken Sie die Drücken Sie die Tasten auf der Fernbedienung um die Einstellung CLOCK oder ALARM zu wählen und drücken Sie dann zur Bestätigung die Taste OK 3 Drücken Sie die Tasten zum Einricht...

Страница 21: ... zur normalen Lautstärke zurückzukehren Wählen Sie Equalizer EQ Effekt Drücken Sie die Tasten POP CLASSIC ROCK FLAT auf der Fernbedienung um den Equalizer auszuwählen Einstellen der Helligkeit Drücken Sie die DIMMER Taste auf der Fernbedienung um die Helligkeitsstufe zu wählen niedrig mittel hoch Zeitschaltuhr für den Ruhezustand einstellen Dieses Gerät kann nach einer festgelegten Zeitspanne auto...

Страница 22: ... Titel Kapitel Tonspur und drücken Sie dann die Taste USB SD Kartenbetrieb 1 Stecken Sie das USB Gerät oder das SD Kartengerät ein 2 Drücken Sie die Taste am Gerät oder die MODE Taste auf der Fernbedienung um den USB oder SD Modus auszuwählen 3 Die Wiedergabe startet automatisch Wenn die Wiedergabe nicht automatisch startet wählen Sie einen Titel Kapitel Tonspur und drücken Sie dann die Taste Wied...

Страница 23: ...icht finden können drücken und halten Sie die Taste am Gerät oder die Taste auf der Fernbedienung Das System ist in den Kopplungsmodus eingetreten Das Gerät zeigt PAIRING an 3 Wählen Sie Grundig MS 300 in der Kopplungsliste Bei erfolgreicher Kopplung erscheint auf der Anzeigetafel BT 4 Musik von dem angeschlossenen Gerät wiedergeben Wiedergabe starten unterbrechen oder fortsetzen Vorheriger Titel ...

Страница 24: ...ienung gedrückt die Frequenz wechselt automatisch nach unten oder oben bis eine Station gefunden wird Die Suche darf nicht an einer Station mit einem sehr schwachen Signal enden Radiostationen manuell einschalten Drücken Sie die Tasten so oft bis Sie die gewünschte Station gefunden haben Wenn der Empfang immer noch schlecht ist versuchen Sie die Position der Antenne anzupassen oder das Radio an ei...

Страница 25: ...enden Sie für die Aufzeichnung nur Kassetten des Typs NORMAL IEC I CHROME IEC II oder METAL Kassetten IEC IV sind nicht geeignet Auswählen der Kassetteneingangsquelle 1 Drücken Sie die Taste am Gerät oder die Taste MODE auf der Fernbedienung um den Modus KASSETTE zu wählen Playback 1 Öffnen Sie die Frontklappe die auf der Frontplatte mit OPEN gekennzeichnet ist 2 Drücken Sie um das Kassettenfach z...

Страница 26: ...r wählen Sie eine andere Station Der Link der Station wird geändert oder die Station sendet nicht mehr fragen Sie den Anbieter nach Informationen falls erforderlich BLUETOOTH Keine Verbindung Vergewissern Sie sich dass alle Einstellungen auf allen Geräten korrekt vorgenommen wurden Die Bluetooth Funktion kann auf dem externen Gerät deaktiviert werden Aktivieren Sie dies falls erforderlich Prüfen S...

Страница 27: ...teien max 980 Ordner 8500 Datei SD Unterstützte Formate MP3 WMA WAV FLAC bis zu 48KHz 16bit Dateisystem FAT 32 FAT16 Systemkompatibilität 64G max Alben und Dateien max 980 Ordner 8500 Datei Disc Frequenzbereich 100 Hz 18 kHz Signal Rausch Verhältnis 65 dBA Alben und Dateien max 980 Ordner 8500 Datei FM 87 5 108 0 MHz Abmessungen BxHxT Lautsprecher Dimension 150 x 220 x 200 mm 140 x 220 x 150 mm Ei...

Страница 28: ... schädliche Umweltauswirkungen und mögliche Gesundheitsgefahren zu verhindern Einhaltung der RoHS Richtlinie Das von Ihnen gekaufte Produkt entspricht der EU RoHS Richtlinie 2011 65 EU Sie enthält keine schädlichen und verbotenen Materialien die in der Richtlinie aufgeführt sind Information zur Verpackung Das Verpackungsmaterial für dieses Erzeugnis wurde aus Recyclingstoffen gemäß unseren nationa...

Страница 29: ...stall near any heat sources such as radiators heaters stoves or other apparatus including amplifiers that produce heat The lightning flash with arrowhead symbol within an equilateral triangle is intended to alert the user to the presence of uninsulated dangerous voltage within the product s enclosure that may be of sufficient magnitude as to constitute a risk of electric shock to persons The excla...

Страница 30: ... the provided plug does not fit into your outlet consult an electrician for replacement of the obsolete outlet Protect the power cord from being walked on or pinched particularly at plugs convenience receptacles and the point where they exit from the apparatus Only use attachments accessories specified by the manufacturer Use only with the cart stand tripod bracket or table specified by the manufa...

Страница 31: ...a clean dry or slightly damp cloth When removing the power plug from the wall outlet always pull directly on the plug never yank on the cord Changes or modifications to this unit not expressly approved by the party responsible for compliance will void the user s authority to operate the equipment The rating label is pasted on the bottom or back of the equipment Battery usage CAUTION To prevent bat...

Страница 32: ... use in cribs beds carriages or playpens This bag is not a toy Discard bag and any other packing materials immediately after removing product Do not re use this bag To keep the laser pickup clean do not touch it and always close the disc tray Do not move the unit during playback During playback the disc rotates at high speed Do not lift or move the unit during playback as doing so may damage the d...

Страница 33: ...iscs working from the centre outwards in a straight line Do not use solvents such as petrol thinners commercially available cleaners or antistatic sprays for vinyl records Hearing safety Listen at a moderate volume Warning Excessive sound pressure from earphones and headphones can cause hearing loss To prevent possible hearing damage do not listen at high volume levels for long periods SAFETY AND ...

Страница 34: ...tape and opens the tape compartment Pauses recording and playback 11 Speakers Left Right Do not block or cover the speakers To avoid damaging the speaker units please don t touch they directly 12 SPEAKERS OUT R L Sockets 13 AUX Socket 14 ANT Socket 15 AC Socket 16 Speakers R L Sockets What s in the Box 1 Main Unit x1 2 Speakers Left Right x2 3 Remote Control x1 AAA Batteries x2 4 AC Power Cord x1 ...

Страница 35: ... press for 0 05MHz frequency change long press will scan to previous next available station OK Confirm a selection 12 A B Repeat a specific section within a track chapter 13 POP ROCK Select Equalizer EQ Effect 14 Increase decrease the volume level 15 0 9 Numric Button Select preset radio station or stored programme 16 SCAN Scan for radio station 17 Open and close the disc compartment 18 Select the...

Страница 36: ...er Precautions Concerning Batteries Be sure to insert the batteries with correct positive and negative polarities Use batteries of the same type Never use different types of batteries together Either rechargeable or non rechargeable batteries can be used Refer to the precautions on their labels Be aware of your fingernails when removing the battery cover and the battery Do not drop the remote cont...

Страница 37: ...e LINE IN AUX Socket Use a RCA to 3 5mm audio cable not included to connect the TV s audio output sockets to the AUX socket on the unit Use a 3 5mm to 3 5mm audio cable included to connect the TV s or external audio device headphone socket to the AUX socket on the unit Connect the FM Aerial Connect one end of the FM aerial included to the ANT socket at the rear of the unit Then position the aerial...

Страница 38: ...uttons on the remote control to select BUZZER to wake to a buzzer sound FM to wake your selected FM Radio Station DISC to wake to your CD music USB to wake to your USB music 5 Press the OK button on the remote control to confirm the display will show the volume level 6 Press the buttons on the remote control to adjust the volume and then press the OK button on the remote control to confirm will sh...

Страница 39: ...n the remote control to select brightness level low mid high Set the Sleep Timer This unit can switch to standby automatically after a set period of time 1 Press the button on the remote control repeatedly to select your desired number of minutes The number of minutes shown will display in this sequence SLEEP120 SLEEP 90 SLEEP 60 SLEEPOFF SLEEP 15 SLEEP 30 2 Stop pressing the button when your desi...

Страница 40: ...ay Start pause or resume play Previous track Next track Perform fast forward reverse playback Select shuffle play modes Repeat one Repeat all Repeat folder flashing INFO View extra information of playing content or mode INTRO Every soundtrack will be played for 10 Sec Folder Down Up Play all tracks in next last folder Programme Setting The user can programme up to 20 tracks in CD USB mode in any d...

Страница 41: ...on you can Switch to another function on the unit Disable the function from your Bluetooth device Press and hold the button on the unit or the button on the remote control The Bluetooth device will be disconnected from the unit FM OPERATION_______________________________ Auto Scan and Save Preset Station 1 Press the MODE button on the unit or on the remote control to select FM mode 2 Press the SCA...

Страница 42: ...TAL IEC IV tapes are not suitable Selecting the cassette input source 1 Press the button on the unit or MODE button on the remote control to select the CASSETTE mode Playback 1 Open the front flap which is marked with OPEN on the front panel 2 Press to open the tape compartment 3 Insert a cassette in the compartment with the open side facing downwards and the full reel on the left side and close t...

Страница 43: ...le currently try it again later or select another station The link of the station is changed or the station no longer transmits ask the provider for information when necessary BLUETOOTH No connection Take care to ensure that all settings have been made correctly on all devices The Bluetooth function may be deactivated on the external device Activate this if necessary Check whether the device to be...

Страница 44: ...x 980 folder 8500 file SD Supported formats MP3 WMA WAV FLAC Up to 48KHz 16bit File system FAT 32 FAT16 System compatibility 64G max Albums and files max 980 folder 8500 file Disc Frequency response 100 Hz 18 kHz Signal to Noise ratio 65 dBA Albums and files max 980 folder 8500 file FM 87 5 108 0 MHz Unit Dimension WxHxD Speaker Dimension 150 x 220 x 200 mm 140 x 220 x 150 mm Unit Net Weight Speak...

Страница 45: ...ive consequences for the environment and human health Compliance with RoHS Directive The product you have purchased complies with EU RoHS Directive 2011 65 EU It does not contain harmful and prohibited materials specified in the Directive Package information Packaging materials of the product are manufactured from recyclable materials in accordance with our National Environment Regulations Do not ...

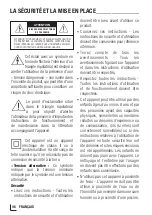
Страница 46: ... utilisé à proximité de l eau ou de l humidité par exemple dans une cave humide ou à proximité d une piscine Cet éclair avec un symbole en formedeflècheàl intérieurd un triangle équilatéral est destiné à alerter l utilisateur de la présence d une tension dangereuse non isolée dans l enceinte du produit qui peut être d une amplitude suffisante pour constituer un risque de choc électrique Le point d...

Страница 47: ...ppareils de chauffage poêles ou autres appareils y compris les amplificateurs qui produisent de la chaleur Utilisez uniquement le chariot le support le trépied la console ou la table spécifiés par le fabricant ou vendus avec l appareil Lorsqu un chariot ou un support est utilisé soyez prudent lorsque vous déplacez la combinaison chariot appareil afin d éviter les blessures dues au renversement Déb...

Страница 48: ...ement utilisable Danger d explosion si la pile n est pas correctement remplacée LA SÉCURITÉ ET LA MISE EN PLACE_______________ Remplacez la uniquement par une pile de type identique ou équivalent Avertissement La pile piles ou bloc piles ne doit pas être exposée à une chaleur excessive telle que le soleil le feu ou autre Avant d utiliser ce système vérifiez sa tension pour voir si elle est identiq...

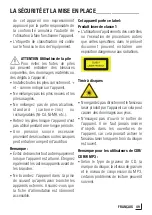
Страница 49: ...sque l appareil est allumé Éteignez également les autres appareils avant de les brancher Ne branchez l appareil dans la prise de courant qu après avoir branché les appareils externes Assurez vous que la fiche d alimentation est librement accessible LA SÉCURITÉ ET LA MISE EN PLACE_______________ Cet appareil porte ce label Produit laser de classe 1 L utilisation d ajustements des contrôles ou l exé...

Страница 50: ...à remettre le plateau à disqueenpositionferméedanslelecteur Ensuite appuyez sur l interrupteur pour couper le courant avant de débrancher le cordon d alimentation Déplacer cet appareil avec le disque chargé peut entraîner des dommages à cet appareil Manipulation Ne touchez pas la face de lecture des disques Tenez les disques par les bords pour éviter de laisser des empreintes digitales sur la surf...

Страница 51: ...ité auditive Écoutez à un volume modéré Avertissement Une pression sonore excessive en provenance des écouteurs et des casques peut entraîner une perte de l audition Pour éviter d éventuelles lésions auditives n écoutez pas à haut volume pendant de longues périodes ...

Страница 52: ...n à la lecture enregistrement de la bande et ouvre le compartiment à cassette Pause de l enregistrement et de la lecture 11 Haut parleurs Gauche Droite Il ne faut pas bloquer ou couvrir les haut parleurs Pour éviter d endommager les haut parleurs veuillez ne pas les toucher directement 12 Prises SPEAKERS OUT R L 13 Prise AUX 14 ANT Prise 15 Prise AC 16 Prises haut parleurs D G Ce qu il y a dans la...

Страница 53: ...tion préréglée précédente suivante Piste précédente Piste suivante En mode FM une pression courte pour un changement de fréquence de 0 05MHz une pression longue permet de balayer la station précédente suivante disponible OK Confirmez une sélection 12 A B Répétez une section spécifique dans un titre chapitre 13 POP ROCK Sélectionner l effet d égalisation EQ 14 Augmenter ou diminuer le niveau du vol...

Страница 54: ...nt des piles Précautions concernant les piles Veillez à insérer les piles en respectant les polarités positives et négatives Utilisez des piles du même type N utilisez jamais différents types de piles ensemble Vous pouvez utiliser des piles rechargeables ou non rechargeables Reportez vous aux précautions figurant sur leurs étiquettes Faites attention à vos ongles lorsque vous retirez le couvercle ...

Страница 55: ...ez la prise LINE IN AUX Utilisez un câble audio RCA à 3 5 mm non fourni pour relier les prises de sortie audio du téléviseur à la prise AUX de l appareil Utilisez un câble audio de 3 5 mm à 3 5 mm inclus pour connecter la prise casque du téléviseur ou d un appareil audio externe à la prise AUX de l appareil Connectez l antenne FM Branchez une extrémité de l antenne FM incluse à la prise ANT à l ar...

Страница 56: ...ande pour sélectionner BUZZER pour se réveiller au son d un buzzer FM pour réveiller la station de radio FM que vous avez choisie DISC pour s éveiller à la musique de votre CD USB pour s éveiller à la musique de votre USB 5 Appuyez sur la touche OK de la télécommande pour confirmer l écran affichera le niveau de volume 6 Appuyez sur les touches de la télécommande pour régler le volume puis appuyez...

Страница 57: ...K FLAT de la télécommande pour sélectionner l égaliseur Ajuster la luminosité Appuyez sur la touche DIMMER de la télécommande pour sélectionner le niveau de luminosité Faible Moyen Élevé Régler la minuterie de sommeil Cet appareil peut se mettre en veille automatiquement après une période de temps déterminée 1 Appuyez plusieurs fois sur la touche de la télécommande pour sélectionner le nombre de m...

Страница 58: ...re pas automatiquement sélectionnez un titre chapitre piste et appuyez ensuite sur le bouton Contrôle de la lecture Arrêtez la lecture Démarrer mettre en pause ou reprendre la lecture Piste précédente Piste suivante Effectuer une lecture rapide en avant en arrière Sélectionnez les modes de lecture aléatoire Répétez une fois Répétez tout Répéter le dossier clignote INFO Voir des informations supplé...

Страница 59: ...reil connecté Démarrer mettre en pause ou reprendre la lecture Piste précédente Piste suivante Pour déconnecter la fonction Bluetooth vous pouvez passer à une autre fonction de l appareil Désactivez la fonction à partir de votre appareil Bluetooth Appuyez sur le bouton de l appareil ou sur le bouton de la télécommande et maintenez le enfoncé L appareil Bluetooth sera déconnecté de l unité FONCTION...

Страница 60: ...1 Réglez la station souhaitée puis appuyez sur le bouton PROG 2 Appuyez sur les touches ou sur les touches numériques 0 à 9 pour sélectionner le numéro préréglé 3 Appuyez sur le bouton PROG pour mémoriser la station 4 Répétez les étapes 1 à 3 ci dessus pour chaque station que vous souhaitez mettre en mémoire avec un numéro prédéfini ...

Страница 61: ...avec du ruban adhésif Remarque N utilisez que des cassettes de type NORMAL IEC I pour l enregistrement Les bandes CHROME IEC II ou METAL IEC IV ne conviennent pas Sélection de la source d entrée de la cassette 1 Appuyez sur la touche de l appareil ou sur la touche MODE de la télécommande pour sélectionner le mode CASSETTE Lecture 1 Ouvrez le compartiment avant où il est indiqué OUVRIR sur le panne...

Страница 62: ...rd ou sélectionnez une autre station Le lien de la station est modifiée ou la station ne transmet plus demandez des informations au fournisseur lorsque cela est nécessaire BLUETOOTH Aucun lien Prenez soin de vous assurer que tous les réglages ont été effectués correctement sur tous les appareils La fonction Bluetooth peut être désactivée sur l appareil externe Activez la si nécessaire Vérifiez si ...

Страница 63: ... 980 dossier 8500 fichier SD Formats Supportés MP3 WMA WAV FLAC jusqu à 48KHz 16bit Système de fichiers FAT 32 FAT16 Compatibilité du système 64G max Albums et fichiers max 980 dossier 8500 fichier Disques Réponse de fréquence 100 Hz 18 kHz Rapport signal bruit 65 dBA Albums et fichiers max 980 dossier 8500 fichier FM 87 5 108 0 MHz Dimension de l unité LxHxP Dimension du haut parleur 150 x 220 x ...

Страница 64: ...s potentielles pour l environnement et la santé humaine Conformité avec la directive RoHS Votre appareil est conforme à la directive RoHS de l Union européenne 2011 65 EU Il ne comporte pas de matériaux dangereux et interdits mentionnés dans la directive Informations sur l emballage Les matériaux d emballage de cet appareil sont fabriqués à partir de matériaux recyclables conformément à nos réglem...

Страница 65: ...Beko Grundig Deutschland GmbH Thomas Edison Platz 3 D 63263 Neu Isenburg www grundig com ...

Отзывы: