background image


9. LANGUAGE SETUP     

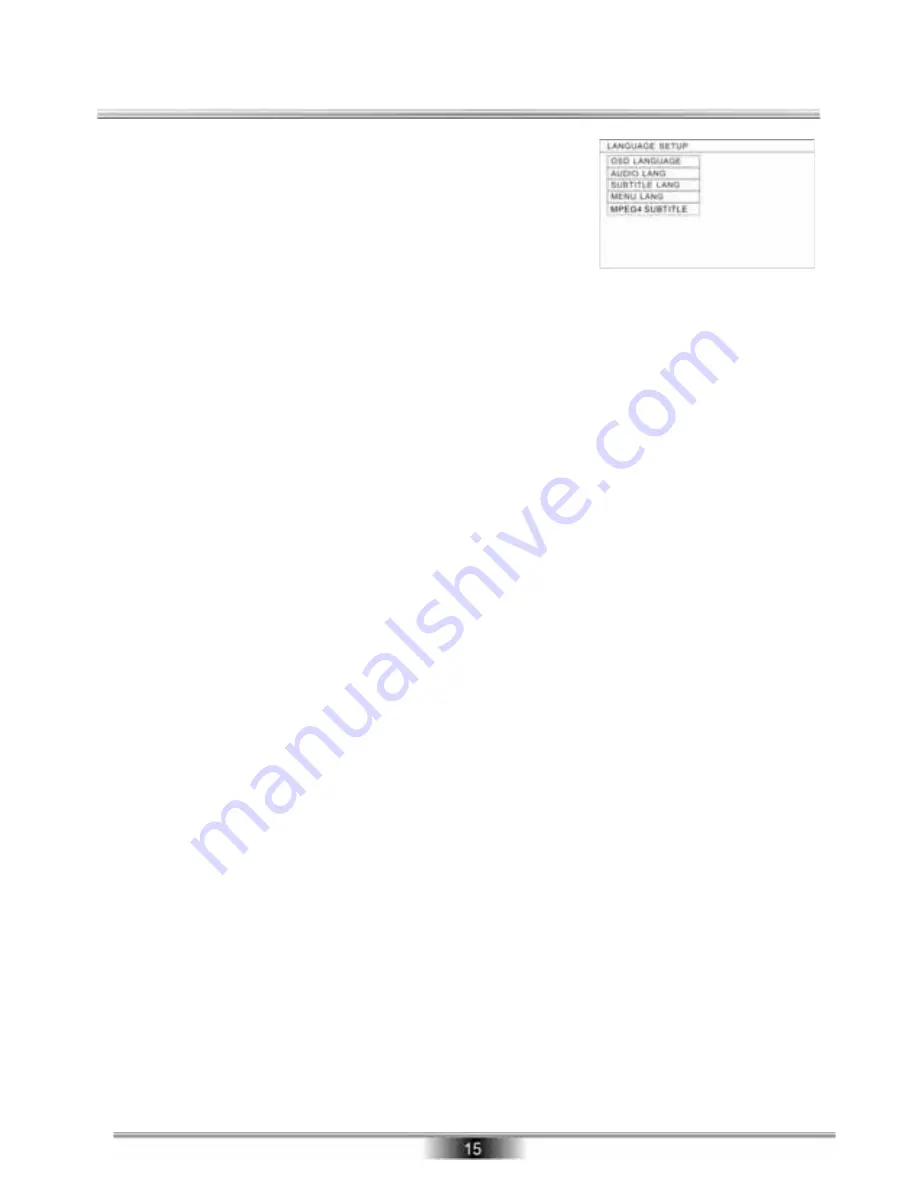
The language setup options are illustrated on the right.   
A.  Highlight the OSD LANGUAGE option and press the   
ARROW buttons to choose the OSD language you prefer. 
Press the ENTER button to confirm and it will display the 
OSD language. 


B.  Highlight the AUDIO LANG option and press the ARROW buttons to choose the audio 

language you prefer. Press the ENTER button to confirm. If the disc you are playing 
has that language available, it will output the audio will be in that language. 


C.  Highlight the SUBTITLE LANG option and press the ARROW buttons to choose the 

subtitle language you prefer. Press the ENTER button to confirm. If the disc you are 
playing has that language available, it will display the subtitles in that language.   


D.  Highlight the MENU LANG option and press the ARROW buttons to choose the menu 

language you prefer. Press the ENTER button to confirm. If the disc you are playing 
has that language available, the menu will be displayed in that language. 


E.  Highlight the MPEG4 SUBTITLE option and press the ARROW buttons to choose the 

Subtitle you prefer. Press the ENTER button to confirm.   

 
Note: If 

your preferred language isn’t available

the disc’s default 

language will be played.


10. AUDIO SETUP   
 

Highlight the AUDIO OUT option and press the ARROW buttons to choose the audio output 
mode you prefer. Press the ENTER button to confirm. There are three optional audio output 
modes: SPDIF/OFF, SPDIF / RAW and SPDIF/ PCM. 

 
SPDIF/OFF: There will be no Audio Output signal from the Coaxial Digital Output.   
SPDIF/ RAW: Choose this setting if your DVD player is connected to a power amplifier 
with a coaxial cable

.

 When playing a disc recorded with Dolby Digital, DTS and MPEG 

audio formats, the corresponding digital signals will be output from the Coaxial Output 
Jack. This DVD 

player’s digital output jacks are designed for a connection to a Dolby 

Digital, DTS, or MPEG receiver or decoder. 
SPDIF / PCM: Choose this setting if your DVD player is connected to a 2-channel 
digital stereo amplifier

.

 When playing a disc recorded with Dolby Digital and MPEG 

audio formats, audio signals will be modulated into a 2-channel PCM signal and it will 
be output from the Coaxial Output Jack. 


Содержание GDP1620HD

Страница 1: ...SLIM HDMI DVD PLAYER GDP1620HD The Gold Technical Support Line 1902 215 259 Charges will apply at 2 95 per minute ...

Страница 2: ...features and to ensure you get the very best from your purchase Safety is important Your safety and the safety of others are important Please therefore ensure you read the Safety Instructions before you operate this unit Warranty In the unlikely event that your product fails to work normally please call the below free phone number to discuss the problem with one of our qualified service engineers ...

Страница 3: ...3 FEATURES 3 4 SAFETY PRECAUTIONS 4 5 5 FRONT PANEL AND REAR PANEL 6 6 REMOTE CONTROL 7 7 CONNECTING YOUR DVD PLAYER 8 9 8 OPERATION 10 11 9 PLAYING WMA MP3 AND JPEG DISCS 12 11 SETUP MENU SYSTEM 13 16 12 SPECIFICATIONS 17 13 TROUBLESHOOTING 18 14 WARRANTY 19 ...

Страница 4: ...Picture CDs CD Rs and CD RWs with video data Component YPbPr and Composite Video Output Coaxial Digital Audio Output Video Output Supported to 1080P HDMI Output LED Display Multi Language Menu Remote Control Progressive scan Region code This DVD player is programmed under the region code policy Only region 4 can be played on this DVD Player ...

Страница 5: ...2 Do not touch the power plug with wet hands 3 Switch off the main power when the unit is not in use 4 Disconnect the power plug from the power outlet when you do not intend to use the unit for a prolonged period of time 5 Before moving the unit remove the disc from the unit tray first 6 Do not open the cover or touch any of the components inside the unit 7 To avoid heat damage do not expose the u...

Страница 6: ...tellectual property rights owned by Macrovision Corporation and is intended for home and other limited viewing uses only unless otherwise authorized by Macrovision Corporation Reverse engineering or disassembly is prohibited Manufactured under license from Dolby Laboratories Dolby and the double D symbol are trademarks of Dolby Laboratories ...

Страница 7: ...REAR PANEL Front Panel Rear panel 1 Standby 2 Eject 3 Play Pause 4 Stop 5 Disc Tray 6 Sensor 7 LED Display Screen 1 Downmix Left 2 Component Video Output 3 Video 4 Downmix Right 5 HDMI 6 Coaxial Output 7 S video Output ...

Страница 8: ...ry compartment with their and ends aligned as indicated Do not mix old and new batteries or different types of batteries Replace the battery compartment lid Slide the lid until you hear it click into place Important Please ensure you throw away your batteries in a responsible manner 1 STANDBY 2 AUDIO 3 SUBTITLE 4 CLEAR 5 SETUP 6 UP BUTTON 7 LEFT BUTTON 8 DOWN BUTTON 9 REV 10 FWD 11 STEP 12 STOP 13...

Страница 9: ... TV There are the following ways of connecting the DVD player AV output to the TV set Connect the Composite Video Cable and left right audio cable for S Video connection Connect the S Video Cable and left right Audio Cable to set the video type to Component Connect the Component Video Cable and left right audio cable to set the video type to Component If you are connecting a progressive scan TV se...

Страница 10: ...our DVD player with an AV amplifier z Connect the left right Audio Output z Connect the Coaxial Digital Audio Output Warning Do not connect any amplifier with coaxial connector that does not contain Dolby digital AC 3 or DTS decoder Any attempt to do so will result in damaging your speakers ...

Страница 11: ...u want chapters or tracks to play the maximum is 16 Program Menu Press the PROGRAM button to enter program playing state Use the ARROW key to highlight the item Use the NUMERIC key to enter chapter track Use the PLAY PAUSE to start play Note To clear the programmed order use ARROW buttons to highlight the CLEAR item and then Press the ENTER button To modify the programmed order use ARROW buttons t...

Страница 12: ...system NTSC PAL and AUTO Zoom Function The Zoom Function allows you to enlarge or zoom in and out of the video image Zoom formats Zoom 2 Zoom 3 Zoom 4 Zoom 1 2 Zoom 1 3 Zoom 1 4 and Zoom Off Press consecutively to enter formats Use the ARROW buttons to pan across the screen when the zoom factor is 2 3 or 4 A B FUNCTION During the normal or fast motion playback press the A B button once and REPEAT ...

Страница 13: ...ivate the function and choose the required switch mode Spread from Up to Down Spread from Down to Left Spread from Left to Right Spread from Right to Left Spread from Left Up to Right Down Spread from Right Up to Left Down Spread Left Down to Right Up Spread from Right Down to Left Up Spread from Center to Up Down Fold from Up Down to Center Fold from Left Right to Center Horizontal Shutter Vertic...

Страница 14: ... SCREEN SAVER When your DVD player is in Stop Open or No Disc state or there is a frame frozen for more than 3 minutes the screen saver will be displayed This feature can protect the screen from damage ON Choose this setting to activate the screen saver OFF Choose this setting to cancel the screen saver 3 HD OUTPUT In this option you can select different resolution The default set is HD 720P When ...

Страница 15: ...orded disc format Some discs can not display images in the aspect ratio you choose If you play a disc recorded in 4 3 format on a wide screen TV black bars will appear on the left and right side of the screen You must adjust the screen setting depending on the type of the television you have 6 PASSWORDS In order for the Ratings feature and Password to work the password mode must be turned on If yo...

Страница 16: ...the MPEG4 SUBTITLE option and press the ARROW buttons to choose the Subtitle you prefer Press the ENTER button to confirm Note If your preferred language isn t available the disc s default language will be played 10 AUDIO SETUP Highlight the AUDIO OUT option and press the ARROW buttons to choose the audio output mode you prefer Press the ENTER button to confirm There are three optional audio outpu...

Страница 17: ... or 36 BIT 12 SPEAKER SETUP The speaker setup options are illustrated on the right DOWNMIX Use the UP and DOWN ARROW buttons to move the scroll and adjust the speaker setup LT RT STEREO VSS 13 DIGITAL SETUP The video setup options are illustrated on the right OP MODE LINE OUT Choose this setting to line out the input signal In this mode the volume input will be low RF REMOD This mode will provide ...

Страница 18: ...ad impedance 75Ω imbalance negative polarity MAX Resolution 500 lines Power Supply AC 230V 50Hz Dimensions 255 mm X190 mm X38 mm Supported Disc MPEG 4 Xvid DVD SVCD VCD CD MP3 Kodak Picture Photo CD Accessories Instruction manual Remote control warranty leaflet AV cable Recycling Please ensure that you dispose of this DVD player in the correct manor after its life contact your local council to fin...

Страница 19: ...ut settings for the television and stereo system are correct z You may have pressed MUTE by accident Press the MUTE button again to turn MUTE off Remote Control does not work properly z Remove any obstacle existing between the DVD player and the remote control z The remote control may be too far away from the DVD player Move closer to the DVD player z Point the remote control at the remote sensor ...

Страница 20: ...259 New Zealand and have your receipt of purchase on hand This warranty is subject to the following provisions It is only valid within boundaries of the country of purchase The product must be correctly assembled and operated in accordance with the instructions contained in this manual This product must be used solely for domestic purposes The warranty does not cover accidental damage The warranty...

Страница 21: ...PO BOX 6287 Silverwater NSW 1811 www grundig net au ...

Отзывы: