


Viewer :
ActiveX control plug-in for Microsoft IE
4.3. Power Connection
Please refer to section 4.1. Camera Overview for power wiring. Additionally, if using PoE, make sure Power
Sourcing Equipment (PSE) is in use in the network.
4.4. Ethernet Cable Connection
Use of Category 5 Ethernet cable is recommended for network connection. To have the best transmission quality,
the cable length shall not exceed 100 meters. Connect one end of the Ethernet cable to the RJ45 connector of the
IP Camera, and the other end of the cable to the network switch or PC.
NOTE: In some cases, you may need to use an Ethernet crossover cable when connecting the IP Camera directly
to the PC.
Check the status of the link indicator and the activity indicator LEDs. If the LEDs are unlit, please check the LAN
connection.
Green Link Light indicates good network connection.
Orange Activity Light flashes for network activity indication.
4.5. Alarm Application
The camera is equipped with one alarm input and one relay output for alarm application.
Please refer section 4.1. Camera Overview for details of the alarm connection.
4.6. How to open the Dome Camera
If you would like to open the dome camera to get access to the connectors, please make sure to push the metal
base down and then slide it to the side. The metal base should then slide out and you can take the dome cover off.
5. Accessing the Camera
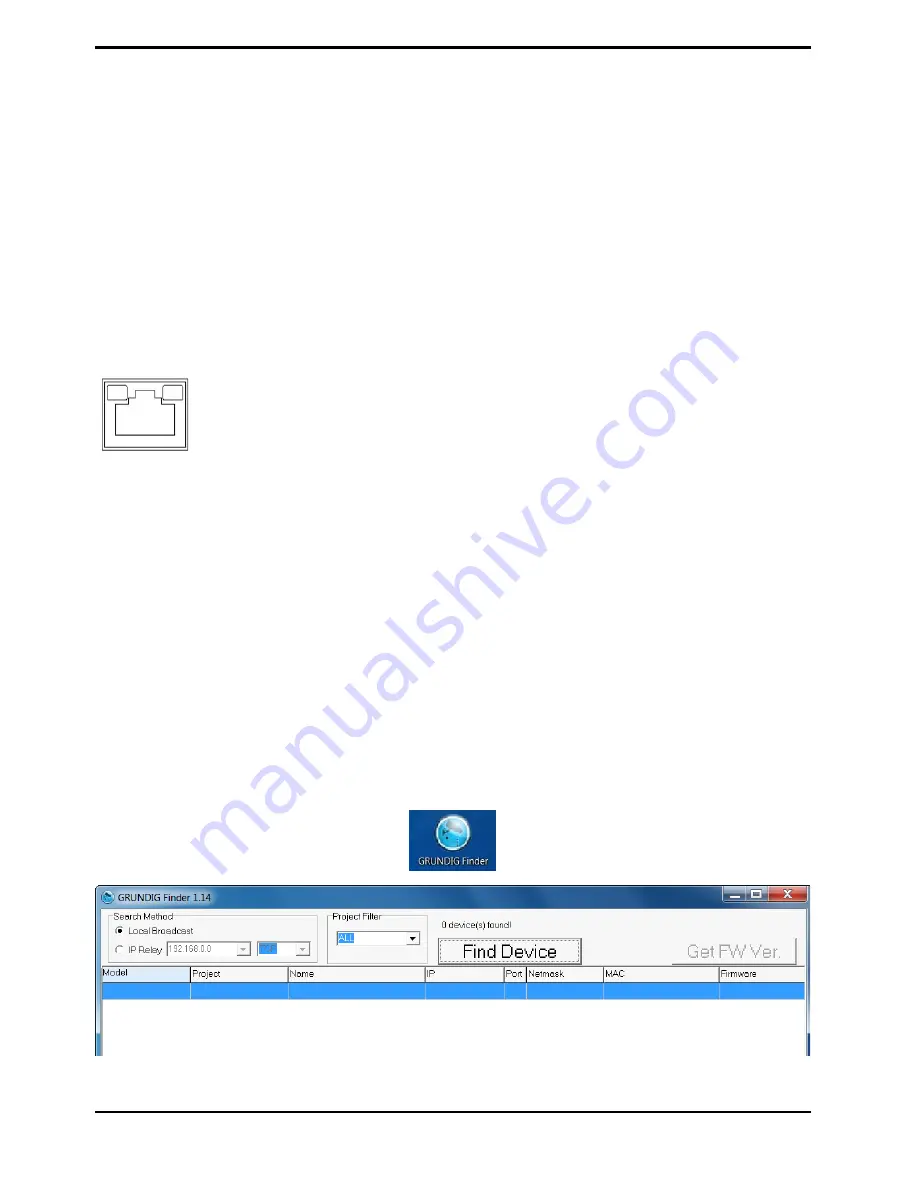
For initial access to the IP Camera, users can search the camera through the installer program: GRUNDIG
Finder.exe, which can be found on the supplied CD.
GRUNDIG Finder Software Setup :
Step 1: Double-click on the program GRUNDIG Finder.exe (see the desktop icon below). Its window will appear as
shown below. Then click on the “Find Device” button.
4
English
Содержание GCI-F0676D
Страница 2: ......
Страница 102: ...100 English...


