Grundig 40VLE8270 Скачать руководство пользователя страница 21

ENGLISH

­22

3D­FUNCTION

­-------------------------------------------------------------------------------------------------------------------------

Watching­3D­films

Notes:

7  

The 3D function is supported using the »

DVB-

T

«, »

DVB-C

«, »

DVB-S

« and »

DLNA

« chan-

nel sources or external devices connected to 
the »

HDMI

«, »

YPbPr

«, »

VGA

« or »

USB

« 

inputs.

7  

With  »

HDMI

«,  »

YPbPr

«  and  »

VGA

« 

inputs,  3D  mode  is  only  possible  with 

resolutions  at  »1280  x  720p  50/60 

Hz«,  »1920  x  1080i  50/60  Hz«  and  

»1920 x 1080p 24/30, 50/60 Hz«.

7  

The 3D experience depends on the format 

and  features  of  the  movie  (resolution, 

sharpness etc.) being played.

7  

If 3D mode is activated for a picture which 

is not in 3D, the picture on the screen may 

appear blurry both with or without the 3D 

glasses.

7

  The  3D  effect  may  degrade  if  you  watch 

3D images under fluorescent light. In such 

cases, either reduce the light or turn off the 

lamp.

7  

Your  TV  will  switch  from  3D  mode  to  2D 

mode for the following: if the program table 

or EPG information is displayed, the channel 

or the source are changed, playback of a 

3D film is completed or the next film starts to 

play in USB or PVR mode.

1

  Open the »Select Source« menu with »

«.

2

  Select the source (digital channel or suitable 

input) that will be played in 3D with »

<

«, 

»

>

«, »

V

« or »

Λ

« and confirm with »

OK

«.

3

  Open  3D  menu  with  »3D«  button  and  use 

»

<

«, »

>

« button to select »Side by Side«, »Top 

Bottom« or »2D → 3D« option according to 

the  content  to  be  played  and  confirm  with 

»

OK

«.

  –  »2D → 3D«: Changes 2D picture to 3D.

  –  »Side by Side«: Displays a picture next to 

the other one.

  –  »Top  Bottom«:  Displays  a  picture  below 

the other one.

  –  »Frame Packing«: Right and left images of 

the TV are displayed alternately.

Note:

7  

Frame Packing appears in the 3D menu only 

if a video signal is sent to the »

HDMI

« input 

in  HDMI  1.4  format.  The  »Side  by  Side« 

and »Top Bottom« options do not appear.

4

  Turn off the 3D function by setting it to »Off« 

with the »

3D

« button and confirm with 

»

OK

«.

3D­Settings

1

  Open the menu with »

MENU

«.

2

  Select the line »PICTURE SETTINGS« with 

»

V

« or »

Λ

« and confirm with »

OK

«.


–  The »PICTURE SETTINGS« menu appears.

3

  Select »3D SETTINGS« with »

Λ

« and 

confirm with »

OK

«. 


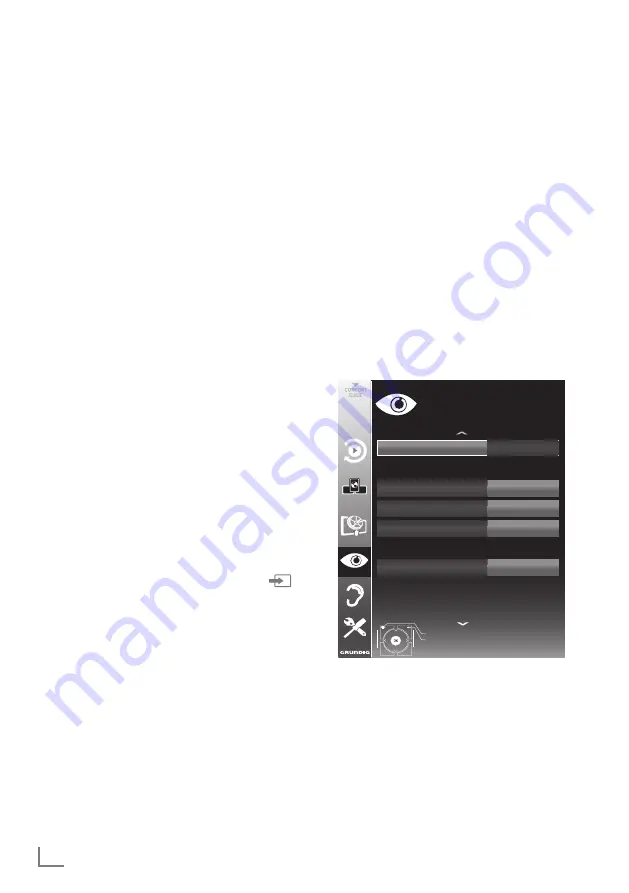
–  The »3D SETTINGS« menu is displayed.

3D Mode

Off

Effect mode

On

Depth

0

Left-Right Correction

Off

3D Perspective

0

Exit

Back

PICTURE SETTINGS

3D Settings

3D Options

3D Effects

dd.mm.yyyy

hh:mm


Note:

7  

Additional operations are explained in the 

following sections.

Содержание 40VLE8270

Страница 1: ...T 14 Tuning television channels from the cable provider DVB C 15 Changing the program table for the digital channels 18 TELEVISION OPERATION 18 Basic functions 19 Zoom function 19 Eco mode 19 Zapping...

Страница 2: ...stances Warranty claims are excluded for damage resulting from improper handling 7 Make sure the power cord or the power sup ply unit if provided are not damaged 7 Only operate the television with the...

Страница 3: ...he assembly manual for the wall bracket or have a spe cialist assemble it 7 When purchasing the wall bracket make sure that all the fastening points on the televi sion are also on the wall bracket and...

Страница 4: ...n tre of Ny lesund For customers in Russian 1 SRD with FHSS modulation 7 Maximum 2 5 mW e i r p 7 Maximum 100 mW e i r p Permitted for use SRD for outdoor applications without restric tion on installa...

Страница 5: ...vX Certified device that plays DivX video Visit divx com for more information and software tools to convert your files into DivX video ABOUT DIVX VIDEO ON DEMAND This DivX Certified device must be reg...

Страница 6: ...able for the rooftop antenna to the an tenna socket ANT IN on the television set Note 7 When connecting an indoor antenna you may have to try it out at different positions until you get the best recep...

Страница 7: ...ch does not meet the applicable safety standards Do not tamper with the power cord Inserting batteries into the remote control 1 Open the battery compartment by removing the lid 2 Insert the batteries...

Страница 8: ...ist All FAV 1 to FAV 4 Record play pause and stop only digital television channels Opens the tools menu opens closes the control menu when playing a file in DLNA menu Adjusts the volume Navigation in...

Страница 9: ...enu appears 2 Select the required menu item e g PICTURE SETTINGS with V or The line for the menu item is still displayed 3 Display the required menu item with OK The menu e g PICTURE SETTINGS appears...

Страница 10: ...s from the cable provider on page 14 7 Tunes analogue television channels you will find in the Detailed Manual 7 Further settings for digital television channels after the initial set up can also be f...

Страница 11: ...elevision channels received this can easily take a few minutes The scan is complete as soon as the PRO GRAM TABLE appears Note 7 You can abort the scan by pressing MENU Advanced installation 1 In the...

Страница 12: ...used by a change in satellite parameters made by the broadcaster e g new channels have been added Set the Network Search option to On 11 Start the scan with red The Results menu appears and the scan f...

Страница 13: ...hannels from the cable provider DVB C 1 In the Source Setup menu in the Connec tion Type line select the option Cable with or 2 Select the line Scan Type with V or Use or to set the required scan type...

Страница 14: ...ng channel lists 1 Open the menu with MENU 2 Select the SOURCE SETUP menu with V or and press OK to confirm The SOURCE SETUP menu appears 3 Select the line Programe Table with V or and press OK to con...

Страница 15: ...eria with red green or yellow 3 Quit the program table with MENU Skipping channels You can mark television channels which should be skipped when selecting with or V It is still possible to select them...

Страница 16: ...like to change channels in a different favourites list 4 Exit the current favourites list with blue The entire programe table will appear again 5 Quit the program table with MENU SETTINGS Enter own n...

Страница 17: ...volume with o Switching sound on off 1 Press p to mute the sound or switch it on again TELEVISION OPERATION Displaying information 1 Display information press repeatedly The display disappears automat...

Страница 18: ...overview of all programmes that will be broadcast in the next week for digital channels only 1 Press GUIDE to display channel informa tion Notes 7 Not all channels supply provide a detailed TV guide...

Страница 19: ...of Das Erste1 Mediathek as well as graphical re structured teletext with high definition pictures The ZDF offering includes the ZDF mediathek and other programme information as of Septem ber 2011 The...

Страница 20: ...feel dizzy or nau seous your eyes hurt you have muscle spasms or have difficulty in concentrating you must stop watching immediately 7 3D images can startle the viewer We rec ommend that elderly perso...

Страница 21: ...ect Source menu with 2 Select the source digital channel or suitable input that will be played in 3D with V or and confirm with OK 3 Open 3D menu with 3D button and use button to select Side by Side T...

Страница 22: ...t arising from HDMI signal You may correct 3D perception with this feature 1 Select Left Right Correction with V or 2 Press or to switch the function On Note 7 Set the function to Off with or 3 Press...

Страница 23: ...ng traffic congestions depending on your local city Also you can listen to online radio The availability of the applications and the con tent is dependent on the content provider Network connection Yo...

Страница 24: ...R CTIVE TV with V or and press OK to confirm The INTER CTIVE TV menu appears inter ctive Applications Connection Type Wired DNS Netmask Gateway MAC Address 10 134 150 8 255 255 255 0 10 134 151 254 E1...

Страница 25: ...P Address 10 134 151 15 Exit Back INTER CTIVE TV Network Settings dd mm yyyy hh mm Connect Test Connection OK Network Configuration AUTO 5 Select IPAddress with V and press OK Enter the IP address wit...

Страница 26: ...er 7 Please note that video playback performance in a DLNA application on a wireless local net work and in a smart Inter ctive TV applica tion on a network with internet connection de pends on the num...

Страница 27: ...with V or and then select Wireless with or SMART INTER CTIVE TV AND HOME NETWORK 4 Select Network Configuration with V or and then select AUTO with or 5 Select Select Access Point with V or and confir...

Страница 28: ...he password select Confirm with V or and confirm with OK Notes 7 In WEP encryption system more than one network password can be assigned for the network Your television can only connect to network wit...

Страница 29: ...sible for such changes 7 Grundig reserves the right to make all changes such as modifications restrictions extensions transfers and removals on internet applications provided through your Smart Inter...

Страница 30: ...Press 1 0 red green yellow blue to select enable various functions in the applications 9 Press GUIDE to end the application Smart nter ctive browser main menu 1 Application gallery 2 Selected applicat...

Страница 31: ...V or and confirm with OK dlna menu is displayed 0 Device Found Page 1 1 Press BLUE key to search DMS device SMART INTER CTIVE TV AND HOME NETWORK 3 Press blue to discover DMS devices on home network D...

Страница 32: ...informations vTuner internet radio Many radio stations broadcast through the inter net vTuner allows you to access many popular radio stations on earth Thanks to the vTuner function of your televisio...

Страница 33: ...accept liability for any loss of saved data on an external data medium Possible limitations when using an external data medium Depending on the broadcaster you may experi ence various restrictions on...

Страница 34: ...amme without time shift The scenes in the time shift memory are deleted Recording programmes You can record programmes The data for these programmes is recorded on an external data medium and this arc...

Страница 35: ...ss GUIDE to display channel informa tion The electronic TV guide appears 2 Select the preferred channel with V or 3 Switch to the information about the current programme with 4 Select the programme of...

Страница 36: ...vision channel 7 If the timer recording starts during playback playback is not interrupted recording takes place automatically in the background as long as you do not select Yes when the timer countdo...

Страница 37: ...ark the end point B by pressing 8 once again at the required scene during playback This scene is marked as the end point B The television repeats the programme be tween these two points 3 Quit the rep...

Страница 38: ...r for the respective drive e g C appears behind the folder symbol Select the letter of the drive with V or and press OK to confirm 4 Select the folder or file with V or and press OK to open it A list...

Страница 39: ...the subtitle and film files must be identical Otherwise no subtitles will be shown Subtitle function is only supported in movies that you will watch in 3D mode Additional playback functions Depending...

Страница 40: ...SK DVBS2 QPSK 8 PSK IF band 950 MHz 2 150 MHz Signal level 25dBm to 65 dBm Cable Overall band 110 MHz 862 MHz Modulation 16QAM 32QAM 64QAM 128QAM and 256QAM Symbol rate 4 0 Msym s to 7 4 Msym s Terres...

Страница 41: ...Grundig Intermedia GmbH Beuthener Strasse 41 90471 N rnberg www grundig com 72011 777 4000 12 31...

Отзывы: