the work. Leave the tool point in the cut.
• Overcome the tendency to let the handpiece continue to
stroke when not actually cutting (by failing to take your foot off
the throttle.) With practice, control of the throttle becomes an
automatic response.
• Use a stable vise or heavy engraver’s block to hold the
work. If the work is not held solidly, vibration will decrease
effectiveness of the tool’s power and will quickly dull or chip
the point. A GRS engraving block is a most effective work-
holding device.
• Don’t push hard! If your hand become tired or cramped, you
aren’t using the power of the machine to do the work, or you
may not have the tool properly sharpened or heeled.
• Keep the tool sharp and properly heeled. Sharpen frequently -
before you lose the point entirely. With practice you will begin
to “feel” when the point is beginning to dull. At this time, only
a slight amount of sharpening is necessary to bring it back
to the desired sharpness. Hardness of the material you are
cutting will greatly affect tool life.
• There should be no noticeable vibration of the tool point in the
cut. If the point is allowed to vibrate in the cut, the point will
dull quickly.
WORKHOLDING
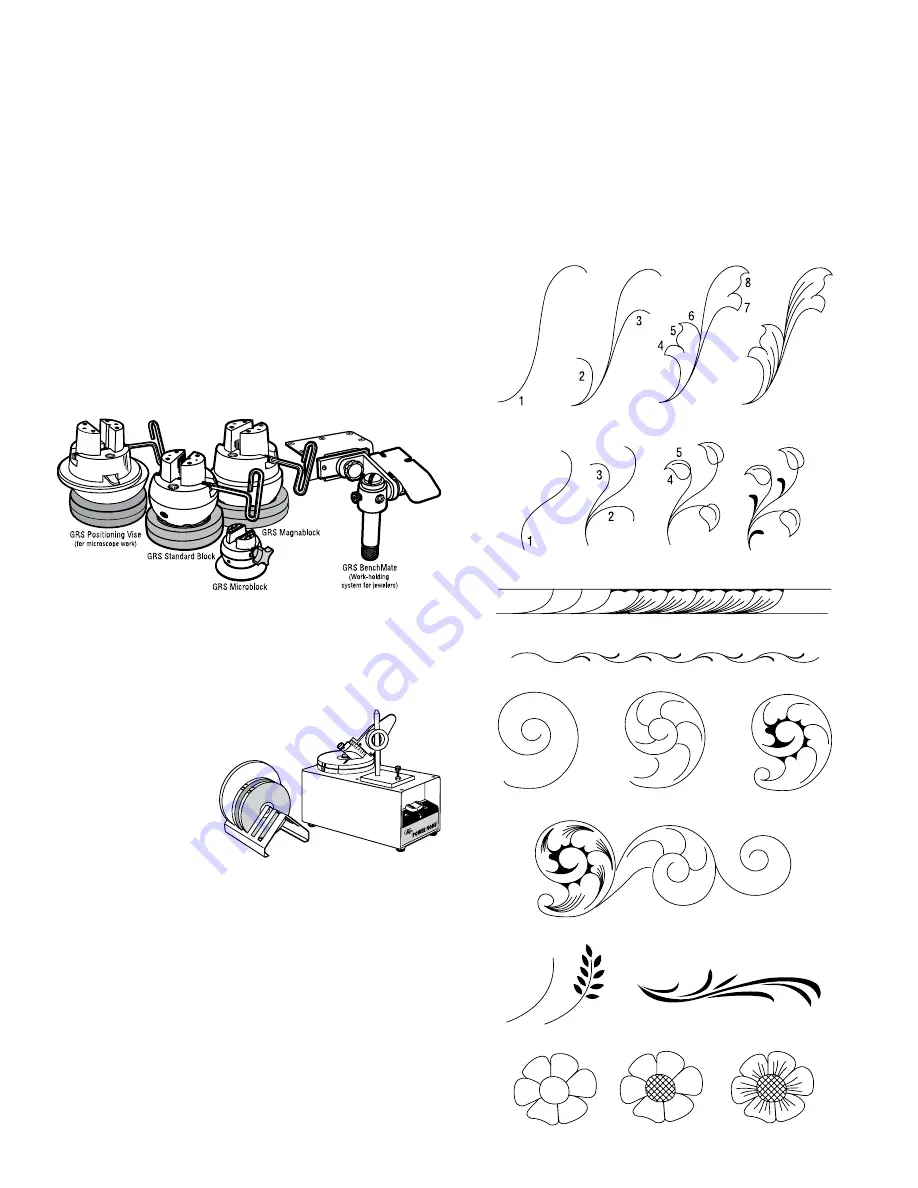
The workpiece must be held as firmly as possible. If it is not,
much of the power and cutting capability of the tool is lost. Use
either an engraver’s ball vise or a vise which can be rotated with
your free hand to position the work as the cut progresses. GRS
offers a selection of vises to fit different tasks.
GRS sharpening
equipment is a most
valuable aid in tool
sharpening. It is especially
helpful for beginners in the
art of engraving, and has
been readily accepted by
accomplished engravers
who have found that it is
faster and produces more
consistent results.
The combination of the GRS Power Hone
®
and the Sharpening
Fixture provides the ideal sharpening system. The Sharpening
Fixture is designed specifically for use with the Power Hone. With
this combination, you can sharpen repeatedly with consistent
results time after time. It is easy to learn — you merely follow the
instructions.
Tips For Practice Sessions
Start with simple cuts. Using a square or point (onglette) graver,
begin by cutting straight lines then simple curves. Practice depth
control, cutting both fine shallow lines and deep cuts. It is good
practice to master the technique of varying the depth of cuts to
produce a pleasing shaded effect. These practice sessions will
help you acquire the necessary skills in both tool control and tool
sharpening techniques.
After you have mastered the basic skills, you can concentrate on
learning the more difficult and intricate designs. With confidence
in your ability to control the tool, you will be able to execute
progressively more difficult patterns with varying depth of cut and
subtle shading, and finally on curved or irregular surfaces.
Simple exercises like those sketched below are good beginning
practice designs as they are relatively simple. It is easy to
determine the progression of the cuts to generate the design, and
they do not require a large amount of rotation or manipulation of
the work piece. This type of design is also good practice for the
beginning woodcarver.
Dual Angle
Sharpening Fixture
Ceramic lap
& diamond wheels
GRS Power Hone


