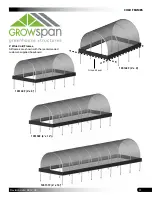
COLD FRAMES
10
Revision date: 02.12.09
SHELTER CARE AND MAINTENANCE
Proper care and maintenance of the shelter is important.
Check the following items periodically to properly maintain
the shelter:
• Check the ground posts and anchoring system (if
equipped) to see that all components are tight and in
good repair.
• Check connections and all fasteners to verify that they
remain tight.
• Verify that all connections and connectors are secure.
Tighten these if necessary.
• Check the cover material to verify that it is in good
repair.
• Do not climb or stand on the cold frame at anytime.
• Remove debris and objects that can accumulate on the
cold frame. Use tools that will not damage the cover
when removing debris.
• Remove snow to prevent excess accumulation. Use
tools that will not damage the cover when removing
snow.
• Check the contents of the shelter to verify that nothing
is touching the cover that could cause damage.
• If the cold frame is moved, inspect all parts and
connections before reassembling.
• Check the ground posts to ensure that they do not work
out of the ground.
• For replacement or missing parts, call 1-800-245-9881
for assistance.
NOTE:
With the exception of Truss Arch buildings,
GrowSpan™ shelters and greenhouses
do not
have any
tested loading criteria.
INSTALL THE MAIN COVER
The main cover is attached to the assembled frame using
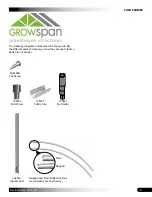
fabric clips (105107) and Tek screws. It is attached to the
end rafter assemblies only.
Complete these steps.
1. Locate the fabric clips, divide the quantity in half, and
the Tek screws needed to attach the main cover.
2. Locate the main cover and unfold it next to the
assembled frame.
NOTE:
It is easiest to install the cover when there is no
wind. Use additional help to secure the cover if needed.
3. With adequate assistance, pull the cover over the
frame and center it front-to-back and side-to-side on
the frame.
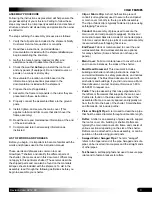
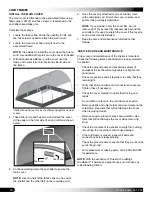
4. Take a fabric clip and Tek screw and attach the cover
at the peak on the front side of an end rafter as shown
below.
5. Continue working down the end rafter to secure the
main cover.
NOTE:
Use one-half of the fabric clips on one end of
the shelter and the other half on the remaining end.
Fabric clip
Tek screw
6. Once the cover is attached to one end rafter, move
to the remaining end, stretch the cover in place, and
secure it as previously described.
NOTE:
If you decide to trim the cover film, do not
remove all of the excess film that extends beyond the
end rafters. It is used to stretch the cover if the cover is
ever removed and reinstalled.
7. Read the care and maintenance information that
follows.
Shelter shown above may be of a different length than actual
shelter.


