background image

-14-

G0532 2HP Dry Spray Booth

3.

  Fasten  a  long  leg  support  (

Figure  5

)  to  the 

two legs with four 

3

8

"-16 x 

3

4

" hex bolts, eight 

flat washers and four hex nuts.

4.

  With the help of an assistant, turn the exhaust 

fan onto its opposite side.

5. 

Install the other two legs and a long leg sup-
port  on  the  other  side  of  the  exhaust  fan, 
repeating 

Steps 2-3


Note

Do not completely tighten the hardware 

at this time. 

6.

  Fasten a short leg support (

Figure 6

) to two 

legs with four 

3

8

"-16 x 

3

4

" hex bolts, eight flat 

washers and four hex nuts. 


7.

  Repeat 

Step  6

  to  install  the  second  short 

leg support. The stand assembly should now  
look like the example shown in 

Figure 6

.

Figure 5.

 Installing a long leg support.

Figure 6.

 Short leg supports installed.

8. 

To install casters onto the legs, go to 

Step 9

If you prefer not to install casters, go to 

Step 

10

9.

  Fasten each of the four casters to the bottom 

of the each of the legs with four 

5

16

"

-18 x 

3

4

hex  bolts,  eight  flat  washers  and  four  hex 
nuts. Install the fixed casters in front and the 
swivel casters in back.

10.

  With  the  help  of  an  assistant,  raise  the 

exhaust  fan  off  of  the  floor  and  tighten  all 
hardware. 

11.

  Proceed to 

Skew Boards on this page

.

Components and Hardware Needed: 

Qty

Skew Boards (Upper & Lower) .......................... 2
Skew Boards (Right and Left) ........................... 2
Braces (Large) ................................................... 4
Braces (Small) ................................................... 4
Curtain Braces  .................................................. 2
Hex Bolts 

5

16

"-18 x


3

4

"

 ....................................... 9

Flat Washers 

5

16

" ............................................ 18

Hex Nuts 

5

16

"-18 ................................................ 9

Hex Bolts 

1

4

"

-20 x 

1

2

" ...................................... 24 

Flat Washers 

1

4

"

 .............................................. 72

Hex Nuts 

1

4

"-20 ............................................... 48

Flat Head Screws 

1

4

"-20 x 

5

8

" ......................... 24

To install the skew boards and braces:


1.

  Secure the right skew board (

Figure 7

) to the 

exhaust fan with three 

5

16

"

-18

 x 

3

4

" hex bolts, 

six flat washers, and three hex nuts. 

Skew Boards

Long

Leg 

Support

Figure 7.

 Installing right skew board.

Right 

Skew

Board

Short

Leg 

Supports

Содержание G0532

Страница 1: ...ER S MANUAL COPYRIGHT DECEMBER 2005 BY GRIZZLY INDUSTRIAL INC REVISED APRIL 2007 BL WARNING NO PORTION OF THIS MANUAL MAY BE REPRODUCED IN ANY SHAPE OR FORM WITHOUT THE WRITTEN APPROVAL OF GRIZZLY INDUSTRIAL INC BL5690 PRINTED IN TAIWAN ...

Страница 2: ... operator or bystander from machine hazards The machine owner MUST maintain the original label location and readability If a label is removed or becomes unreadable REPLACE the label before using the machine For new labels contact Grizzly Industrial Inc at 570 546 9663 or techsupport grizzly com ...

Страница 3: ...erations 13 Stand 13 Skew Boards 14 Work Table 16 Curtains 16 Filters 17 Exhaust Fan Outlet 18 Table Curtain Adjustments 18 Ducting 19 Air Filter Indicator 19 SECTION 4 OPERATIONS 20 Operation Safety 20 Filter Indicator 20 SECTION 5 MAINTENANCE 22 Schedule 22 Exhaust Fan and Motor 22 Ducting 22 Air Filter Indicator 22 Interior Booth Walls 22 Exhaust Filters 22 SECTION 6 SERVICE 23 About Service 23...

Страница 4: ...th in this manu al you can expect years of trouble free enjoyable operation and proof of Grizzly s commitment to customer satisfaction We are pleased to provide this manual with the Model G0532 It was written to guide you through assembly review safety considerations and cover general operating procedures It repre sents our effort to produce the best documenta tion possible The specifications draw...

Страница 5: ...G0532 2HP Dry Spray Booth 3 Data Sheet ...

Страница 6: ... 4 G0532 2HP Dry Spray Booth ...

Страница 7: ...h 5 H Figure 1 G0532 Identification A Exhaust Fan Outlet B Top Curtain C Right Curtain D First Stage Filters E Work Table Leg F Work Table G Left Curtain H Stand Leg I Filter Indicator J Motor Identification A B C D E F J G I ...

Страница 8: ...and can cause cancer and severe respiratory illnesses For Your Own Safety Read Instruction Manual Before Operating this Machine The purpose of safety symbols is to attract your attention to possible hazardous conditions This manual uses a series of symbols and signal words which are intended to convey the level of importance of the safety messages The progression of symbols is described below Reme...

Страница 9: ...ories 16 MAKE SURE GUARDS ARE IN PLACE AND WORK CORRECTLY BEFORE USING MACHINERY Safety Instructions for Machinery 17 REMOVE ADJUSTING KEYS AND WRENCHES Make a habit of checking for keys and adjusting wrenches before turn ing machinery ON 18 CHECK FOR DAMAGED PARTS BEFORE USING MACHINERY Check for binding and alignment of parts broken parts part mounting loose bolts and any other conditions that m...

Страница 10: ...nd make sure it is operating correctly 3 BOOTH INTERLOCK A booth interlock which disables spraying devices unless the exhaust fan is operating may be required by local codes 4 RESPIRATOR Use an OSHA approved paint spray respirator when spraying in the booth 5 FILTER PAD REPLACEMENT Do not operate the spray booth when the air filter indicator indicates the filter pad needs to be replaced 6 FLAMMABL...

Страница 11: ...mps Connection Type We recommend that you hardwire the dry spray booth directly to your circuit breaker The ON OFF switch must be installed a minimum of 10 feet from the booth unless specified for hazard ous locations per NFPA 33 and NEC 2005 It is the customer s responsibility to install wiring and a switch in the G0532 Because of the fire explosion hazard potential of spray booths you MUST have ...

Страница 12: ...o cess This machine presents serious injury hazards to untrained users Read through this entire manu al to become familiar with the controls and opera tions before starting the machine Unpacking Set Up Safety SECTION 3 SET UP The Model G0532 is a heavy machine 346 5 lbs shipping weight DO NOT over exert yourself while unpacking or mov ing your machine get assistance The following items are needed ...

Страница 13: ...rd Stage Filter 1 S Curtain Braces Not Shown 2 Hardware and Tools Not Shown Hex Bolts 3 8 16 x 3 4 Stand 32 Flat Washers 3 8 Stand 64 Hex Nuts 3 8 16 Stand 32 Swivel Casters Stand 2 Fixed Casters Stand 2 Hex Nuts 5 16 18 Stand Skew Boards 25 Hex Bolts 5 16 18 x 3 4 Stand Skew Boards Outlet 35 Flat Washers 5 16 Stand Skw Bd Outlet 60 Flat Hd Screws 1 4 20 x 5 8 Skew Boards Work Table Curtains 36 He...

Страница 14: ... 12 G0532 2HP Dry Spray Booth Hardware Recognition Chart ...

Страница 15: ... visitors inside your shop could cause serious per sonal injury to themselves Lock all entrances to the shop when you are away and DO NOT allow unsupervised children or visitors in your shop at any time Site Considerations 68 48 Components and Hardware Needed Qty Leg Support Long 2 Leg Support Short 2 Leg 4 Exhaust Fan 1 Hex Bolts 3 8 16 x 3 4 32 Flat Washers 3 8 64 Hex Nuts 3 8 16 32 Casters 4 He...

Страница 16: ...9 If you prefer not to install casters go to Step 10 9 Fasten each of the four casters to the bottom of the each of the legs with four 5 16 18 x 3 4 hex bolts eight flat washers and four hex nuts Install the fixed casters in front and the swivel casters in back 10 With the help of an assistant raise the exhaust fan off of the floor and tighten all hardware 11 Proceed to Skew Boards on this page Co...

Страница 17: ...e 9 Removing hex bolts Figure 11 Installing small brace Figure 10 Installing large brace over skew board seams 8 Place a small brace over the seam of the skew boards shown in Figure 11 and fasten with four 1 4 20 x 5 8 flat head screws four flat washers and four hex nuts Large Brace Small Brace 7 Fasten the three remaining large braces over the rest of the skew board seams repeating Step 6 for eac...

Страница 18: ... 4 20 x 5 8 8 To install the curtains 1 Fasten the upper and lower hinges Figure 14 on the left curtain to the left skew board with four 1 4 20 x 5 8 flat head screws four flat washers and four hex nuts Figure 13 Installing table Work Table Components and Hardware Needed Qty Work Table 1 Flat Head Screws 20 x 5 8 4 Flat Washers 1 4 4 Hex Nuts 1 4 20 4 To install the work table 1 Fasten the work ta...

Страница 19: ...Third Stage Filter 1 To install the filters 1 Install the four second stage filters above and below the middle brace on the inner rail as shown in Figure 16 Figure 15 Top curtain and connection bars Figure 17 First stage filters Figure 16 Second stage filters 2 Install the four first stage air filters on the outer rail as shown in Figure 17 3 Insert the third stage filter into the filter drawer as...

Страница 20: ...aust fan and secure with ten 5 16 18 x 3 4 hex bolts and flat washers as shown in Figure 19 Figure 19 Installing outlet Outlet Exhaust Fan Table Curtain Adjustments To adjust the legs and secure the curtains 1 Reach under the work table and fully extend the two support legs to support the work table 2 Lock the latches on the bottom of each cur tain into the work table as shown in Figure 20 Figure ...

Страница 21: ...ure 22 Tubing installed onto spray booth chamber 2 Adjust the manometer so the built in level reads level Figure 21 3 Install a tubing connector fitting in the larger pre drilled hole on the side of the booth near the manometer as shown in Figure 22 4 Run tubing from the low pressure side of the manometer to the tubing connector fitting as shown in Figure 22 Figure 21 Mounting manometer to spray b...

Страница 22: ...el adjustments can be made using the zero adjustment knob Note Only use Dwyer red gauge oil to fill the manometer If you need additional oil order Grizzly part number P0532095 Damage to your eyes lungs and ears could result from using this machine without proper protective gear Always wear safety glasses a respirator and hearing protection when operating this machine Loose hair and cloth ing could...

Страница 23: ...e 7 Multiply the reading from Step 6 times 2 2x and mark with the supplied red arrow Figure 26 This is the dirty filter indicator mark When the fluid reaches the red arrow install new filters Figure 26 Dirty filter mark example Note Always make sure the fluid level is at zero before using the spray booth each time Also check the fluid level on a regular basis and re fill as needed Dirty Filter Ind...

Страница 24: ...epending on the type of paint being captured Consult local authorities for storage and disposal recommendations Exhaust Filters How often you perform maintenance checks depends upon the material type and amount being sprayed Checking at regular intervals can reduce fire hazards maintain spray booth efficiency pre vent newly painted objects from blemishing and hinder rust Schedule Check the air fil...

Страница 25: ...roperly seated Too much airflow in booth 1 Filters are not correctly seated 1 Make sure all filters are installed and properly seated The filter indicator does not work prop erly 1 Fluid level is low 2 Obstructions exist in hoses 3 Air filter indicator is not level 1 Check fluid level and add fluid as needed 2 Remove obstructions from hoses 3 Loosen manometer mounting hard ware level using sight g...

Страница 26: ... 24 G0532 2HP Dry Spray Booth 115V Wiring Diagram ...

Страница 27: ...G0532 2HP Dry Spray Booth 25 230V Wiring Diagram ...

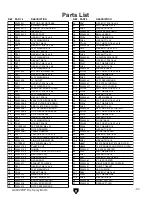
Страница 28: ... 26 G0532 2HP Dry Spray Booth Parts Breakdown ...

Страница 29: ...CK FILTER BOX BOARD 43 PFH04 FLAT HD SCR 1 4 20 x 5 8 6 5 P0532006 5 RIGHT FILTER BOX BOARD 44 PW06 FLAT WASHER 1 4 6 6 P0532006 6 SMALL FILTER BOX COVER 45 PN05 HEX NUT 1 4 20 6 7 P0532006 7 LEFT FILTER BOX BOARD 46 P0532046 LEFT SIDE STEEL CURTAIN 6 8 P0532006 8 FILTER BOX BOARD BASE 47 PFH04 FLAT HD SCR 1 4 20 x 5 8 6 9 P0532006 9 FILTER BOX BASE 48 PW06 FLAT WASHER 1 4 6 10 PB04 HEX BOLT 5 16 ...

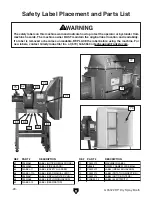
Страница 30: ...tact Grizzly Industrial Inc at 570 546 9663 or techsupport grizzly com REF PART DESCRIPTION REF PART DESCRIPTION 62 P0532062 LABEL NOTICE REGULATIONS 70 P0532070 MACHINE ID LABEL 63 P0532063 LABEL FIRE HAZARD 71 G8588 GRIZZLY NAMEPLATE SMALL 65 PLABEL 11 LABEL SAFETY GLASSES 72 P0532072 LABEL IMPELLER HAZARD 66 PLABEL 12A LABEL READ MANUAL VERT 73 P0532073 LABEL ROTATION DIRECTION 67 P0532067 LABE...

Страница 31: ...ll be tried in the State of Washington County of Whatcom We shall in no event be liable for death injuries to persons or property or for incidental contingent special or consequential damages arising from the use of our products To take advantage of this warranty contact us by mail or phone and give us all the details We will then issue you a Return Number which must be clearly posted on the outsi...

Страница 32: ... 30 G0532 2HP Dry Spray Booth ...

Страница 33: ... 0 2 Years ____ 2 8 Years ____ 8 20 Years ____20 Years 6 How many of your machines or tools are Grizzly ____ 0 2 ____ 3 5 ____ 6 9 ____10 7 Do you think your machine represents a good value _____Yes _____No 8 Would you recommend Grizzly Industrial to a friend _____Yes _____No 9 Would you allow us to use your name as a reference for Grizzly customers in your area Note We never use names more than 3...

Страница 34: ...D LINE FOLD ALONG DOTTED LINE GRIZZLY INDUSTRIAL INC P O BOX 2069 BELLINGHAM WA 98227 2069 Place Stamp Here Name_______________________________ Street_______________________________ City______________State______Zip______ Send a Grizzly Catalog to a friend ...

Страница 35: ......

Страница 36: ...zly Trusted Proven and a Great Value OR SECURE ORDERING ORDERS SHIPPED WITHIN 24 HOURS E MAIL RESPONSE WITHIN ONE HOUR Visit Our Website Today And Discover Why Grizzly Is The Industry Leader Call Today For A FREE Full Color Catalog ...

Отзывы: