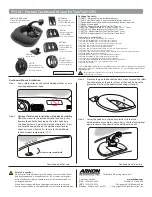
Step 4
–
Loosen
the knob shown
in
Figure 4
to
adjust the angle
of the boom
pipe.
Step 6
–
Figure 7
shows how to screw
in the microphone
clip.
Use
a
microphone clip or
shock
mount
to
mount
your
microphone.
Step 1
–
Loosen the knob at the base by turning it
clockwise as shown on
Figure 1
. Expand and spread the
legs and tighten the knob to hold the legs in place.
Step 2
–
Take the boom arm, insert it in the top shaft
of the stand and screw it fully (see
Figure 2
).
Step 3
–
To adjust the
height of the stand,
simply loosen the
hand knob near the
connection of the
boom piece then
adjust up or down the
inner pipe to your
preference and tighten
to hold in place (see
Figure 3
).
Step 5 -
To adjust the boom, loosen the knob located on
the left side of the boom and pull or push the boom
forward or backward, the tighten the knob to hold in
place as shown in
Figure 5
. This Microphone Stand has
an additional telescoping boom located near the
microphone. To extend or retract, loosen the knob
directly behind the microphone clip and extend or retract
the boom (See
Figure 6
). Tighten the knob to hold it in
place.
Please scan the QR Code below for the product
demonstration video. Or go to the URL shown here and find
the product video. www.Griffin-Stands.com/Videos
Step 7
–
For safety reasons, please always make sure to
test the stability and safety of the product before use.
Double check all nuts and bolts, knobs and connectors,
make sure that these are tight and securely fastened
before use of your product. Test the product under light
use or light loads the first time to confirm assembly and
structure of the product is correct.


