•
Keep the trimmer head free of grass, leaves, or excessive
grease.
•
Keep the air vents clean and free of debris to avoid
overheating and damage to the motor or the battery.
•
Do not spray water onto the motor and electrical
components.
10.3
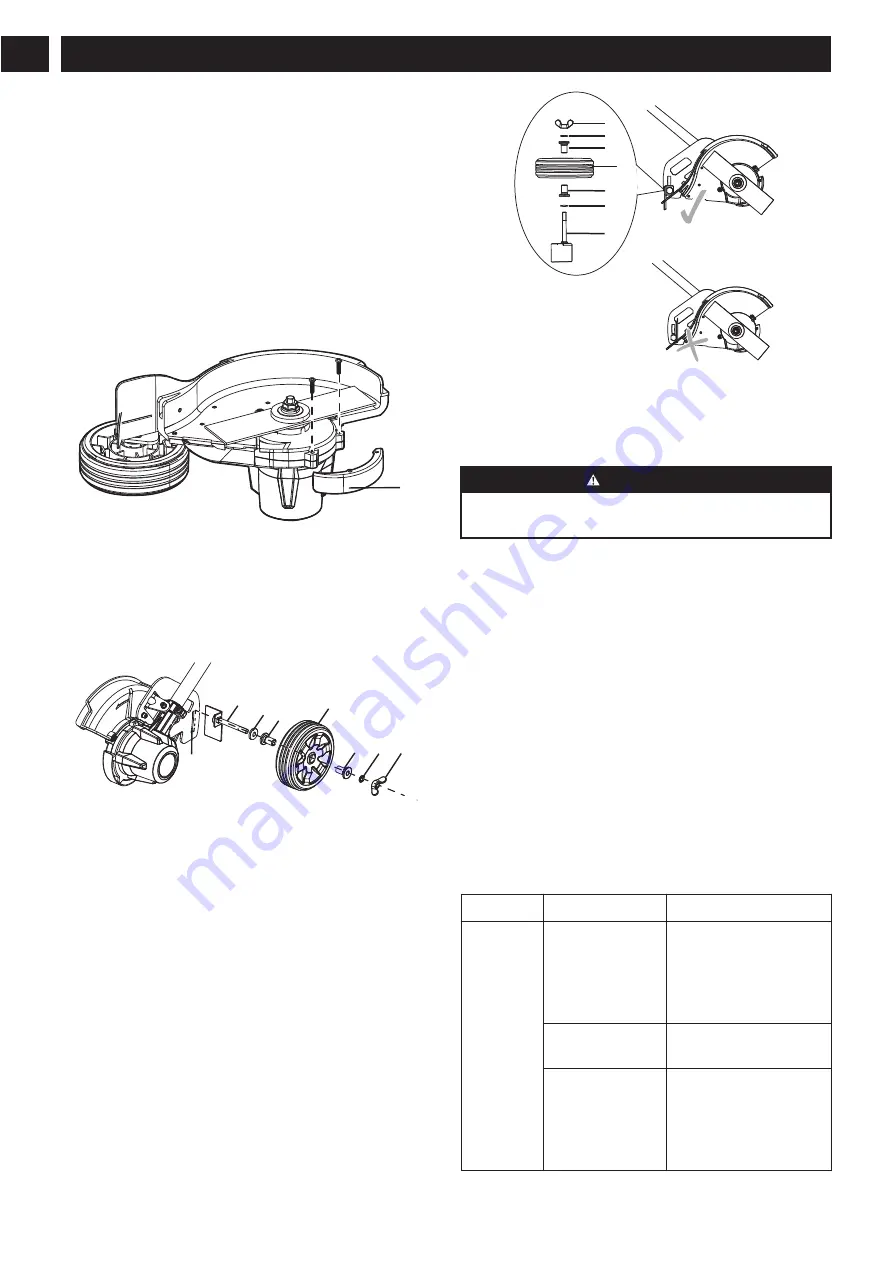
REPLACE THE SKID PLATE
1. Remove the screws with a Phillips Head screwdriver (not
included).
2. Replace with the new skid plate (1).
3. Tighten the screws.
1
10.4
REPLACE THE WHEEL
1. Remove the battery.
2. Remove the wing nut (1), washer (2), axle sleeve (3),
wheel (4), axle sleeve (3), rubber washer (5) and wheel
axle (6) orderly from the wheel assembly.
1
2
3
4
3
5
7
6
3. Replace with the new wheel.
4. Insert the wheel axle (6) through the slot (7) downward,
then put the rubber washer (5), axle sleeve (3), wheel (4),
axle sleeve (3), washer (2) and wing nut (1) orderly
through the wheel axle (6).
1
2
3
4
6
3
5
5. Tighten the wing nut (1).
11
TRANSPORTATION AND
STORAGE
WARNING
Remove the battery pack from the machine before
transportation and storage.
11.1
MOVE THE MACHINE
When you move the machine, you must:
•
Stop the machine.
•
Remove the battery pack.
11.2
STORE THE MACHINE
•
Remove the battery pack from the machine.
•
Make sure that children cannot come near the machine.
•
Keep the machine away from corrosive agents such as
garden chemicals and de-icing salts.
•
Secure the machine during transportion to prevent
damage or injury. Clean and examine the machine for any
damage.
12
TROUBLESHOOTING
Problem
Possible Cause
Solution
The ma-
chine does
not start
when you
push the
trigger.
No electrical con-
tact between the
machine and the
battery pack.
1. Remove battery pack.
2. Check contact and in-
stall the battery pack
again.
The battery pack is
depleted.
Charge the battery pack.
The lock-out but-
ton and trigger are
not pushed at the
same time.
1. Pull the lock-out but-
ton and hold it.
2. Pull the trigger to start
the machine.
10
English
EN


