background image

NC-100 NETcat

®

 Micro

Operation

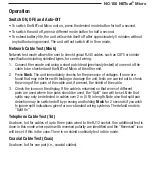
Switch ON, OFF, and Auto-Off


To switch the NETcat Micro unit on, press the desired mode button for half a second. 


To switch the unit off, press a different mode button for half a second. 


To extend battery life, the unit will switch itself off after approximately 5 minutes without 

any button being pressed. The unit will not switch off in Tone mode.

Network Cable Test (Ntwk)

Network test mode allows the user to check typical RJ45 cables, such as CAT5 or similar 

specification including shielded types, for correct wiring.
1.


Connect the remote unit using a short patch lead (previously tested) at one end of the 

cable to be checked and the NETcat Micro at the other end.

2.


Press 

Ntwk

. The unit immediately checks for the presence of voltages. If none are 

found that may interfere with testing or damage the unit, tests are carried out to check 

the wiring of the pairs of the cable and, if present, the shield of the cable.

3.


Check the icons on the display. If the cable is miswired so that wires of different 

pairs are used where true pairs should be used, the “Split” icon will be set. Note that 

splits may only be detected in cables over 2 m (5 ft) in length. Note also that split pair 

detection may be switched off by pressing and holding 

Ntwk 

for 2 seconds if you wish 

to ignore split indications given for non-standard wiring systems. The default mode is 

“Split On”.

Telephone Cable Test (Tel)

As above, but for cables of up to three pairs wired to the RJ12 socket. One additional test is 

done in this mode where pairs with reversed polarity are identified and the “Reversed” icon 

will be set if this is the case. There is no shield continuity test in this mode.

Coaxial Cable Test (Coax)

As above, but for one pair (i.e., coaxial cables).

Содержание NETcat NC-100

Страница 1: ...NC 100 NETcat Micro Wiring Tester INSTRUCTION MANUAL Read and understand all of the instructions and safety information in this manual before operating or servicing this tool ...

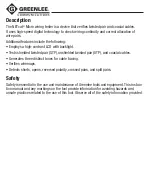
Страница 2: ...ts shielded twisted pair STP unshielded twisted pair UTP and coaxial cables Generates three distinct tones for cable tracing Verifies wiremaps Detects shorts opens reversed polarity crossed pairs and split pairs Safety Safety is essential in the use and maintenance of Greenlee tools and equipment This instruc tion manual and any markings on the tool provide information for avoiding hazards and uns...

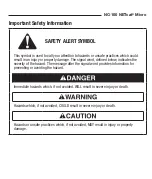
Страница 3: ... The signal word defined below indicates the severity of the hazard The message after the signal word provides information for preventing or avoiding the hazard Immediate hazards which if not avoided WILL result in severe injury or death Hazards which if not avoided COULD result in severe injury or death Hazards or unsafe practices which if not avoided MAY result in injury or property damage ...

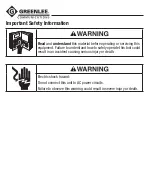
Страница 4: ... or servicing this equipment Failure to understand how to safely operate this tool could result in an accident causing serious injury or death Electric shock hazard Do not connect this unit to AC power circuits Failure to observe this warning could result in severe injury or death ...

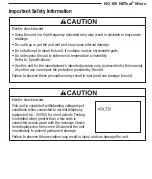
Страница 5: ... described in this manual Any other use can impair the protection provided by the unit Failure to observe these precautions may result in injury and can damage the unit Important Safety Information Electric shock hazard This unit is capable of withstanding voltage input conditions when connected to normal telephony equipment i e 50 VDC for short periods Testing is inhibited when greater than a few...

Страница 6: ... 7 Short Some wires are short circuit 8 Digits showing wiremapping to remote unit 9 Open Some wires are open circuit 10 Pass All wires are connected one to one correct 11 Split Split pair is detected 12 VOLTS Voltage is detected on one or more pairs testing is inhibited Disconnect quickly to prevent damage The NETcat Micro requires one 9 V snap type battery alkaline types are recommended When the ...

Страница 7: ...e are found that may interfere with testing or damage the unit tests are carried out to check the wiring of the pairs of the cable and if present the shield of the cable 3 Check the icons on the display If the cable is miswired so that wires of different pairs are used where true pairs should be used the Split icon will be set Note that splits may only be detected in cables over 2 m 5 ft in length...

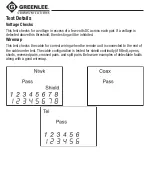
Страница 8: ...old then testing will be inhibited Wiremap This test checks the cable for correct wiring when the remote unit is connected to the end of the cable under test The cable configuration is tested for shield continuity if fitted opens shorts reversed pairs crossed pairs and split pairs Below are examples of detectable faults along with a good wiremap ...

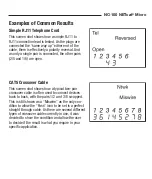
Страница 9: ... 2 5 and 1 6 are open CAT5 Crossover Cable This screen shot shows how a typical two pair crossover cable is often used to connect devices back to back with the pairs 1 2 and 3 6 swapped This is still shown as a Miswire as the only con dition to allow the Pass icon to be set is a perfect straight through cable As there are several different types of crossover cable currently in use it was decided t...

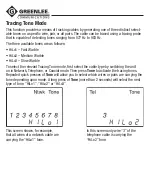
Страница 10: ...ble To select the relevant Tracing Tone mode first select the cable type by switching the unit on in Network Telephone or Coaxial mode Then press Tone to activate the tracing tones Repeated quick presses of Tone will allow you to select which wires or pairs are carrying the tone depending upon mode A long press of Tone more than 2 seconds will select the next type of tone HiLo1 HiLo2 or HiLo3 This...

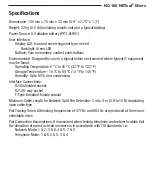
Страница 11: ...ure 0 C to 50 C 32 F to 122 F Storage Temperature 10 C to 60 C 14 F to 140 F Humidity Up to 95 non condensing Interface Connections RJ45 shielded socket RJ12 6 way socket F Type threaded female coaxial Minimum Cable Length for Network Split Pair Detection 2 m to 3 m 5 ft to 10 ft depending upon cable type Pair Tracing Tones Alternating frequencies of 577 Hz and 983 Hz are produced at three user se...

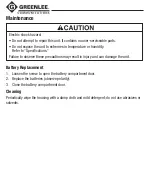
Страница 12: ... Refer to Specifications Failure to observe these precautions may result in injury and can damage the unit Battery Replacement 1 Loosen the screw to open the battery compartment door 2 Replace the batteries observe polarity 3 Close the battery compartment door Cleaning Periodically wipe the housing with a damp cloth and mild detergent do not use abrasives or solvents ...

Отзывы: