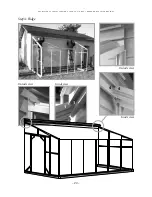
8.
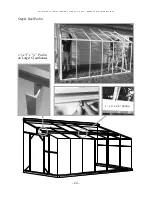
ROOF PURLIN (CHANNEL)
(See Page 24)
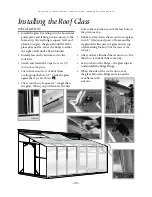
When installing the roof purlin, mark it out by measuring from the ridge. The roof purlin
should be located approximately the center between the ridge and the gutter. Always face the
open end of the purlin up towards the ridge so that it can be used for hanging baskets. Every
Glass Bar has notches punched out so that the head of the bolts can be inserted and can slide
up or down on the bar.
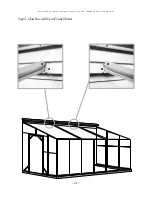
9.
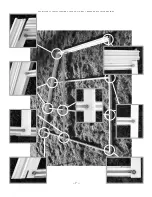
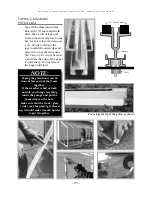
TAPE ALL GLASS BARS
(See Page 25)
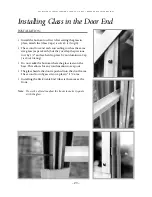
Complete all taping with the 1/8” foam tape -
install side vent frame sliders before taping the bars
(if it was not done before)
.
Do not put foam strips in between the glass and the base, and beside the door frame.
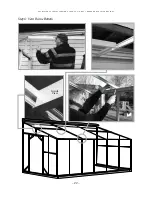
1O. FASTENING / SEALING THE GREENHOUSE TO
THE WALL
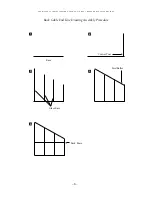
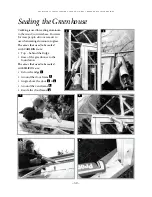
Before you seal behind the ridge and end
Glass Bars, square your greenhouse using
the
3/4/5 method (see sketch)
. Sometimes
the foundation is level but your wall is not
plumb. You may have to decide to pull
the greenhouse away from the wall or make
your foundation off-level. When your greenhouse is
squared up, mark the edge of the ridge on your wall and pull your greenhouse away from
the wall and seal behind it. Push the greenhouse back to the wall and fasten it with screws.
NOTE:
Sealing can also be done after greenhouse is finished and before the vents are installed.
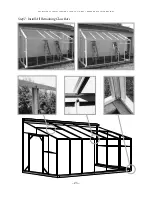
11. SIDE VENTS, INTAKE SHUTTER AND EXHAUST FANS INSTALLATION
(IF NECESSARY) SEE APPENDIXES B THRU E. THEN RETURN TO THE
NEXT PAGE AND CONTINUE
Note:
Make sure the greenhouse is fastened to the foundation with 1” screws.
OPTIONALS
SIDE VENTS, INTAKE SHUTTERS AND EXHAUST FAN INSTALLATION: See Appendix B-E
(Pages 39 – 41)
.
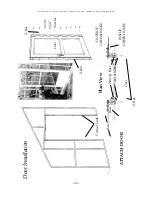
TRUSS: If the greenhouse is larger than the instructions show, it will require a truss. Insert a
truss after the Ridge
(See #4 Page 17)
. Follow up with installation of the Perlin
(See #8, this
page).
Truss assembly sketch is on Page 38.
– 18 –
T R A D I T I O N A L S E R I E S S T R A I G H T L E A N T O M O D E L • G R E E N H O u S E I N S T R u c T I O N S
1

