


D 10 Glue the 1/32" ply hatch tabs to the bottom
of the aft fuse top so they are centered between
the marks you just made The tabs should extend
approximately 1/4" out into the hatch cutout.
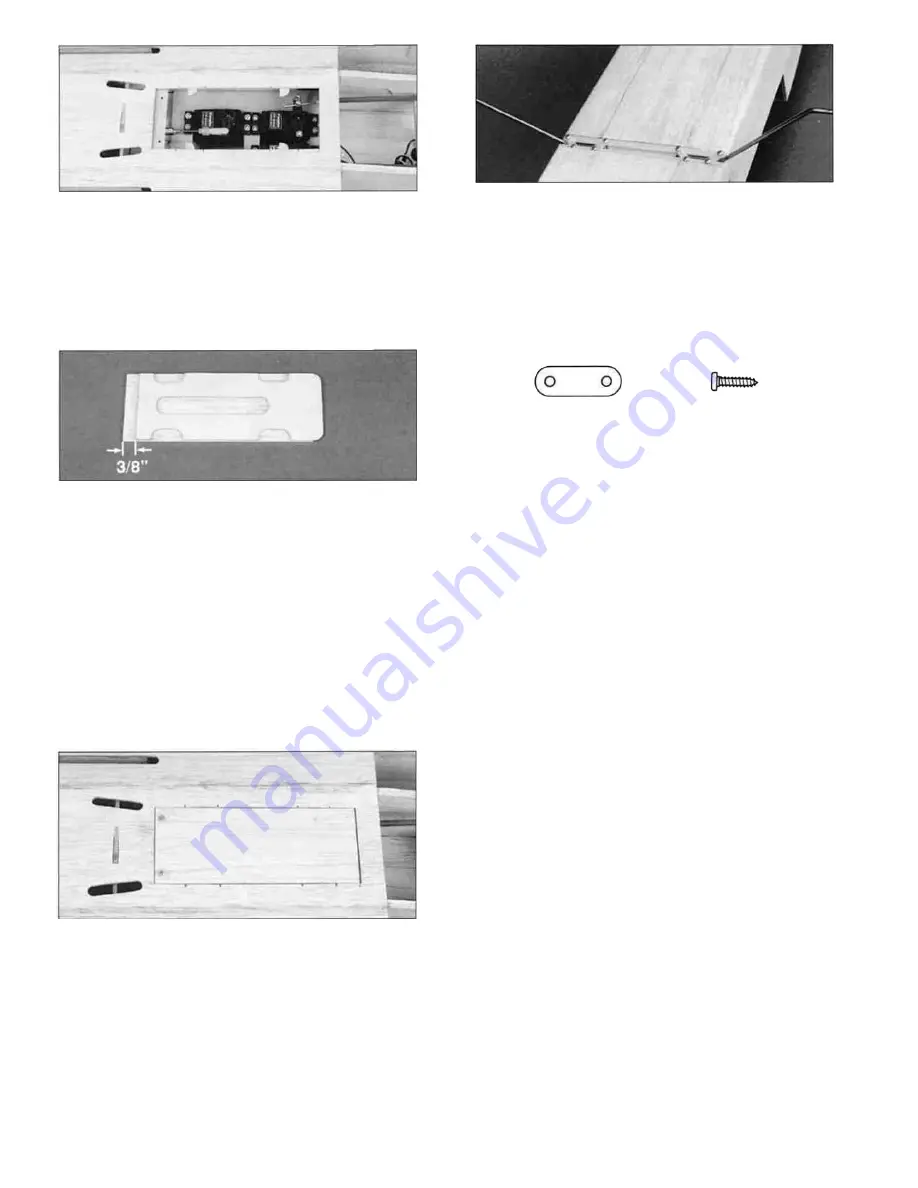
D 13. Grind off any burrs on the ends of the main
landing gear (WBNT186) and press the gear into
the grooved LG block Cut the four nylon landing
gear straps (NYLON36) apart and position them
on the grooved LG block as shown Mark where to
drill the mounting holes Drill 1/16" diameter holes
at each of the marks and install the straps using
the #2 x 3/8" screws (SCRW024) provided.
D 11 Position the 1/16" ply hatch doubler on the
3/32" balsa hatch (it was die-cut from the fuse top)
so that the hatch overlaps the doubler by 3/8" as
shown in the photo The side of the hatch with the
punch marks should be opposite the doubler and
the punch marks should be near the squared off
end of the doubler Apply thin CA around the
edges of the doubler to glue the two together.
Keep the hatch against a flat surface while doing
this so it doesn't end up bowed.
D 12 Position the hatch in the hatch cutout and
drill 1/16" holes down through the screw block at
the two punch marks Remove the hatch and
countersink the holes in the hatch only to accept
the #2 x 3/8" flat head screws (SCRW069)
provided Sand the edges of the hatch until there
is a 1/32" gap all around the hatch when it is
positioned in the hatch cutout To remove the
hatch from the fuselage, just press down on the
front edge of the hatch
WING
NOTE: The following instructions explain
how to build the wing on a flat surface,
directly over the plans The j i g tabs will
automatically build in the correct dihedral
and the required 1-3/4° of washout This
enables you to build a wing as straight as
your work surface It is a good idea to lay
a piece of "Celotex' * or some ceiling tiles
or other semi-soft (and flat) surface, into
which you may easily stick pins, on your
work surface Because this wing has a lot
of taper, it is not advisable to build it on a
wing j i g ^Available from lumber
companies and home centers.
SPARS
D 1 Before using the hard balsa spars,
examine them carefully for possible imperfections.
Look for knots, soft spots, diagonal grain and any
other imperfections If possible, position each spar
so the imperfections (if any) are on the outer half of
the wing panel (toward the tip), where they will be
least affected by high stress If the spars are
warped slightly try to "balance them out" by
installing the warped spars in opposite directions
(see sketch on next page) NOTICE: If you feel
that any of the wing parts are unusable due to
severe warps or other defects, give us a call
and we'll replace the parts.
28
Содержание F-15 EAGLE
Страница 7: ...6 DIE CUT PATTERNS ...
Страница 53: ...TWO VIEW DIAGRAM ...