7
Pressed all the way down
No
Yes
❏
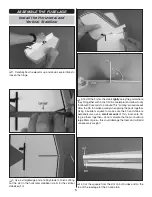
4. Center the trims and connect a battery to the ESC to
power the system up. Mount the servo arms 90°—or as close
to 90° as you can get—to the servos and install the servo
screws. Be certain the servo arms are all the way down on
the toothed output shafts before installing the screws.
❏
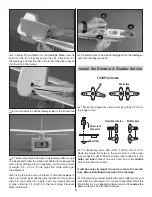
5. Disconnect the servos and the ESC from the receiver.
Use the tiny wood screws included with this kit or the screws
included with your servos to mount the servos to whichever
of the two balsa servo trays fi ts your servos. Add a small drop
of CA to the tips of the screws where they come through the
bottom of the servo tray.
❏
6. Fit, then glue the servo tray into position—although the
parts you are gluing here are balsa and regular CA could be
used, foam-safe CA is still recommended.
Mount the Motor
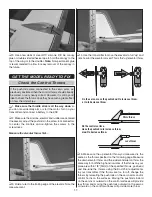
Gap
NO!
YES!
No gap
❏
1. If using the recommended APC 8 x 3.8 Slow-Flyer
propeller, install the larger I.D. spacer ring that came with
the propeller into the back of the propeller hub. Reinstall the
propeller adapter on the RimFire 250 motor so the propeller
will mount on the large end of the adapter—don’t forget to
use a tiny drop of threadlocker on the threads of the adapter
screws.
Note:
If the heads of the adapter screws interfere
with the base of the propeller hub not allowing the hub to lie
fl at and square, carefully chamfer the base of the hub just
enough to clear the screws.
Содержание EP FALCON ARF
Страница 16: ......

