5
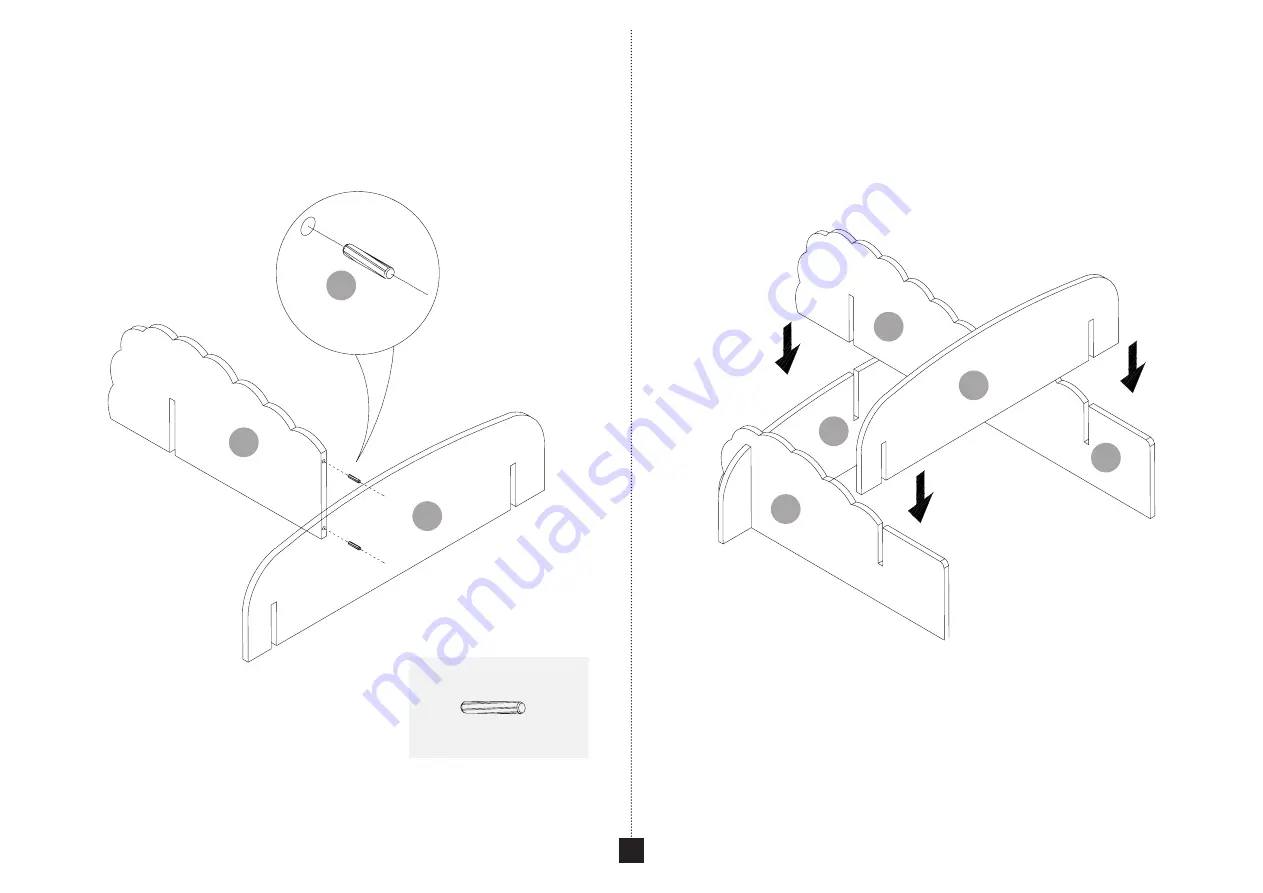
STEP 3:
Attach panel E to panel F using 2x wooden dowels
(#2)
.
STEP 4:
Slot the joined panels E & F into the remaining cutouts in panels C (x2) and D.The shelf component is now complete.
Hardware for Step 3:
2x #2 Wooden Dowels
E
C
F
D
#2
Страница 1: ...om where you are going to be using it to avoid the need to move it after it s been assembled Do not throw away any packing materials until assembly is complete just in case you accidentally discard sm...
Страница 2: ...climb on the product Maximum shelf weight load 5kg Do not overload Check all fixtures and fittings regularly and tighten as necessary Remove all packaging before allowing your child to use the product...
Страница 3: ...ed Cam Dowels 73mmL 8x Screws 30mmL Component Check List Component Check List x1 Back panel tail x2Vertical divider panel legs x1 Upper shelf x1 Central vertical divider panel x1 Lower shelf 4x Cam Lo...
Страница 4: ...els STEP 2 Slot the two C panels into the two cutouts at each end of shelf panel D as shown Please ensure the straight edges of panels are all flat against the floor C C D 1 2 3 A B Using cam locks Wh...
Страница 5: ...panel E to panel F using 2x wooden dowels 2 STEP 4 Slot the joined panels E F into the remaining cutouts in panels C x2 and D The shelf component is now complete Hardware for Step 3 2x 2 Wooden Dowels...
Страница 6: ...required to help lift the shelf onto the back panel STEP 6 Carefully stand the unit on its feet so you have access to the back of the bookcase ensuring the shelves are supported and don t separate fro...
Страница 7: ...gistered trade marks of G L T C Limited STEP 7 Before you use your unit we strongly advise that you use the anti tip kit included to secure this product to the wall especially if young children have a...