


ã
2016 Great Arbor Communications
www.greatarbor.com
3
Automatic Mode
Access the last field in the Dial Up Configuration page to configure the router to dial up on demand at power up In this mode, whenever your PC is connected to the router (via WiFi
or LAN) and you attempt to access the Internet, the router will make the dial up connection. Enter the time after which the router should automatically disconnect the connection in
case of no activity (180 seconds is recommended). Setting the time to 0 changes the router from Automatic Mode to Forced Connect at power-‐up. Press
Save & Apply
to save the
new configuration. In Automatic mode various programs on your laptop (Virus update, Windows Update, etc.) may attempt to access the Internet without your knowledge and will
trigger a dial up connection. Once you are connected to the Internet, you will not be able to receive any calls on your phone line. The dial up connection can be disconnected by
disconnecting the WiFi connection on your laptop/device. The dial up connection will be automatically dropped in 3 minutes or less (Automatic Disconnect Parameter in the Dial Up
Configuration webpage). As a further precaution, you can use a power strip to switch the power off to the router when it is not being used.
Optional: WiFi Security (Recommended)
Your WiFi connection can optionally be made secure if you want to be sure that no one else accesses the Internet using your dial up connection or accesses your PC over WiFi. Click
the
Wifi
tab (located next to the
Interfaces
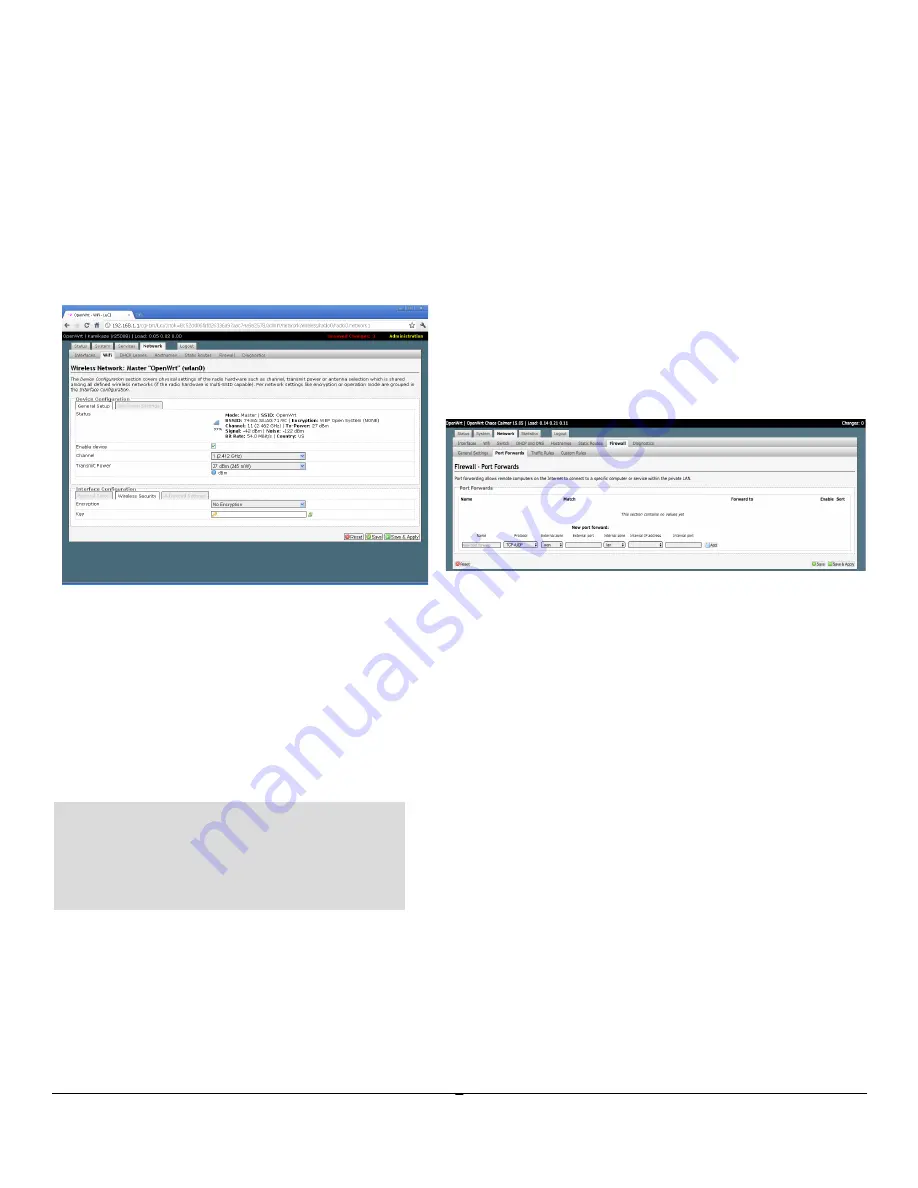
tab) under the Network section. In the Wireless Overview section, there are clickable options on the extreme right. Click the “pencil”
image to edit the WiFi configuration (Figure 5). Click the Wireless Security tab in the lower section to set encryption. The most secure form of encryption is WPA2-‐PSK and the key
can be a mixture of characters and letters. If your device does not support WPA2-‐PSK, you can set the encryption to WEP. However, in the case of WEP, the key has to be exactly 10
characters. After making the entries, click
Save & Apply
.
Figure 5
WiFi Configuration Page
Figure 6
Port Forwarding (Traffic Redirection Page)
Optional: Router Password Change
For increased security, you can change the password for the router. Select
System
and then
Administration
. Put in the new password, confirm it and click
Save & Apply
.
Optional: Scheduled Dial Up
The router can be configured to make a dial up connection at particular times of the day, week, or month and the duration of the connection can also be specified. In order to create
a schedule, first set the TimeZone by clicking on the System Tab, selecting the city in the same time zone as you desire and then clicking
Save & Apply
. Next, click on the Services Tab
and then on Scheduled Tasks. Type in the scheduled dialup command (crontab) in the box (see examples below) and then click Submit. After that turn the power off and then on to
the router to enable the schedule. Note that the router does not have a real-‐time clock and gets set with the correct time only after it connects to the Internet after power on. So if
power is lost then the router will reset to the factory set time and the configured schedule will be affected till the router dials up for the first time.
A crontab file has five fields for specifying the schedule:
* means all values (i.e all days or all months, etc.); ? means omit the specification
For scheduled dial up, the command is “ifup dialup” to start the connection and “ifdown dialup” to
end the connection.
To start the session at 1:00 AM and end it at 1:05 AM every day enter the following 2 lines in the Scheduled Tasks box and Submit:
0 1 * * * ifup dialup
5 1 * * * ifdown dialup
To start the session at 5:30 AM every Sunday and end it 5 minutes later, use the following commands:
30 5 ? * 0 ifup dialup
35 5 ? * 0 ifdown dialup
Port Forwarding (Redirection)
Port Forwarding can be used to redirect incoming connections to servers on the LAN side of the GAC router. Port Forwarding is useful if video cameras and other devices on the LAN
need to be accessed from the Internet, say through a scheduled dial up connection. Typically, a dynamic DNS client on the content server is used to associate a hostname with the
current IP address of the GAC router site. The port forwarding configuration on the router then ensures that those incoming connections are redirected to the content server. To
configure port forwarding, click the
Network/Firewall
tab and then select the
Port Forwards
section of the firewall page. The port forwarding page shown in Figure 6 will be displayed.
* * * * * command to be executed
- - - - -
| | | | |
| | | | +----- day of week (0 - 6) (Sunday=0)
| | | +------- month (1 - 12)
| | +--------- day of month (1 - 31)
| +----------- hour (0 - 23)
+------------- min (0 - 59)


