background image

GRAVELY 

655 West Ryan Street
Brillion, WI  54110-1072

920-756-2141
Fax 920-756-2407
www.gravely.com

Содержание Promaster 144

Страница 1: ...tor Manual Manuel Du Propriétaire Utilisateur Models 991026 21hp PM144M XDZ 991027 21hp PM148M XDZ 991028 23hp PM152M XDZ 991031 23hp PM152M XDZ Promaster 144 148 152 03899000 9 09 Printed in USA ENGLISH FRANÇAIS ...

Страница 2: ...els dans différentes langues sont disponibles chez votre revendeur Rendez vous chez votre revendeur ou allez sur le site www ariens com pour consulter la liste des langues disponibles pour votre équipement Les manuels imprimés dans des langues différentes de l anglais sont également disponibles en téléchargement gratuit sur notre site Web http www gravely com THE MANUAL Before operation of unit ca...

Страница 3: ...e or obligation to the purchaser The descriptions and specifications contained in this manual were in effect at printing Equipment described within this manual may be optional Some illustrations may not be applicable to your unit DEALER DELIVERY Dealer should 1 Test brakes after unit is assembled to be sure adjustment has not been disturbed in shipment See Adjust the Parking Brake on page 24 Wheel...

Страница 4: ... someone other than original purchaser loaned rented or sold ALWAYS provide this manual and any needed safety training before operation SAFETY WARNING This cutting machine is capable of amputating hands and feet and throwing objects Failure to observe the safety instructions in the manuals and on decals could result in serious injury or death Slopes are a major factor related to loss of control an...

Страница 5: ...Look down and behind before and while backing Keep children out of work area and under watchful care of a responsible adult NEVER CARRY CHILDREN Go up and down slopes not across DO NOT operate on slopes over 17 If machine stops going uphill stop blade and back down slowly Avoid sudden turns Keep safety devices guards shields switches etc in place and working Check interlock system per manual befor...

Страница 6: ...re each use for missing or damaged decals and shields correctly operating safety interlock system and deterioration of grass catchers Replace or repair as needed ALWAYS check overhead and side clearances carefully before operation ALWAYS be aware of traffic when operating along streets or curbs Keep children and people away Keep children out of work area and under watchful care of a responsible ad...

Страница 7: ... functioning properly NEVER modify or remove safety devices Do not operate without either entire grass catcher or the discharge guard in place Stop engine before removing grass catcher or unclogging chute Ensure Safety Interlock System is functioning properly DO NOT operate unit if safety interlock is damaged or disabled Start and operate unit only when seated in operator s position Steering contr...

Страница 8: ...ALWAYS turn off power to attachment and shut off fuel when transporting unit Keep unit free of debris Clean up oil or fuel spills This product is equipped with an internal combustion type engine DO NOT use unit on or near any unimproved forest covered or brush covered land unless exhaust system is equipped with a spark arrester meeting applicable local state or federal laws A spark arrester if it ...

Страница 9: ...ff fuel and allow engine to cool completely before storing in closed area or covering unit Clean grass and debris from unit especially from around muffler and engine to help prevent fires For extended storage shut off fuel and clean unit thoroughly See engine manual for proper storage Lower cutting deck unless a positive mechanical lock is used Use only attachments or accessories designed for your...

Страница 10: ...WARNING Safety interlock system failure and improper operation of unit can result in death or serious injury Test this system each time unit is operated If this system does not function as described do not operate until repairs are made WARNING FAILURE OF CONTROLS could result in death or serious injury CONTROLS AND FEATURES 1 Choke Control 2 Throttle Lever 3 Seat Knob 4 Fuel Tanks and Caps 5 Stee...

Страница 11: ...rols are mechanically locked in neutral whenever the parking brake is engaged NOTE Aggressive turning can scuff or damage lawns ALWAYS keep both wheels rotating when making sharp turns DO NOT make turns with inside wheel completely stopped To obtain minimum turning radius slowly reverse inside wheel while moving outside wheel slowly forward Ignition Switch Operate the ignition switch with the remo...

Страница 12: ...ght adjustment pin in desired hole Push mower lift pedal 1 forward and hold while pushing down on the lift lock 2 Slowly lower mower lift pedal 1 until deck lift contacts cutting height adjustment pin Fuel Shut Off Valve Control fuel flow from left or right fuel tank Open the valve to operate the engine Turn the valve to Off when storing or transporting the unit Parking Brake Lever 1 Pull lever up...

Страница 13: ...f filler neck 5 Replace fuel cap and tighten 6 Clean up any spilled fuel PRE START 1 Check Safety Interlock System If this system does not function as described do not operate until repairs are made 2 Check Air Cleaner Check air filter for dirt Clean as required Follow Engine Manual Maintenance Schedule 3 Check Engine Fuel and Crankcase Oil Check and add fuel if required Check that engine crankcas...

Страница 14: ... position 3 Turn the ignition key to the Off position OPERATING MOWER 1 Start engine 2 Move throttle lever 3 4 Fast position IMPORTANT Never engage the PTO if the mower is plugged with grass or other material 3 Engage PTO to engage mower blades 4 Move throttle lever to fast 5 Release parking brake 6 Use steering levers to move the unit 7 Disengage PTO to stop mower blades PARKING To park the unit ...

Страница 15: ...er deck properly leveled Adjust anti scalp rollers to prevent scalping Do not set height of cut too low For very tall grass mow twice Do not travel too fast Mow with the engine set at full throttle When mulching only remove 1 3 of grass length per cutting Discharge clippings into areas already cut Vary cutting pattern with each mowing Do not allow grass or debris to collect inside of mower deck Cl...

Страница 16: ...ck System on page 11 Check Parking Brake Engage parking brake Push unit If unit rolls adjust parking brake see PARKING BRAKE ADJUSTMENT on page 23 Check Hydraulic Oil Level See Check Hydraulic Fluid Level on page 18 Check Tires See SPECIFICATIONS on page 32 for correct tire pressure Clean Unit Clean engine battery seat mower deck etc of dirt and debris Do not use solvents hard cleaners or abrasive...

Страница 17: ...nuts and bolts to their correct torque value Check All Belts Replace worn or deteriorated belts Check mower drive belt See Replacing Mower Belts on page 24 for belt location Check PTO belt See Replacing Mower Belts on page 24 for belt location Check transmission belt See Replacing the Hydro Pump Belt on page 25 for belt location Every 400 Hours Grease Front Axle Castor Pivots Repack front axle cas...

Страница 18: ... under oil filter to catch oil 3 Remove oil filter 4 Allow tank to drain 5 Lubricate rubber gasket on new oil filter with clean hydraulic oil 6 Spin new oil filter onto filter housing until it makes contact Tighten oil filter another 1 2 turn 7 Add new oil to the oil tank It will take about 1 5 quarts 1 4 liters Use Mobil 1 Extended Performance 15W50 Synthetic Oil or equivalent for best component ...

Страница 19: ...mower blade by removing an equal amount of material from each end of mower blade DO NOT change angle of cutting edge or round the corner of the mower blade 3 Check mower blade balance Slide mower blade on an unthreaded bolt A balanced blade should remain in a horizontal position If either end of mower blade moves downward sharpen the heavy end until blade is balanced 4 Install mower blade s on uni...

Страница 20: ...100 operating hours or monthly for best performance 1 Remove battery from unit See Remove Battery on page 20 2 Clean terminals and battery cable ends with wire brush 3 Coat terminals with dielectric grease or petroleum jelly 4 Replace battery See Replace Battery on page 20 WARNING AVOID INJURY Read and understand entire Safety section before proceeding WARNING Battery posts terminals and related a...

Страница 21: ...y on page 20 Jump Starting Gravely does not recommend jump starting your unit Jump starting can damage engine and electrical system components See your engine manual for more detailed information LUBRICATE UNIT NOTE Use Ariens Hi Temp Grease or equivalent part number 00036700 Apply oil at all pivot points and pin connections STEERING CONTROL NEUTRAL ADJUSTMENT If the steering levers do not line up...

Страница 22: ... and hydrostatic transmission several times 8 Return seat to operating position 9 Start engine 10 Move steering levers from Forward to Reverse several times Then return steering levers to neutral position 11 Shut OFF engine 12 If wheel is not moving tighten jam nuts on tie rod The adjustment is complete 13 If wheel is still moving repeat steps 7 through 12 ADJUSTING THE UNIT TO TRACK STRAIGHT Chec...

Страница 23: ...eft handles are the same height Tighten nut PARKING BRAKE ADJUSTMENT The parking brake might need adjustment over time and after new brake pads have been installed NOTE After installing new brake pads in the calipers they must be burnished by driving for a short distance about 100 feet with the brake on To do this bring the parking brake lever part way up while driving in a straight line This quic...

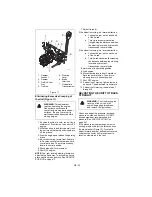
Страница 24: ...nuts and trunnion 5 Tighten return nuts together BELTS Belt Access 1 Properly stop and park unit See OPERATION on page 11 2 Lower the mower deck 3 Place seat in most rearward position 4 Remove belt covers 5 Place foot board in open position Figure 15 6 Secure raised footboard with latch Replacing Mower Belts NOTE Long PTO mower belt must be removed from blade spindle pulleys prior to removing shor...

Страница 25: ...to closed position Replacing the Hydro Pump Belt 1 Properly stop and park unit See OPERATION on page 11 2 Remove the PTO mower belt from the PTO clutch sheave See Replacing Mower Belts on page 24 3 Remove clutch anchor 4 Slowly release the tension on the hydro pump belt idler until all the tension is removed from the springs 5 Remove old hydro pump belt from right hand hydrostat sheave first Figur...

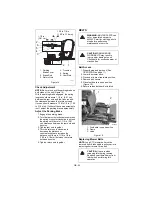
Страница 26: ...TANT Adjust the mechanical lift spring on each side of the unit to the same length Adjust the eye bolt to increase the length of the mechanical lift spring which will decrease the amount of force required to lift the mower deck Adjust the eye bolt to decrease the length of the mechanical lift spring which will increase the amount of force required to lift the mower deck Removing the Mower Deck NOT...

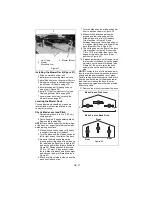
Страница 27: ... the low side of the deck using the height adjusters on the deck lift brackets see Figure 23 6 After deck is level side to side check the deck front to back pitch 7 Turn the blades so the blade ends point front to back as shown in Figure 22 8 Measure the distance between the ground and the cutting edge of the middle blade at the front of the deck Front position in Figure 22 and between the ground ...

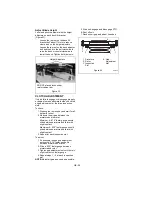
Страница 28: ...air gap between the armature and the rotor Minimum A 016 feeler gauge should slide between armature and rotor with slight contact Maximum A 020 feeler gauge should slide between armature and rotor with slight contact 3 Repeat for each inspection slot To adjust 1 If necessary loosen gap adjustment nuts until a 016 feeler gauge fits between armature and rotor 2 Slide a 020 feeler gauge between armat...

Страница 29: ...resulting in gum deposits in the system These deposits can damage the carburetor and the fuel hoses filter and tank Prevent deposits from forming in the fuel system during storage by adding a quality fuel stabilizer to the fuel Follow the recommended mix ratio found on the fuel stabilizer container To treat the fuel system for storage 1 Add fuel stabilizer according to manufacturers instructions 2...

Страница 30: ...es not light up when starting engine 1 Discharged battery 1 Charge battery see Charging the Battery on page 21 Oil pressure light is on 1 Oil pressure is low 1 Refer to Engine Manual Engine continues to run when ignition key is in the off position 1 Ignition ground wire disconnected 2 Ignition switch failure 1 Connect ground wire to clean metal surface 2 Replace ignition switch see your Gravely De...

Страница 31: ...iciency Reporting Software 79204700 Eye Q Accessory Wire Harness Kit Required for any optional sensors accelerometers or GPS 79204900 Eye Q Guard Kit 79207300 Eye Q Ready Kit SERVICE PARTS 21537000 1 Air Filter Outer Element 21536900 1 Air Filter Inner Element 21535800 1 Engine Oil Filter Kawasaki 21397200 1 Engine Oil Filter Kohler 09246900 1 Hydraulic Oil Filter S N 000101 000499 00669300 1 Hydr...

Страница 32: ...to Engine Manual Fuel Tank Capacity 10 gal 37 8 L Transmission Type Hydrostatic Drive Transmission Oil Mobil 1 Extended Performance 15W50 Synthetic Oil or Equivalent Hydraulic System Capacity qt L 4 8 4 5 Hydraulic Oil Filter Yes Size and Weight Length in cm 72 5 184 Width in cm 59 150 62 157 67 5 171 67 5 171 Height in cm 47 119 47 119 Height w ROPS in cm 75 190 Weight lbs kg 971 441 976 444 986 ...

Страница 33: ...e labor will be provided free of charge for as long as the original purchaser owns the product Three Year Limited Warranty on Deck Spindles Mower deck spindles are warranted to the original purchaser for three years from the date of pur chase Any defect in material or workmanship of the mower deck spindles will be repaired free of charge parts and labor to the original purchaser for two years afte...

Страница 34: ...improper adjustment neglect or accident which requires repair is not covered by this warranty This warranty applies only to products purchased in the United States including Puerto Rico and Canada In all other countries contact place of purchase for warranty information Disclaimer Ariens may from time to time change the design of its products Nothing contained in this warranty shall be construed a...

Страница 35: ......

Страница 36: ...GRAVELY 655 West Ryan Street Brillion WI 54110 1072 920 756 2141 Fax 920 756 2407 www gravely com ...

Отзывы: