background image

140

Program description: Telemetry menu

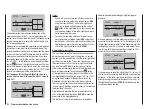
RX SERVO

RX SERVO

REVERSE  : OFF
CENTER   : 1500µsec

TRIM     : –000µsec
LIMIT–   : 150%

OUTPUT CH: 01

LIMIT+   : 150%
PERIOD   : 20msec

Before you carry out any programming at this screen 
display be sure to read the information on page 137.

Value

Explanation

Possible settings

OUTPUT CH Channel select

1 … according to 
receiver

REVERSE

Servo reverse

OFF / ON

CENTER

Servo centre in μs  If active (high-

lighted), according 
to transmitter 
control position

TRIM

Trim position in μs 
deviating from the 
CENTRE position

-120 … +120 μs

LIMIT–

Travel limit on the 
“-” side of servo 
travel in % servo 
travel

30 … 150%

LIMIT+

Travel limit on the 
“+” side of servo 
travel in % servo 
travel

30 … 150%

PERIOD

Cycle time in ms

10 or 20 ms

OUTPUT CH (Channel select)

Select the “Channel” line if necessary using the ar-
row buttons. Touch the 

SET

 button of the right-hand 

touch-key to highlight the value field. Now use the arrow 
buttons of the right-hand touch-key to set the desired 
channel (e. g. 01). 

The following parameters always 

refer to the channel which you set at this point:
REVERSE (servo reverse)

Sets the direction of rotation of the servo connected to 
the selected control channel: ON / OFF

CENTER (servo centre)

The “CENTRE” line displays the current pulse width in 
μs of the control channel selected in the “OUTPUT CH” 
line.
The displayed value varies according to the current posi-
tion of the transmitter control which affects this control 
channel, and also its trim position.
A pulse width of 1500 μs corresponds to the standard 
centre position, and therefore the usual servo centre 
setting.
If you wish to alter this value, select the “CENTER” line 
and touch the 

SET

 button. Now move the corresponding 

transmitter control, stick and / or trim lever in the desired 
direction, and touch the 

SET

 button again to store the 

current position. This position will be stored as the new 
neutral position.

TRIM (trim position)

The purpose of the “TRIM” line is to provide fine adjust-
ment of the neutral position of a servo connected to 
the control channel selected in the “OUTPUT CH” line. 
Adjustments are made in 1 μs increments using the 
arrow buttons of the right-hand touch-key. The value 

in the “CENTRE” line can be adjusted over the range 
+/- 120 μs around the TRIM value set here.
Default setting: 0 μs

LIMIT–/+ (travel reduction, separate for each side)

This option can be used to place a limit on servo travel 
(control surface travel) for the servo connected to the 
control channel selected in the “OUTPUT CH” line. The 
value is set separately for each side of centre.
The setting can be altered separately for both directions 
within the range 30 ... 150%.
Default setting: 150% on both sides.

PERIOD (cycle time)

In this line you can determine the frame time for the 
individual channel signals. This setting applies to all 
control channels.
If you use digital servos exclusively, it is safe to set a 
cycle time of 10 ms.
If you are using a mixture of servo types, or exclusively 
analogue servos, it is essential to set 20 ms, otherwise 
the servos will be “over-stressed” and may response by 
jittering or making rumbling noises.

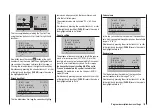
RX FAIL SAFE

RX FAIL SAFE

INPUT  CH: 01
MODE     : HOLD

F.S.POS. : 1500µsec
DELAY    : 0.75sec

OUTPUT CH: 01

FAIL SAFE ALL: NO

POSITION : 1500µsec

Before we describe this menu a few words as a re-
minder:

“Doing nothing” is the worst thing you can do in this 

Содержание mx-12 Hott

Страница 1: ...Programming Manual 33116 mx 16 HoTT 3 en mx 16...

Страница 2: ...Foreword 10 Description of radio control set 11 Technical specifications 13 Recommended battery chargers 13 Operating notes Transmitter power supply 14 Receiver power supply 16 Adjusting the stick le...

Страница 3: ...m the device and taken to the appropriate collection point Please ask your local authority for the location of your nearest waste disposal site The sole purpose of this manual is to provide informa ti...

Страница 4: ...r electric motor could burst into life accidentally if the receiving system is switched on when you are transmitting the transmitter To be on the safe side disconnect the fueltank or the flight batter...

Страница 5: ...ely and ensure that no persons are standing in front of the model Before you fly the model carry out at least one complete check of all the working systems and one complete simulated flight in order t...

Страница 6: ...f an RC system is to work correctly it is therefore important to suppress the electric motors and in electric powered models it is essential that every motor should be effec tively suppressed Suppress...

Страница 7: ...Components and accessories As manufacturers the company of Graupner GmbH Co KG recommends the exclusive use of components and accessories which have been tested by Graupner and approved for their cap...

Страница 8: ...ectrolyte is corrosive do not allow it to contact skin or eyes In an emergency rinse the area immediately with plenty of clean water before seeking medical help The cells air vents must never be block...

Страница 9: ...il its performance falls off or until the low voltage warning is triggered Caution When stored for a long period the cell voltage should not be allowed to fall below 1 2 V This means that you may have...

Страница 10: ...ng the user to exploit all the options he needs in accordance with his experience in handling radio controlled models In theory the Graupner SJ HoTT process allows more than 200 models to be operated...

Страница 11: ...receiver Five different languages English French German Italian and Spanish Ultra fast response times through direct ultra reliable data transmission from the main processor to the 2 4 GHz RF module...

Страница 12: ...3sv 2nick pitch axis 4 SV 90 Swashplate limiter Servo travel adjustment 150 for all servo out puts variable separately for each side Single Side Servo Throw Variable sub trim range 125 for adjusting t...

Страница 13: ...of servos speed controllers gyros etc which can be connected to the receiver is only 4 8 to 6 Volt The set Order No 33116 contains mx 16 HoTT micro computer transmitter with integral 4NH 2000 RX RTU f...

Страница 14: ...cess can cause the charge voltage to rise to the point where the transmitter is immediately damaged For this reason check carefully that all connectors are secure and are making really good contact Po...

Страница 15: ...rged This timer is automatically reset to 0 00 when the transmitter detects that the voltage of the transmitter battery is significantly higher than the last time it was switched on e g as a result of...

Страница 16: ...via the separate charge socket or the charge socket which is built into the switch The switch on the switch harness must be left at the OFF position for charging Polarity of the receiver battery conne...

Страница 17: ...d After this use a PH1 size cross point screwdriver to undo the six screws recessed into the back panel of the transmitter as shown in the illustration Arrangement of the case back screws Hold the two...

Страница 18: ...image construction i e the screw you require is located on the right below centre Turn this screw clockwise until the stick on that side moves freely from one end stop to the other alterna tively unsc...

Страница 19: ...to the right harder spring tension Turn to the left softer spring tension horizontal vertical Note The right hand stick unit is of mirror image construction i e the screw you require is located on th...

Страница 20: ...y that the transmitter is perfectly balanced even when suspended from a neckstrap Order No 1121 Neckstrap 20 mm wide Order No 70 Neckstrap 30 mm wide 3 position switch SW 6 7 Rotary proportional contr...

Страница 21: ...r speech output is German For more information on this please refer to Voice messages in the HIDDEN MODE section starting on page 26 and the Teleme try section starting on page 137 The volume of the h...

Страница 22: ...when using a flight simulator and when using the mx 16 HoTT transmitter as a Pu pil unit in a Trainer system for only in this position is the RF section of the transmitter module switched off no RF s...

Страница 23: ...d insert it in the card slot of a PC or laptop The data can subsequently be analysed on a compatible PC using the PC program available on the Download page for the transmitter at www graupner de Firmw...

Страница 24: ...battery voltage falls below a particular level you will see a warning display see Warning notes on page 36 At the same time the transmitter emits an audible warning signal Visual display of the trim...

Страница 25: ...rameters in set up fields af ter you have activated them by briefly pressing the SET button the buttons and are assigned the same function in each case i e it makes absolutely no difference which of t...

Страница 26: ...ed in the following section If you have not already done so insert your SD or SDHC card in the transmitter as described on page 22 Switch the transmitter on with RF switched off RF ON OFF ON OFF Chang...

Страница 27: ...o update and or replace the transmitter s firmware and with it the screen language using this menu point the procedure is similar to that described in the section entitled VOICE When this manual went...

Страница 28: ...e model memory as described on page 66 It makes no difference whether you select a fixed wing or helicopter model type Wait for the usual on screen messages which appear in the base display after swit...

Страница 29: ...eft hand end point using the right hand stick again without exerting pressure STICK CALIBRATION 100 and briefly press the central SET button of the right hand touch key In our example this completes t...

Страница 30: ...t with the exception of the RECEIVER display which is described in the next column RECEIVER If you wish you can confirm your choice immediately after this by pressing the central SET button of the rig...

Страница 31: ...in Ampere and the actual voltage of the battery connected to the sensor The meanings are as follows Value Explanation BAT1 BAT2 Battery 1 Battery 2 FUEL Fuel level Fueltank indicator E F Empty full T...

Страница 32: ...No 33620 connected to the receiver For more information on this module please see the Appendix or refer to the product on the Internet at www graupner de Depending on the sensors connected to the modu...

Страница 33: ...VER GENERAL ELECT AIR VARIO GPS RXSQ 0 MAX 0m MIN 0m ALT 0 H L m 1s 0 0 m 3s 0 0 m 10s 0 0 This display visualises the data from a Vario module Order No 33601 connected to the receiver The meanings ar...

Страница 34: ...s follows Value Explanation W N E S West North East South Kmh Speed RXSQ Signal strength of downlink channel DIS Distance ALT Current altitude relative to launch point m 1s m 1 sec climb descent m 3s...

Страница 35: ...35 For your notes...

Страница 36: ...ed with the RF section switched off CAN T RECEIVE DATA OK No bound receiver in range On screen warnings The bottom line of the screen displays function fields which vary according to the menu selected...

Страница 37: ...stick trim levers 01 3 33h stop flt 0 00 0 00 5 2V HoTT M About two seconds after you cease operating one of the two rotary controls the screen reverts to a display of the current position of the fou...

Страница 38: ...0 00 0 00 0 0V 5 2V HoTT M The symbol combination means that the currently ac tive model memory is already bound to a Graupner SJ HoTT receiver but there is currently no connection with this receiver...

Страница 39: ...as reception is not pos sible and until a new valid signal is picked up If this should happen simply increase the dis tance between transmitter and receiver until the displays revert to normal Updatin...

Страница 40: ...to future download packages V5 or higher If individual firmware files change within a version VX all you need to do is install the new later firmware ver sion for the corresponding product The date of...

Страница 41: ...USB socket on the back of the transmit ter with the transmitter switched off Check that the USB lead is making solid contact 4 Updating the mx 16 HoTT transmitter software Start the program Firmware_...

Страница 42: ...g on the Download Start button Shortly after this you will see a warning that the transmitter s RF signal is being disabled RF will be switched OFF Before clicking on Yes you should therefore switch t...

Страница 43: ...c 32 SD card Firmware folder of the unpacked HoTT_ Software_VX file The file matching the mx 16 transmitter is called mx 16_1vXXX_German bin or English bin Now press the Download Start button to initi...

Страница 44: ...e power supply by using a Y lead Order No 3936 11 Do not connect the battery to these sockets with reversed polarity as this is likely to ruin the receiver and any devices connected to it The power su...

Страница 45: ...xception of the binding information If you carry out a RESET by mistake this means that you will have to restore all the receiver settings entered using theTelemetry menu On the other hand a deliberat...

Страница 46: ...e driver only has to be installed once the proce dure is described on page 39 Connecting the receiver to the PC 2 Connect the USB interface Order No 7168 6 to the receiver socket marked T using the ad...

Страница 47: ...the product e g transmitter update file instead of receiver update file the pop up window Product code error appears and you will be unable to continue the update process Follow the instructions for P...

Страница 48: ...ve indicates this Hold the SET button on the receiver pressed in while you switch the receiver on The red and green LEDs flash four times followed by a pause lasting about two seconds At this point th...

Страница 49: ...49 For your notes...

Страница 50: ...is fitted with a three core lead cut through the central red wire of the adapter lead before using it Now connect the USB interface to the PC or lap top using the USB lead supplied in the set PC USB...

Страница 51: ...eceiver Setup program from the receiver Important notes The Receiver Setup program includes addition al functions which are currently still in prepara tion they must not be used at present You can fin...

Страница 52: ...vibration protection for your servos but only if the servo retaining screws are fitted and tight ened properly The drawing below shows how to in stall a servo correctly The brass spacers should be pus...

Страница 53: ...leads running to the receiver You might install a Y lead Order No 3936 11 between lead and receiver as shown in the diagram below if you wish to use one or both of the receiver sockets to connect a se...

Страница 54: ...of 7 4 Volt of a two cell LiPo pack presents no problems to Graupner SJ HoTT receivers nor to those servos speed control lers gyros etc which are expressly approved for use at these higher voltages P...

Страница 55: ...55 For your notes...

Страница 56: ...affect the course of the signal after this point and it is possible and likely that there will be differences between the number of the transmitter control as stated above and the number of the subse...

Страница 57: ...right hand touch key CLEAR simultaneously Transmitter control switches Many functions are best controlled automatically by a particular freely programmable position of the Ch 1 transmitter stick or t...

Страница 58: ...s another feature in addition to cut off trim as described under Fixed wing models on the left this time in conjunction with the Throttle limit function see page 99 while the throttle limit slider is...

Страница 59: ...59 For your notes...

Страница 60: ...gram contains the appropriate mixer functions for the two servos Up to four flight phases can be programmed in each of the twenty model memories The digital trim positions are stored separately for ea...

Страница 61: ...only one flap servo receiver output 7 right flap MUST be left unused assuming that you have selected 2 FL in the Base settings menu Please also read the information on the following pages Receiver so...

Страница 62: ...problem Model type Servo rotating in wrong direction Remedy V tail Rudder and elevator reversed Reverse servos 3 4 in the servo set menu Rudder correct elevator reversed Swap over servos 3 4 at the r...

Страница 63: ...63 For your notes...

Страница 64: ...ned to inputs 5 8 in virtually any order This is carried out in the Transmitter control settings menu In addition to three linear mixers which can be assigned to any functions and can also be switched...

Страница 65: ...ans that you can easily skip irrelevant menus when programming a model helicopter Installation notes The servos MUST be connected to the receiver outputs in the order shown on this page Outputs not re...

Страница 66: ...the Fixed wing model model type and the receiver supplied in the set is bound to it This is indicated by the receiver code displayed at top right of the screen in the example above this is R08 If on t...

Страница 67: ...ory which you inadvertently occupied you can simply erase it from a different model mem ory However if you erase a model memory which is not currently active after the procedure you will see the memor...

Страница 68: ...er receiver before any servos connected to the receiver can be con trolled from the transmitter For more information on this please refer to the Binding section on pages 80 and 88 You will find a desc...

Страница 69: ...69 For your notes...

Страница 70: ...to SD import from SD Use the arrow buttons of the left or right hand touch key to select the clear model sub menu then touch the SET button Select the model to be erased using the arrow buttons of the...

Страница 71: ...appears in the Model select menu copy model model Use the arrow buttons of the left or right hand touch key to select the copy model model sub menu then touch the SET button select model l l import f...

Страница 72: ...hout warning Import from SD Use the arrow buttons of the left or right hand touch key to select the Import from SD sub menu then briefly press the SET button select model import from SD SWITCHING RF O...

Страница 73: ...selected model memory Notes If the warning SD CARD INSERT OK appears instead of a model selection there is no SD card in the card slot see page 23 When you import a model memory the binding data is co...

Страница 74: ...E 2 Throttle at left stick MODE 3 Throttle at right stick MODE 4 Throttle at left stick MODE 1 Throttle at right stick elev down elev up left rudder right rudder full throttle idle left aileron right...

Страница 75: ...throttle warning message Throttle too high see page 36 and the option cut off are disabled no inv The brake system is retracted in the back position of the throttle brake stick In the Wing mixer menu...

Страница 76: ...n the right hand column later However if you prefer to set a lower switching threshold so that the switch only takes effect when the throttle servo or speed controller is below a certain point then yo...

Страница 77: ...ct one of the three options which are 1aile Both ailerons are actuated by a single servo 1ail1fl Both ailerons are actuated by a single servo and both flaps are actuated by a single servo 2aile Each a...

Страница 78: ...w starts from the set initial value counting down Timer function When the set time has elapsed the timer does not stop but continues to run so that you can read off the time elapsed after reaching zer...

Страница 79: ...ny receiver output you wish to use However please note that the display in Servo display which you can ac cess from virtually any menu position by simultaneously touching the and buttons of the left h...

Страница 80: ...bind BINDING The receiver LED is now flashing red again and if it goes out without about ten seconds and instead glows a constant green then the binding process has been completed successfully Your mo...

Страница 81: ...ge check period is over the model should re spond again to control commands It this is not 100 the case do not use the system Contact your nearest Service Centre of Graupner GmbH Co KG Carry out the r...

Страница 82: ...k mode Basically there are four possible ways of arranging the principal control functions of a model helicopter on the two dual axis sticks the primary functions are roll pitch axis tail rotor and th...

Страница 83: ...three point linkage as above but rotated through 90 i e one roll servo on one side and two pitch axis servos front and rear 4sv 90 Four point swashplate linkage using two roll and two pitch axis servo...

Страница 84: ...rgency or activate the switching threshold mod name stick mode rotor direct swashplate 1 right 3sv 2rol cut off STARLET STO 125 100 1 Notes You must ensure that the throttle servo does not strike its...

Страница 85: ...ch min line you can set up the direction of operation of the throttle collective pitch stick to suit your preference This setting is crucial to the correct operation of all the other options in the he...

Страница 86: ...ge is 0 to 59 seconds Any combi nation of times can also be selected Simultaneously pressing the buttons of the right hand touch key CLEAR resets any settings you have entered to 0 or 00 rotor direct...

Страница 87: ...rms of receiver socket assignment the mx 16 HoTT software provides the means to swap over the servo outputs 1 to max 8 this is carried out on the second page of the Receiver output sub menu 10 01 G3 p...

Страница 88: ...T receivers have to be instructed to communicate exclusively with a particular model i e model memory of a Graupner SJ HoTT transmitter This process is known as binding and is only necessary once for...

Страница 89: ...ith the receiver aerials at least 15 cm above the ground This means that you may have to place the model on a raised object for the period of the check Hold the transmitter at hip height and away from...

Страница 90: ...or example you might wish to do this to save power when demonstrating the programming of a model If you switch the transmitter off with the RF module switched off next time you switch the trans mitter...

Страница 91: ...91 For your notes...

Страница 92: ...se them as and when necessary The direction of rotation is indicated by the symbols and Be sure to set the direction of servo rotation before you make adjustments to the remaining options Simultaneous...

Страница 93: ...d transmitter control stick rotary proportional knob or switch to the side to be adjusted so that the marking frame only encloses the value you wish to change Touch the central SET button of the right...

Страница 94: ...rate it by mistake unless it is inactive i e unless no function is assi gned to it That is why you can select these supplementary trans mitter controls with complete freedom in the Transmitter control...

Страница 95: ...ransmitter control rotary proportional controls CTRL 6 8 or switches 4 5 and 6 7 to a position at which the marking frame encloses both sides of the travel setting I5 I6 I7 trv 3 I8 ctrl 7 free free 1...

Страница 96: ...upplementary transmitter controls for any task you like and that you are not required deliberately to program away the transmitter controls which are not required for a particular model Any superfluou...

Страница 97: ...CTR 10 provide a centre position in addition to the two end points Simultaneously pressing the or buttons of the right hand touch key CLEAR with the switch assign ment activated see illustration above...

Страница 98: ...d only unnecessarily confuse this complex mixer system For this reason the Throttle input MUST always be left free when you are programming a model helicopter Gyr trv I5 thr gyr I8 lim 100 3 100 100 1...

Страница 99: ...an electric motor directly At the other extreme the throttle servo or speed controller can of course only reach its full throttle position if you release full servo travel using the throttle limit co...

Страница 100: ...Motor off direction the illustration above changes if you alter the transmitter control direction for the collective pitch minimum position of the Ch 1 stick from back reflected in the picture above...

Страница 101: ...101 For your notes...

Страница 102: ...the control surface declines steadily towards the extremes dependent upon the position of the linkage point on the output disc or lever You can compensate for this effect by setting an Expo value grea...

Страница 103: ...nd set the values for each of the two switch positions sepa rately in the highlighted field using the arrow buttons of the right hand touch key Simultaneously touching the or buttons of the right hand...

Страница 104: ...ing an Expo value greater than 0 with the result that the angular travel of the output device increases disproportionately as stick travel increases Like Dual Rates the Expo setting applies directly t...

Страница 105: ...ish to switch between two settings use the button of the left or right hand touch key to move to the right hand column marked at the bottom edge of the screen with the switch symbol then briefly touch...

Страница 106: ...in the highlighted field using the arrow buttons of the right hand touch key take off thermal dist ance If you have not assigned a switch to phases 2 3 and 4 in the Base settings menu i e you have not...

Страница 107: ...thly with a transition time of around one second With this option which works in a similar way to trans mitter control sub trim or offset settings with other radio control systems it is possible to se...

Страница 108: ...rious control systems e g to link the ailerons and rudder or to inter connect a pair of servos where two control surfaces are actuated by separate servos In all these cases the signal which flows dire...

Страница 109: ...ore pronounced in model gliders with high aspect ratio wings than in power models with their much shorter moment arms and usually has to be countered by giving a simultaneous rudder deflection in the...

Страница 110: ...usu ally necessary if the correct channels are used diff flaps Camber changing flap differential The aileron flap mixer see below is designed to superimpose an aileron function on the flaps Flap diffe...

Страница 111: ...when you retract the brakes the model will just fall to the ground at that point brak flap Airbrake flap When you operate the brake function Ch 1 stick both flap servos move together for the landing a...

Страница 112: ...pressing the or buttons of the right hand touch key CLEAR resets an altered value to 0 The usual settings for this mixer are in the low two digit range elev aile Elevator aileron This mixer allows th...

Страница 113: ...up deflection of the ailerons permitting virtually no further up movement on the other hand the down travel has already been reduced by the programmed differential setting The overall result is signi...

Страница 114: ...right hand touch key see below In contrast the mixers Ch 1 throttle and Ch 1 tail rotor are not required for the Auto rotation flight phase described in the section starting on page 124 instead they...

Страница 115: ...tical line crosses the curve is termed the Output and this point can be varied within the range 125 and 125 at a maximum of five reference points The control signal modified in this way affects the co...

Страница 116: ...ated at the centre of the stick travel and the throttle setting should be adjusted relative to the collective pitch curve in such a way that the correct system rotational speed is obtained at this poi...

Страница 117: ...ariable pre set value see the section starting on page 124 Helicopter with speed GOVERNOR REGULATOR In contrast to speed controllers which simply adjust pow er output in the same way as a carburettor...

Страница 118: ...perating mode or if the gyro only offers normal mode then you should set up the mixer as follows The tail rotor control curve can be defined using up to five points in a similar way to the collective...

Страница 119: ...ance with the instructions supplied with the governor you intend to use However it is more convenient and also safer to adopt the method described on the preceding double page using the Ch1 thro mixer...

Страница 120: ...duced collective pitch and for aerobatics The diagram shows a curve with a slightly altered throttle setting below the hover point at the cen tre of stick travel 100 0 OUTPUT 2 3 4 5 1 Control travel...

Страница 121: ...1 throttle graphic page increase the value at Point 3 100 0 OUTPUT 2 3 4 5 1 Control travel Hover point b Rotational speed too high Remedy on the Collec tive pitch graphic page increase the blade pitc...

Страница 122: ...box or even the motor itself is negligible compared with the damage which a model helicopter can cause if its spinning rotor blades are allowed to wreak havoc Make sure that nobody else is standing in...

Страница 123: ...123 For your notes...

Страница 124: ...g off it is necessary to set a greater maximum collective pitch value Touch the central SET button of the right hand touch key to select the graph page of Collective pitch and then move the vertical l...

Страница 125: ...principle i e it is not driven by the motor and therefore there is no torque effect for which compensation is required i e which the tail rotor would have to correct For this reason all the appropriat...

Страница 126: ...hes can potentially be assigned you should take care not to as sign dual functions to particular switches accidentally The two important mixer parameters are as follows the mixer ratio which defines t...

Страница 127: ...ch key the input field in the column marked fro m at the bottom edge of the screen is now high lighted black background Use the arrow buttons of the right hand touch key to 3 define the mixer input fr...

Страница 128: ...ential to remember that the mixed travels of the individual mixers are cumulative when multiple stick commands are made simultaneously and this brings a danger that the servo concerned may strike its...

Страница 129: ...values In the next section we will describe a typical practical application by defining a linear mixer curve intended to solve the following problem We have a powered model with two flap servos conne...

Страница 130: ...s the two arrow buttons or of the right hand touch key CLEAR Symmetrical mixer ratios The next step is to define the mixer values above and below the mixer neutral point starting from its current posi...

Страница 131: ...et the elevator servo connected to receiver output 3 to slight up trim when the tow release is closed In the screen display familiar from page 127 we have set up the third linear mixer to accomplish t...

Страница 132: ...ar in the multi function list With all other swash plate linkages employing 2 4 collective pitch servos the mixer ratios and directions are set up by default as can be seen in the screen shot above Th...

Страница 133: ...is is the only safe method of excluding possible programming errors The display is based on the following scheme for fixed wing models Bar 1 throttle brake servo Bar 2 aileron or left aileron Bar 3 el...

Страница 134: ...whether its power is to be drawn from a four cell NiMH battery or a single cell LiPo battery The voltage range offered in the next line Battery warning threshold will vary according to this setting Si...

Страница 135: ...tting Batt warning Contrast Touch Sense 4 7v 0 2 Display light unlim RF Country Euro The purpose of the country setting is to fulfil the require ments of various directives FCC ETSI IC etc For example...

Страница 136: ...able position Pos if interfer 2 ence occurs after a delay time has elapsed Use the arrow buttons of the left or right hand touch key to select the desired servo socket 1 to 8 then touch the central SE...

Страница 137: ...e the binding sequence before you can enter settings which relate to a particular receiv er When setting up the radio control system please ensure at all times that the transmitter aerial is an adequa...

Страница 138: ...rd or back by one line Lines to which you cannot jump contain no user variable values If you wish to change a parameter touch the central SET button of the right hand touch key to highlight the parame...

Страница 139: ...ting power than the receiver the model can still be operated safely at this point Nevertheless in the interests of safety the distance to the model should be reduced until the audible warning ceases R...

Страница 140: ...centre setting If you wish to alter this value select the CENTER line and touch the SET button Now move the corresponding transmitter control stick and or trim lever in the desired direction and touch...

Страница 141: ...o be adjusted INPUT CH input channel select As already mentioned on page 137 the eight control functions of the mx 16 HoTT transmitter can be shared out between several receivers if necessary or alter...

Страница 142: ...his point you can set the delay time after which the servos are to run to their previously selected positions if the signal should be interrupted This setting applies to all channels but only affects...

Страница 143: ...00 SLAVE CH 00 S TRAVEL 100 S TRAVEL 100 MODE 1 RX WING MIXER TAIL TYPE NORMAL Value Explanation Possible settings MODE Mixer select 1 5 MASTER CH Primary channel 0 1 according to transmitter SLAVE C...

Страница 144: ...YPE B CURVE1 CH 02 TYPE B CURVE2 CH 03 TYPE B CURVE3 CH 04 Value Explanation Possible settings CURVE1 2 or 3 CH Channel assign ment of the selec ted curve setting 1 according to receiver TYPE Curve ty...

Страница 145: ...This is accomplished by shifting the arrow button of the left or right hand touch key the symbol at the left hand margin of the bottom line followed by pressing the central SET button of the right han...

Страница 146: ...T To stop the servo test re activate the input field as de scribed previously then select STOP and confirm your choice with the SET button of the right hand touch key ALARM VOLT low receiver voltage w...

Страница 147: ...ard makes this available at servo socket 8 If the receiver s display shows a two digit number to the right of SUMO RX SERVO TEST ALL MIN 1000 sec ALL MAX 2000 sec ALARM VOLT 3 8V ALARM TEMP 10 C ALARM...

Страница 148: ...te receiver configured as SUMO i e all te lemetry sensors must be connected to the satellite receiver SUMO Each receiver should be connected to the shared power supply using its own power lead If high...

Страница 149: ...ALARM VOLT 3 8V ALARM TEMP 10 C ALARM TEMP 55 C TEST START CH OUT TYPE ONCE Now use the Select button of the left or right hand touch key to switch to the displays for the selected sensor where you ca...

Страница 150: ...graphic displays are avail able for selection and which are to be suppressed as described in the section starting on page 30 and the previously described SETTING DATA VIEW sub menu Once you have selec...

Страница 151: ...red and dis played in dBm the higher the bar the worse the re ceive performance and vice versa see also under Receive performance S dbm on page 139 The dots above the bar indicate the worst case re ce...

Страница 152: ...osition ON VOICE TRIGGER REPEAT 10SEC TRIG TRANSMITTER RECEIVER 3 VARIO All the time the assigned switch is closed the last speech output is repeated for the period set to the left of the switch Simul...

Страница 153: ...ght hand four way button VOICE TRIGGER REPEAT 10SEC TRIG TRANSMITTER RECEIVER 3 1 VARIO 7 then touch the central SET button of the right hand four way button to call up the selected sub menu TEMP STRE...

Страница 154: ...they can only be assigned in the Transmitter control settings menu with the Trainer connection switched off Use the arrow buttons of the left or right hand touch key to select the transmitter controls...

Страница 155: ...transmitter must be connected to the Teacher transmitter using the appropriate lead see next double page The control functions of the Pupil transmitter MUST act directly on the control channels i e t...

Страница 156: ...ing appears in the base display no student signal and in the Trainer menu the display changes to P on the left If this should happen note that all the functions automatically remain under the control...

Страница 157: ...Trainer lead Order No 3290 8 M mx 16 HoTT Pupil transmitter mx 12 HoTT mx 16 HoTT mx 20 HoTT und mc 32 HoTT mc 19 to mc 24 mx 22 iFS mx 24s Pupil transmitter with DSC socket Pupil transmitter with Pu...

Страница 158: ...should be observed Channel Function 1 Throttle Collective pitch 2 Aileron Roll 3 Elevator Pitch axis 4 Rudder Tail rotor If you wish to transfer further control functions to the Pupil transmitter i e...

Страница 159: ...uch key to place the marker frame next to SW at bottom left and assign a switch as described on page 49 We recommend that you use one of the two momentary switches SW 1 or SW 9 as the transfer switch...

Страница 160: ...EFORE initiatingTrainer mode operations During Trainer mode operations it is no problem for the Teacher and Pupil to stand a little way apart However you should never exceed a distance of 50 m this is...

Страница 161: ...ever reason one or both transmitters are switched off during a Trainer mode session then the screen displays the following query when the transmitter or transmitters are switched on again TRAINER Wire...

Страница 162: ...o that it is able at any time to identify the radio signals of its transmitter Version RFID firmware ver date time SD CARD 1 234 0Mb ABCDEF12 2012 03 01 THU 11 22 33s This line displays the version nu...

Страница 163: ...s due to power failure for example when the battery is swapped by a user replaceable buffer battery SD card RFID firmware ver date time SD CARD 1 234 2048Mb ABCDEF12 2012 03 01 THU 11 22 33s This line...

Страница 164: ...both of them down and as air brakes by deflecting both of them up simply by setting up a suitable mixer see the section starting on the next double page Such systems are generally more often used in g...

Страница 165: ...reasons you will also see a warning message and hear an audible warning if you switch the transmitter on with the throttle stick positioned towards full throttle but only if you have already set thro...

Страница 166: ...e not possible now voltage too low Once you have overcome this initial hurdle you may need to bind the receiver installed in the model to this model memory in the Base settings menu pages 74 81 This i...

Страница 167: ...eron servos and 0 1 or 2 flap servos At this juncture if not before you should check that the servos are connected to the receiver in the standard Graupner sequence Airbrakes or throttle speed control...

Страница 168: ...os assuming that the flaps are also to be used as ailerons e g using the AIL FL mixer The AIL RUD aileron rudder mixer serves a similar purpose but also makes many models generally easier to handle wh...

Страница 169: ...trol of the flap positions using the selected transmitter control The remaining options in the Fixed wing mixers menu are designed to provide further fine tuning of multi flap wing systems and are lar...

Страница 170: ...no mod name stick mode CH8 delay motor at C1 1 no tail type normal GRAUBELE no Example 1 Using one of the rotary proportional controls CTRL 6 8 If one of these transmitter controls is used the set up...

Страница 171: ...os in the Base settings menu and if you have not connected any other auxiliary function then this would be channel 6 if your model features two aileron servos and two flap servos then channel 8 would...

Страница 172: ...whichever arrangement you prefer However the following section assumes that both OFF positions will be set to for ward If you prefer the alternative arrangement there is no problem the only difference...

Страница 173: ...uching the central SET button of the right hand touch key and moving the switch from forward to back i e towards you With the mixer switched on move to the column above the symbol using the arrow butt...

Страница 174: ...tick movement or the other way round when the switch is operated the latter stay at around the mid point and only the Channel 1 display moves 1 3 5 7 2 4 6 8 0 0 0 100 0 88 0 88 1 3 5 7 2 4 6 8 0 0 0...

Страница 175: ...with the same switching direction so that they start running at the same moment you turn the motor on In contrast if you have decided on the solution de scribed in Example 1 then unfortunately there...

Страница 176: ...orward from the centre position while Phase 3 is back towards you Select the appropriate line name and switch assign ment in the usual way i e using the various touch keys 5 00 2 4 5 aile flap 2ail2fl...

Страница 177: ...or at C1 1 idle re tail type cut off 150 100 2elev sv and set 2elev sv in the tail type line The two elevator servos are then connected to receiver output sockets 3 and 8 Two rudder servos In this exa...

Страница 178: ...or speed controller electric motor Right flap elevator Left flap elevator Rudder if present Left elevon aileron elevator Elevator if present Right elevon aileron elevator Auxiliary function Receiver p...

Страница 179: ...tion of the two elevon combined aileron elevator servos as well as the flap elevator servos Notes The flap mixers and flap differential only appear in the list if you have also entered 2fl in the aile...

Страница 180: ...pro duces an up elevator effect deflecting them up creates the opposite effect In contrast the outboard ailerons act in the reverse direction a down deflection produces a down elevator effect and vic...

Страница 181: ...181 For your notes...

Страница 182: ...o switches without a centre detent SW 3 or SW 8 An optional extra used only if necessary is mixture adjustment control for the carburettor This is generally operated by one of the rotary proportional...

Страница 183: ...on of effect Touch the central SET button of the right hand touch key to move to the mixer inputs on the second screen page and set the appropriate mixer ratios In both cases the mixer neutral point s...

Страница 184: ...tudinal axis aileron MIX rd al ASYmmetrical setting The exact values required must be found by flight testing In most cases relatively small mixer values are called for typically below 10 but this doe...

Страница 185: ...suffer interference for a while In the receiver s default state however the servos remain in their last valid position hold mode when in terference occurs You can program any individual servo output...

Страница 186: ...t want to forfeit all the possible refinement facilities after the basic description you will also find set up notes on gyro gain speed governors and flight phase programming Note If in contrast to th...

Страница 187: ...RLET In the next four lines we come to the first settings which are specific to helicopters In the Swashplate type line select the number of servos which are used to actuate the swashplate See page 82...

Страница 188: ...100 100 100 100 0 0 100 100 100 100 S4 S5 where you can set up the travels and directions of rotation of the individual servos The basic aim here should be to keep servo travels at 100 wherever possi...

Страница 189: ...complexity is just what you don t need at the moment The reference point for hovering should generally be the mechanical centre point of the collective pitch stick as this position feels completely na...

Страница 190: ...u should set a value of around 125 or 125 depending on the direction of servo rotation tail ptch thro Autorot gyro 0 inp8 0 0 125 This setting ensures that the motor stops reliably in the auto rotatio...

Страница 191: ...you will need to activate a series of flight phases which can be called up via switches which you assign The first step in this process is to call up the Base settings menu pages 82 90 pitch min rear...

Страница 192: ...mplement different rotational speeds in the individual flight phases A practical suggestion which includes the throttle limiter function can be found in the section starting on page 117 If you have se...

Страница 193: ...193 For your notes...

Страница 194: ...endix Graupner SJ HoTT Vario module Order No 33601 Vario with altitude signals and five different tones for climb and descent altitude display and storage of min and max altitude Additional warning th...

Страница 195: ...dual cell measurement with min voltage warning thresholds Voltage current and capacity measurement with warning thresholds for min and max voltage max capacity and max current Rev count measurement an...

Страница 196: ...travel Cycle time Channel swap Fail Safe settings Mixer settings Servo test Dimensions approx 76 mm x 72 mm x 17 mm L x W x H Weight approx 55g Graupner SJ HoTT magnetic rev count sensor Order No 336...

Страница 197: ...Angewendete harmonisierte Normen Harmonised standards applied EN 60950 2006 EN 301 489 1 V1 7 1 EN 301 489 3 V1 4 1 EN 300 328 V1 7 1 Health and safety requirements pursuant to 3 1 1 Article 3 1 a Pr...

Страница 198: ...ses and can radiate radio frequency energy and if not installed and used in accordance with the instructions may cause harmful interference to radio communications However there is no guarantee that i...

Страница 199: ...stunsanspr che des Verbrauchers werden durch diese Garantie nicht ber hrt Bitte berpr fen Sie vor einer Reklamation oder R cksendung das Produkt genau auf M ngel da wir Ihnen bei M ngelfreiheit die en...

Страница 200: ...printing errors Printed in Germany PN QC 03 V6de Although we have carefully checked the information contained in these instructions and checked that it is correct we can accept no liability of any kin...

Отзывы: