3
4
Figure 2
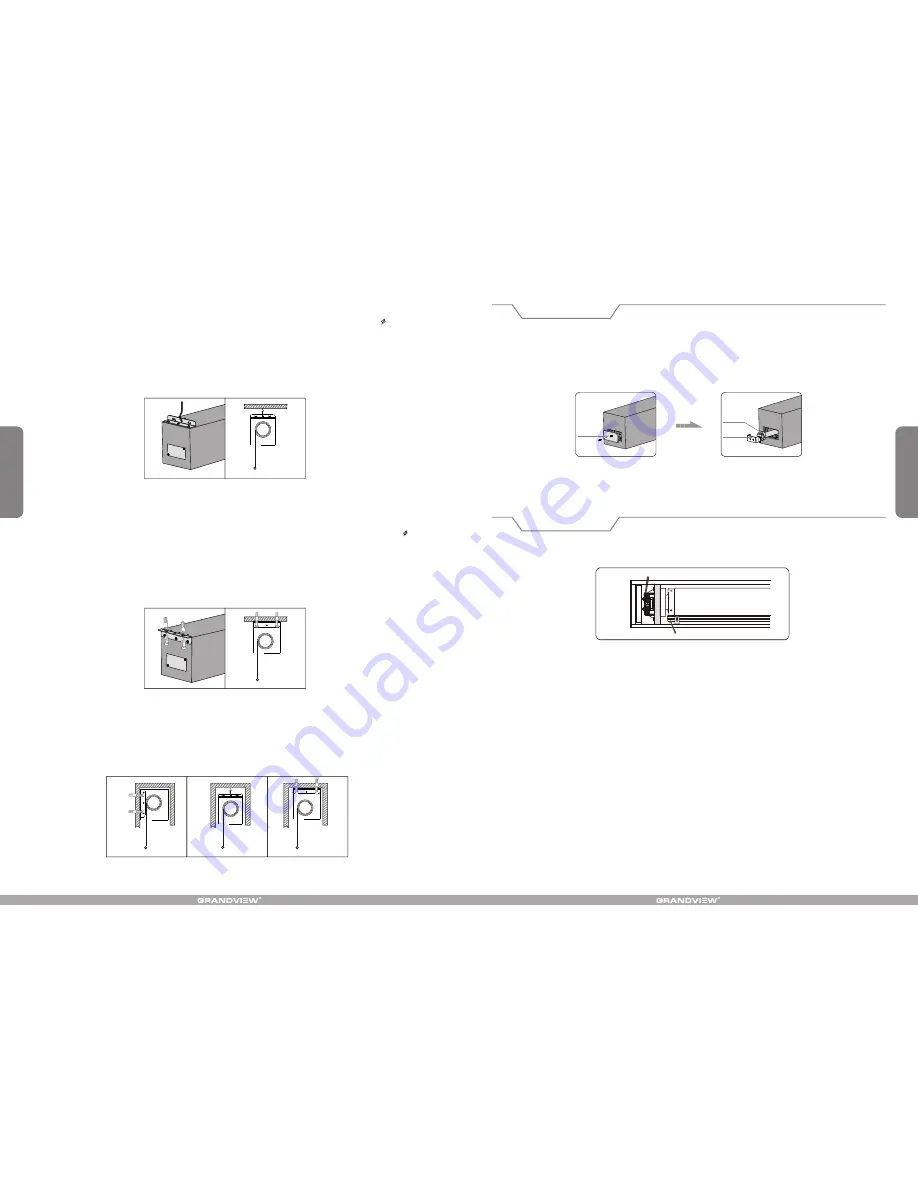
When replacing motor, drawing off the power plug of the screen. Then taking off the flant cover board after
wring the screw from the board in the left end up. Wring the screw of the motor pulling rack, take out the
broken motor. Then install the fresh motor and finished by tighten the screws of the pulling rack and flant
cover board
.
( Figure 5 - 6 )
Ceiling Mount
Fixup the install bracket on the casing top of both sides, and tighten the screws. Then install two 10 dilatant
setscrews with hangers in the corresponding places of ceiling. Then hanging the screen. Finally, you have to
check the security of hanger. If necessary, take some reasonable methods to ensure the screen against falling
by accident from the hanger
.
( Figure 2 )
Ceiling Mount
Installation
Ceiling Fixup Mount
Fixup the install bracket on both sides end up of casing, and tighten the screws. Then choosing four 10
dilatant screws, digging four suitable holes in the ceiling by electric drill, driving them into the holes. Then
tighten the screws again by the corresponding holes through brackets making screen fixup in the ceiling.
( Note: the ceiling must be made by armoured concrete structure )
( Figure 3 )
Ceiling Fixup Mount
Installation
Figure 3
The screen can also be installed in the ceiling as shown below ( Figure 4 ).
Hidden installation
Figure 4
Motor Replacing
Figure 5
Figure 6
Flant cover
board
Motor
Motor
pulling rack
Screen Fabric Rod
Larger screens utilize the rod to help the screen eliminate V-shape wrinkles. It also helps distribute the
weight so that there is less pressure on the roller. The factory default is set at the optimal level, please
contact a professional to help with changing settings.
Position Adjustment
The adjustable motor allows you to position the top and bottom limits of the screen. This allows for greater
flexibility depending on where the screen is installed. The factory default is set at the optimal level, please
contact a professional to help with changing settings.
Motor
Features
Position Adjustment
Screen Fabric Rod


