Installation
Before You Start
Tools
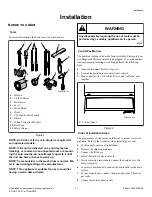
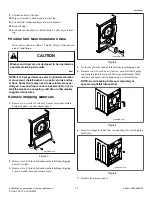
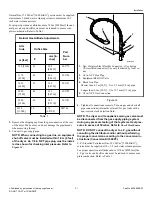
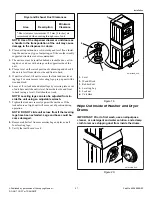
For most installations, the basic tools you will need are:
SWD1021N_SVG
11
10
9
8
4
3
2
1
6
7
5
1.
Wrench
2.
1/4 inch Driver
3.
Screwdriver
4.
Level
5.
Wood Block
6.
Pliers
7.
5/16 Inch Socket Wrench
8.
Gloves
9.
Teflon Tape (Gas Models)
10.
Duct Tape
11.
Safety Glasses
Figure 1
NOTE: An 20.32 cm [8 in.] coin drawer is required for
coin operated models.
NOTE: If the unit is delivered on a cold day (below
freezing), or is stored in an unheated room or area dur-
ing the cold months, do not attempt to operate it until
the unit has had a chance to warm up.
NOTE: Some moisture in the wash drum is normal. Wa-
ter is used during testing at the manufacturer.
NOTE: This appliance is suitable for use in countries
having a warm, damp climate.
WARNING
Any disassembly requiring the use of tools must be
performed by a suitably qualified service person.
W299
Central Pay Models
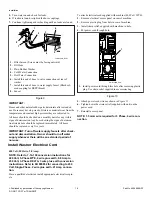
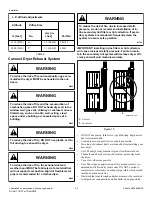
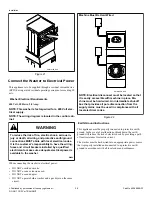
The machine is shipped from the factory with the Electronic Con-
trol Diagnostic Harness Assembly unplugged. To avoid unauthor-
ized manual programming or vending, perform the following
steps.
1.
.
2.
Locate diagnostic harness on electronic control.
3.
Plug connectors for “white/black” wire and “red/blue” wire
together.
SWD990N_SVG
1.
Control Panel
Figure 2
Order of Installation Steps
The proper order of steps must be followed to ensure correct in-
stallation. Refer to the list below when installing your unit.
1.
Position unit near area of installation.
2.
Remove the shipping materials.
3.
Connect the fill hoses.
4.
Install the washer's electrical cord.
5.
For non-gravity drain models, connect the drain hose to the
drain receptacle.
6.
For gravity drain models, connect the drain outlet to the drain
system.
7.
For gas models only, connect the gas supply pipe. Check for
gas leaks.
8.
Connect dryer to exhaust system.
Installation
©
Published by permission of the copyright owner -
DO NOT COPY or TRANSMIT
14
Part No. 805898ENR1

