IN_610-620-INS-LAB-RevC22 2
CHAIR ASSEMBLY
Tools required: Phillips screwdriver
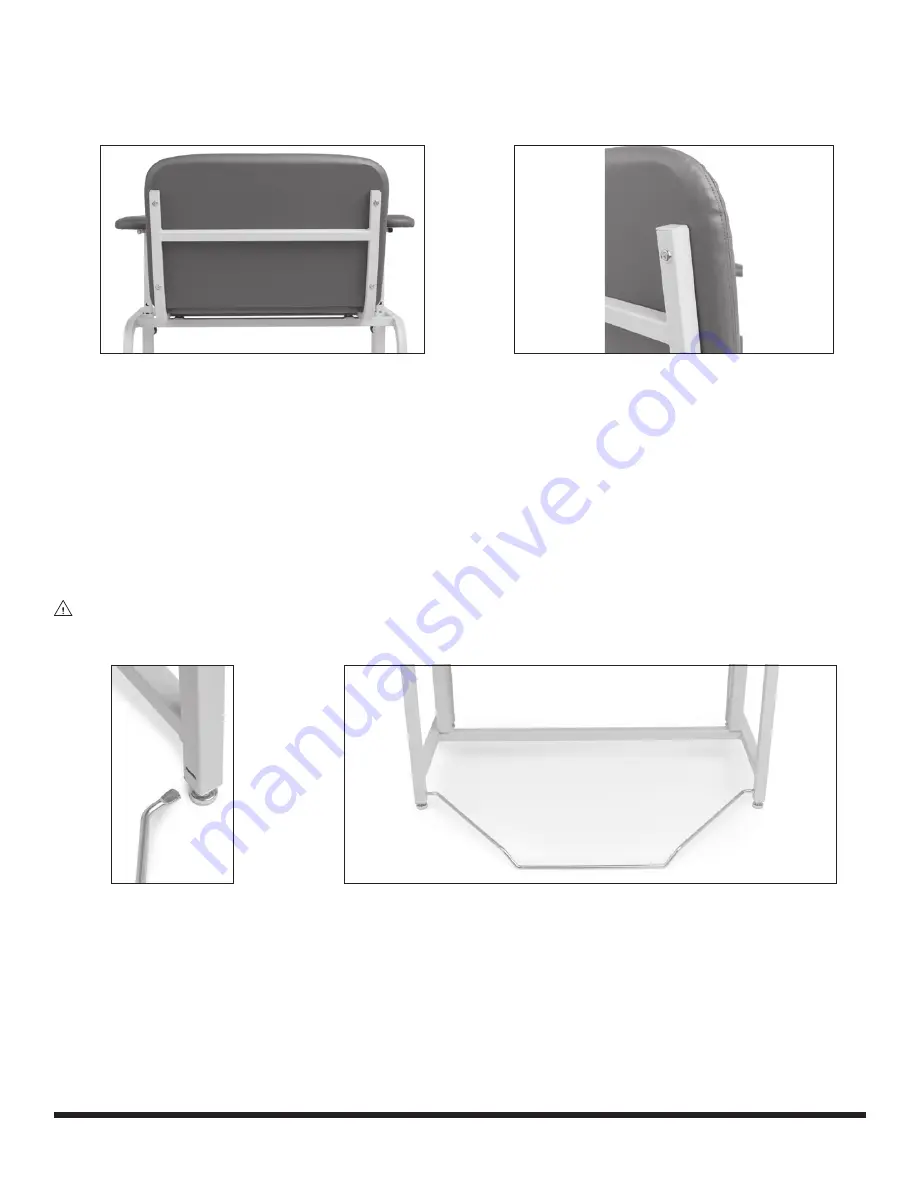
Attaching Back to Frame
1. Place the flat side of the back in position against the rail at rear of frame with curve upward, as shown
at above left, centering the back evenly against the chair frame. Use provided wood screws to secure
with back frame.
2. Secure the back to the frame, as shown above. Use a Phillips screwdriver and the provided four
screws and washers, two screws and washers per side as shown, until tight.
Arm Height and Position Adjustment
1. Pull the plunger-knob, located on front of arm receiver tube, out to release the arm.
2. Slide the arm to the desired height and position.
3. Release the plunger-knob to lock the arm at desired height and position.
WARNING: Ensure arms are locked securely in place before proceeding.
Wireform Wallsaver Installation, if Ordered
Wallsaver End & Chair Leg Slot Wallsaver Shown From Back After Installation
1. Position the Wireform Wallsaver with bent sections facing down and tab ends facing inward as
shown at above left.
2. Gently squeeze both Wallsaver tab ends inward toward the center of the Wallsaver and hold the tabs
parallel to the slots located at the bottom of the chair’s back legs.
3. Slide the tabs into the base holes and let the Wallsaver gently expand outward to lock in place.
Wireform Wallsaver Removal
To remove the Wallsaver, squeeze the ends toward the center of the Wallsaver until the end tabs slide
out of the frame base holes.


