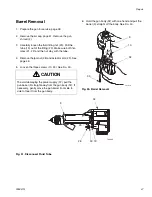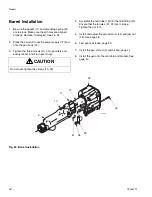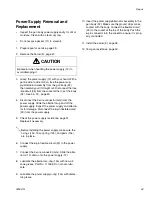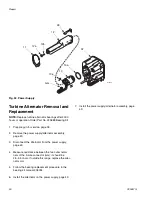
Repair
40
309457G
Remove the Gun from the
Manifold
1.
Discharge the system voltage, page 21.
2.
Flush and clean the gun, page 26.
3.
Relieve the pressure, page 21.
4.
Remove the air cap (3) and shroud (2), page 41.
5.
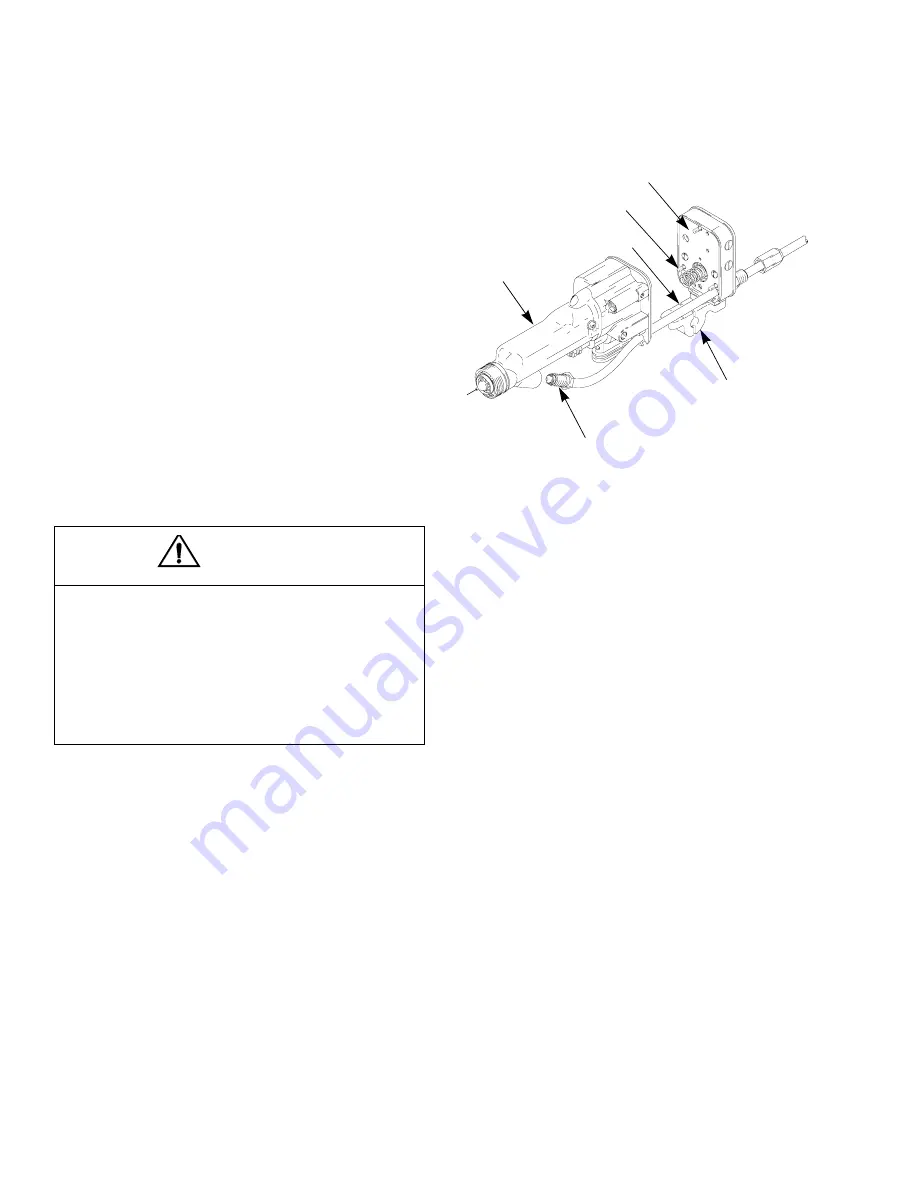
Disconnect the fluid hose fitting (F) from the gun
barrel (9).
6.
Loosen the bottom gun screw (31) until the gun sits
loosely in the mounting bracket slot (A). See F
7.
Holding the gun firmly in hand, loosen the three
screws (106) from the back of the manifold.
8.
Remove the gun from the manifold and take it to the
service area.
Fig. 22. Remove Gun from Manifold
Install the Gun on the Manifold
1.
Make sure the gasket (112) and spring (105) are in
place on the manifold. See F
. 22.. Inspect the
parts for damage and replace them as needed.
2.
Secure the gun to the manifold by tightening the
three screws (106).
3.
Secure the gun to the mounting bracket (102) by
tightening the bottom screw (31).
4.
Make sure the fittings and barrel are clean and dry,
then reconnect the waterborne fluid hose, page 14.
5.
Reinstall the gun shroud (2) and air cap (3), page
41.
CAUTION
The piston return spring (105) is compressed
between the manifold and the gun body when they
are assembled. To avoid sudden movement of the
gun, loosen the bottom gun screw (31) before loosen-
ing the three manifold screws (106). This allows the
gun to move forward gradually as the manifold
screws are loosened. Hold the gun firmly in hand
while loosening the manifold screws.
TI1778A
105
112
102
A
9
F
Содержание PRO Auto Xs
Страница 51: ...Repair 309457G 51 ...

