GOST Watch HD
–
User Guide
4
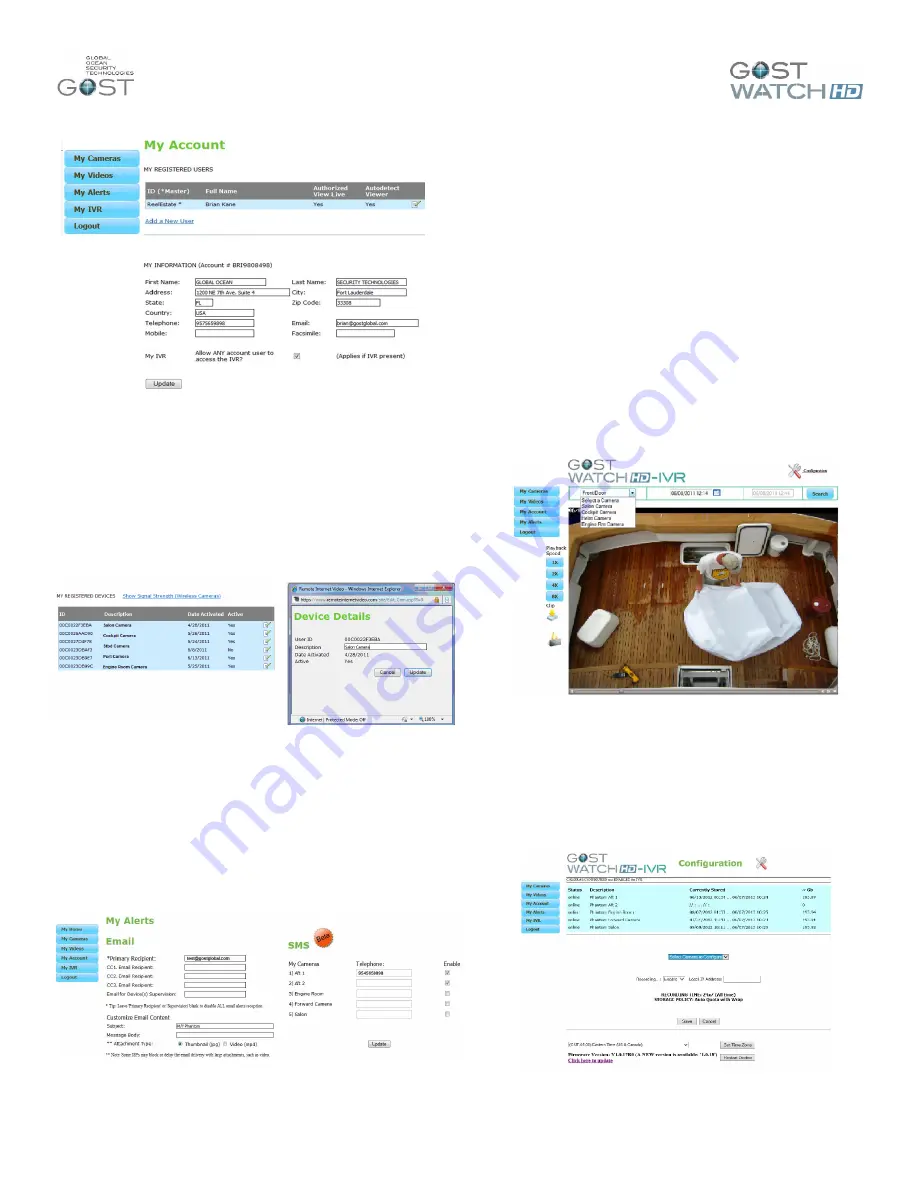
Figure 9
My Account
–
My Registered Devices
In this section, the user has the ability to view and or
change all the A/D Gateway camera and IVR names.
Simply click on the Edit tab marked by a pencil and
paper next to each device and a new window will load
for you to change and update(Figure 10). As an
example, the default name of each Camera is the Mac
address of the gateway, you may want to change the
name to
“Salon”,”Cockpit”, or “Helm” camera.
Figure 10
My Alerts
In this area of the site, the user can select up to four
receipts
’ to receive e
-mail alerts for motion captured
events. You can select whether the recipients are to
receive a thumbnail image (.JPG) or a Video clip (.mp4).
One also has the ability to change the e-mail subject as
well as the message in the body. One can also receive
text alerts of a video event captured via the SMS feature.
Assure that the correct airtime provider is selected on
sms alerts (Figure 11).
Figure 11
My IVR- Viewing and Downloading clips
The GOST Watch HD IVR is an easily accessible
Internet Video Recorder that can be viewed from any
computer with an internet connection. The IVR will work
with up to six A/D Gateways and has a 1 TB hard drive
that should store approximately three months footage for
up to six cameras. Note that the specified storage
capacity can change depending on the footage being
recorded and the size of the particular hardrive.
The IVR is normally configured by the installer at the
time of installation. If you see a
“N/A” next to the
selected camera, assure it is configured properly
according to
“Configuration” Secti
on below. To use,
simply select the camera and the time/date that you wish
to view and press search (Figure 12). You can only
select the starting date and time, a twenty minute clip will
then load from that point. Once the footage loads, you
can view it at x1, x2, x4, and x8 times the speed as well
as download the clip (left side of screen)
Figure 12
My IVR- Configuration
Click on the
“Configuration” tab to access the setup
menu. Select the camera you wish to enable Instant
IVR recording off, select
“Enable”, and press “Save”.
You can also select the time zone of the location that the
IVR is in on the bottom half of this page (Figure 13).
Figure 13


