background image

6

USING THE FEATURES

USING THE FEA

TURES

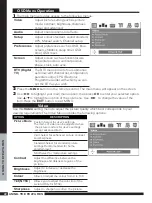
USING THE DTV FEATURES

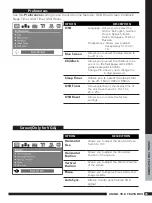
OPTION

DESCRIPTION

Edit Channel 
List

Lock some channels that are not 
suited for younger members of the 
family, skip/add the channel list as 
you wish.

Configuration

Add new channel, set audio language, 

subtitle language, as you wish. Upgrade 

the system. View the signal information.

Parental 
Control

Enable or Disable the menu 
protection system and allows the 
PIN code to be changed.

EPG

Electronic Program Guide

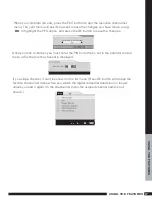
DTV OSD Menu Operation

Edit Channel List 

You can select the channel by using 

▲/▼

, then the selected channel which highlighted 

in yellow is displayed in the quarter-screen image windows.

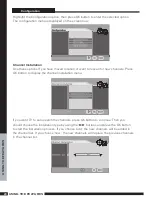
You can lock or unlock the selected channel by pressing the ‘RED’ button, pressing the 
‘OK’ button to skip or add the selected channel. A channel selected as a locked appears 
in the channel list with a lock icon (red button) against the channel name, a channel 
selected as a added appears in the channel list with a add icon (tick) against the channel 
name.

Содержание GTVL19W17HDF

Страница 1: ...ATV DTV CH VOL GUIDE EXIT INFO i SOURCE FAST TEXT MENU 1 4 7 8 9 0 5 6 2 3 I II P MODE P SIZE CH LIST SUBTITLE SLEEP TEXT...

Страница 2: ...personnel This symbol is intended to alert the user to the presence of important operating and maintenance instructions in the literature accompanying the appliance RISK OF ELECTRIC SHOCK DO NOT OPEN...

Страница 3: ...r 2 core or 3 core Follow the appropriate wiring instructions given below In both cases ensure that the outer sheath of the cable is firmly held by the cable clamp WARNING Do not connect either wire t...

Страница 4: ...lves etc The equipment may fall causing serious injuries to children or adults and serious damages to the equipment itself Always place the equipment on the floor or on a surface that is sturdy level...

Страница 5: ...Unplug the unit immediately it gets wet and consult your servicing technician Always unplug the unit before cleaning it Wipe dust off the cabinet of the unit with clean dry soft cloth Apply non ammon...

Страница 6: ...INSTALLATION 15 Connecting a TV Cable or Aerial 15 Connecting a DVD Player 16 Connecting a VCR a Video Camera 17 Connecting a TV Box and Satellite Receiver 18 Connecting an Audio Receiver 19 HDMI 20...

Страница 7: ...cd m2 Contrast Ratio 500 1 640x480 60Hz 1024x768 75Hz NICAM FM Stereo Function Auto Programme Sort APS Manual search Sleep Timer User selectable colour temperature settings Built in ATV and DTV Tuners...

Страница 8: ...extra cable connector etc Package Contents Once you open the box make sure all of the following contents are included If you re missing any items please contact your dealer These items are all you nee...

Страница 9: ...is activated Red standby Green On 3 HEADPHONE Connects to the external headphone for private listening 4 POWER Power Button Turns the LCD TV on and off 5 SOURCE Press to select different input signal...

Страница 10: ...posite A V output sockets on your video equipment 5 AV4 Y Pb Pr AUDIO L R Connects to the component Y Pb Pr video sockets and audio L R sockets of your DVD player HDTV or video equipment 6 AV5 VGA IN...

Страница 11: ...ed a To check the remaining sleep time press the SLEEP button once b To cancel the sleep time repeatedly press the SLEEP button until the display off appears c If you turn the set off after setting th...

Страница 12: ...s the current channel and the input source TV AV1 SCART AV2 S VIDEO AV3 CVBS AV4 Y Pb Pr AV5 VGA AV6 HDMI DTV Cycles among the different input signal sources INFO i Accesses the TELETEXT items or corr...

Страница 13: ...ds of the batteries with the and ends indicated in the battery compartment Align the lower tabs of the back cover to the remote control and squeeze the cover into place Do not use caustic cleaners por...

Страница 14: ...necessary parts are in the box How to install the TV Stand Cover an even stable surface with a soft cloth Place the LCD TV unit face down on the cloth Fit the stand onto the bottom of the LCD TV unit...

Страница 15: ...y mode it does not disconnect the device from the mains supply To completely disconnect the main voltage please switch off the power switch on the rear of the TV or remove the power plug from the sock...

Страница 16: ...n a red light will show on the front centre panel of the TV b Press the POWER button the red light will change to green and the First Time Installation screen will show 1 Make sure an aerial is fitted...

Страница 17: ...t all power sources before turning on the power switch of the LCD TV or other connected equipments Press the POWER button to turn on your LCD TV To watch DVD press the SOURCE button to select AV1 AV2...

Страница 18: ...TV s SCART socket Connect all power sources before turning on the power switch of the LCD TV or other connected equipments Press the POWER button to turn on your LCD TV Connecting a VCR a Video Camer...

Страница 19: ...et to RCA adapter cable for connecting audio Method E AV1 Use a SCART cable to connect the TV Cable Box s SCART socket to the LCD TV s SCART socket 1 Connect all power sources before turning on the po...

Страница 20: ...LCD TV s DIGITAL OUT sockets 1 3 Press the POWER button to turn on your LCD TV 2 Connect all power sources before turning on the power switch of the LCD TV or other connected equipments PC AUDIO IN F...

Страница 21: ...the audio out socket on the external device and the audio input socket L R audio Input on the rear of the TV HDMI HDMI This TV can accept High Definition Multimedia Interface HDMI or Input of Digital...

Страница 22: ...ton the green light will change to red Selecting a source Press the SOURCE button to display the function required TV AV Using the arrow buttons on the remote highlight the function required and press...

Страница 23: ...which you can set the DTV as you wish 2 Press the MENU button on the remote control The main menu will appear on the screen 3 Use to highlight your main menu option then press OK to enter your select...

Страница 24: ...mid high Blue Stretch Allows you to adjust the blue stretch Green Stretch Allows you to adjust the green stretch Color Temp Allows you to adjust the color temp to be cool warm standard Video Audio OPT...

Страница 25: ...l Poland Sweden Slovenia Slovakia Turkey Others Manual Search Allows you to adjust the manual search by hand if signal is too weak or picture is blurry Channel Setup Press the button to select Sort De...

Страница 26: ...he sleep timer to be off 15min 30min 60min OSD Timer Allows selection of the display time of the on screen menu 5 s 10 s 15 s 20 s 25 s OSD Reset Allows you to restore the factory settings Preferences...

Страница 27: ...tem and allows the PIN code to be changed EPG Electronic Program Guide DTV OSD Menu Operation Edit Channel List You can select the channel by using then the selected channel which highlighted in yello...

Страница 28: ...press the OK button to save the changes Once you lock a channel you must enter the PIN Code that is set in the parental control menu at first before the channel is displayed If you skip a channel it...

Страница 29: ...cation or want to rescan for new channels Press OK button to display the channel installation menu If you want TV to auto search the channels press OK button to continue Then you should choose the ins...

Страница 30: ...llowing menu Using to cycle the channel option then the bar graphs of signal level and signal quality will indicate whether any channels are likely to be found You should choose the channel of which t...

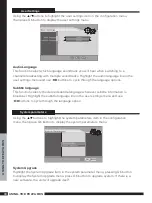
Страница 31: ...language options Subtitle language This function selects the desired subtitle language whenever subtitle information is broadcast Highlight the subtitle language line in the user settings menu and us...

Страница 32: ...information item in the configuration menu pressing OK button to display the Signal information menu Cycle through the channel option by using the buttons on the remote control The signal level and s...

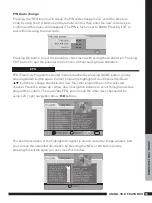
Страница 33: ...option to YES the channels you locked in the edit channel list menu can t be displayed before you enter the PIN CODE Maturity level There are 18 levels total If you toggle this option to a number 1 18...

Страница 34: ...The short description of the highlighted channel is shown under the image window and you can see the extended description by pressing the INFO or OK button and by pressing this button again you can cl...

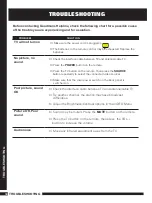
Страница 35: ...POWER button on the remote Press the TV button on the remote then press the SOURCE button repeatedly to select the connected video sources Make sure that the main power switch on the back panel is sw...

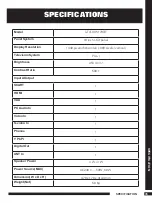
Страница 36: ...orizontal x 900 pixels vertical Television System PAL I Brightness 450 cd m2 Contrast Ratio 500 1 Inputs Output SCART 1 HDMI 1 VGA 1 PC Audio In 1 Video In 1 S video In 1 Phones 1 Y Pb Pr 1 Digital Ou...

Страница 37: ...during manufacture Display Mode VGA TIMING Dot X Line Horizontal Frequency kHz Vertical Frequency Hz 640 x 480 31 46 59 94 640 x 480 37 86 72 80 640 x 480 37 50 75 00 800 x 600 37 87 60 31 800 x 600 4...

Отзывы: