background image

41

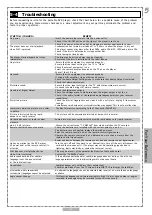
Before requesting service for the portable DVD player, check the chart below for a possible cause of the problem
you are experiencing. Some simple checkups or a minor adjustment on your part may eliminate the problem and
restore proper operation.

SYMPTOM (COMMON)

REMEDY

No power.

· Insert the power plug securely into the power outlet.
· Check if the ON/OFF button on the right of the player is set to on.
· Check if no power at the AC outlet by plugging in another appliance for a test.

The player does not start playback

· Condensation has formed: wait about 1 to 2 hours to allow the player to dry out.

when PLAY is pressed.

· This player cannot play discs other than DVDs, audio CDs, MP3, JPEG and picture CDs.
· Check if the disc is defective by trying another disc.
· Check the region (local) code.

The player starts playback but stops

· The disc may be dirty and may require cleaning.

immediately.

· Ensure that the disc is installed with the label side up.

No picture.

· Ensure that the equipment is connected properly.
· Ensure that the input setting for the TV is “Video”.
· Check if external equipment  is on.
· Select the same channel and source on the TV as on the player.

     · Check if the LCD is on.

No sound.

· Ensure that the equipment is connected properly.
· If using a HiFi amplifier, try another sound source.
· Check the Audio Output Setting menu to make sure that Analog Output is selected.

     ·  Check the Volume Adjustment.

Distorted sound.

· Ensure that the input settings for the TV and stereo system are correct.
· No sound is heard during still picture (pause).

No audio at Digital Output.

· Check the digital connections.
· Check the settings menu to make sure that the digital output is set to on.
· Check if the audio format of the selected audio language matches your receiver

                                                                   capabilities.
Distorted picture.

· Check the disc for fingerprints and clean it with a soft cloth, wiping it from center
   to edge.
· Sometimes a small amount of picture distortion may appear. This is not a malfunction.

Completely distorted picture or no color

· The disc format is not according to the TV-set used (PAL/NTSC).

in picture.
Picture is distorted during rapid

· The picture will be somewhat distorted at times: this is normal.

advance or rapid reverse.
No rapid advance (or rapid reverse)

· Some discs may have sections which prohibit rapid advance (or rapid reverse).

playback.
No 4:3 (16:9) picture.

· Choose the correct setup “TV DISPLAY” item which matches the TV set used.

Remote controls does not operate.

· Check the batteries are installed with the correct polarity (+ and –).
· The batteries are exhausted: replace them with new ones.
· Point the remote control unit at the remote control signal sensor.
· Operate the remote control unit at a distance no more than 6 meters from the
   remote control signal sensor.
· Remove obstacles between the remote control unit and remote control signal sensor.

No key operation (by the DVD player

· Turn the unit off and then back to on. Alternatively, turn off the unit, disconnect the

AC power and/or the remote control) is

   cord and then re-connect it. (The player may not be operating properly due to

effective.                                                      lightning, static electricity or some other external factor.)
PLAY does not start playback even

· This may be a result of the parental lock function that has been set.

when  title is selected.

   Confirm the “PARENTAL” setup.

Audio soundtrack and/or subtitle

· If the audio soundtrack and/or subtitle language does not exist on the disc, the

language is not the one selected

   language selected at the initial settings will not be seen/heard.

at the initial settings.
No subtitles.

· Subtitles appear only with discs that contain them.
· Subtitles are hidden from the TV screen. Press SUBTITLE to display the subtitles.

Alternative  audio  soundtrack

· An alternative language can not be selected may result of no more than one language

(or subtitle) languages cannot be selected.        available.
Angle cannot  change.

· This function depends on software availability. Even if a disc has a number of angles

                                                                   recorded, these angles may be recorded for specific scenes only.

5-4

   Troubleshooting

For Your Reference

5

Содержание GDVD67W2LCD

Страница 1: ...Portable DVD Player User Manual 82 154 00230 Goodmans Product Information Helpline 0870 873 0080 GDVD67W2LCD...

Страница 2: ...ge 11 Subtitles 11 Viewing From Another Angle 12 To Mute the DVD Player 13 DVD Menu 13 Using the Menu Function 13 Chapter 2 Audio CD 2 1 Audio CD Playback 14 Basic Playback 14 Stopping Playback 14 Rap...

Страница 3: ...ing 27 TV System Setting 28 4 3 AUDIO Setup 29 Digital Out Setting 29 Analog Out Setting 30 4 4 Custom Setup 31 Parental Control Setting DVD 31 Password Setting DVD 32 Angle Mark Setting DVD 33 Defaul...

Страница 4: ...n 3 PAUSE UP button 4 MENU button 5 F BWD LEFT button 6 PLAY SEL button 7 PREVIOUS button 8 STOP DOWN button 9 NUMERICAL buttons 10 SUBTITLE button 11 LCD button 12 ANGLE button 13 TITLE button 14 AUD...

Страница 5: ...LCD button 3 SETUP button 4 INFO button 5 MENU button 6 PAUSE UP button 7 F FWD RIGHT button 8 PLAY SEL button 9 STOP DOWN button 10 NEXT button 11 PREVIOUS button 12 SPEAKERS 13 F BWD LEFT button 14...

Страница 6: ...6 Side View Location of controls 1 DC IN Socket 2 POWER button 1 2 1 2 1 Remote Sensor 2 POWER indicator FRONT SIDE LEFT SIDE...

Страница 7: ...on of controls continued 1 2 3 4 5 6 7 RIGHT SIDE 1 Volume control 2 Phones 1 socket 3 Phones 2 socket 4 Coaxial output socket Digital Audio 5 AV out AV in switch 6 Audio output input socket 7 Video o...

Страница 8: ...avoid scratches position it with the printed title side facing up 4 Close the DVD door Close the DVD door and the portable DVD player will start playback if there are no menus on the DVD If the disc...

Страница 9: ...k press PLAY SEL The speed of advance x2 x4 x8 x16 x32 or reverse x2 x4 x8 x16 x32 can be selected by pressing the F FWD or F BWD buttons repeatedly Skipping Ahead or Back to Previous Chapters Skippin...

Страница 10: ...creen NOTE Repeat playback may not work correctly with some DVDs This is not a fault with the DVD player 1 DVD Repeat Sections Between Two Specific Points A B Repeat 1 Press A B to select starting poi...

Страница 11: ...rned on or after a disc is removed the language used will be the language which is selected as the default language in the setup menu If the default language is not recorded on the disc the portable D...

Страница 12: ...these different angles using the ANGLE button The recorded angles vary depending on the disc Press ANGLE repeatedly during playback until the preferred viewing angle is selected NOTE ANGLE will only f...

Страница 13: ...the DVD menu s contents and operation vary from disc to disc the following explains basic operation for these menus 1 Press TITLE in stop mode The DVD menu available on the disc now appears 2 Press t...

Страница 14: ...isc and push the disc gently until it clicks into place with the printed side up Hold the disc without touching its surfaces position it with the printed title side facing up 4 Close the DVD door The...

Страница 15: ...lect eariler tracks Pause Playback Press PAUSE once during playback The player will pause playback To resume normal playback Press PLAY SEL 2 1 Audio CD Playback continued 2 2 Information Audio CDs Di...

Страница 16: ...p Next photo will cover the current from the bottom to the top Cover Down Netx photo will cover the current photo from the top to the bottom Uncover Up The next photo will be uncovered from the bottom...

Страница 17: ...degree ThumbnailMode After pressing the stop button the photos will be shown as thumbnails there are 15 thumbnails per page for viewing 1 Press to select the picture as thumbnails If you want to view...

Страница 18: ...ext photo will cover the current from the bottom to the top Cover Down Netx photo will cover the current photo from the top to the bottom Uncover Up The next photo will be uncovered from the bottom Un...

Страница 19: ...ctures Playback 1 Press NEXT to view the next picture or PREVIOUS to view the previous picture 2 Press RIGHT button or LEFT button to rotate the picture Press RIGHT button to rotate right by 90 degree...

Страница 20: ...using the or the numberical buttons and then pressing PLAY SEL button NOTE Files can only be selected using the File manager when the MP3 disc is stopped To pause playback Press PAUSE To resume playb...

Страница 21: ...ck Press STOP it will enter File Manager Playback 1 Press NEXT to view the next picture or playback the next track 2 Press PREVIOUS to view the previous picture or playback the previous track For JPEG...

Страница 22: ...nguage Setup and then press PLAY SEL 3 Press UP button DOWN button to select OSD and then press PLAY SEL 4 Press UP button DOWN button to select the preferred language 5 Press PLAY SEL 4 1 Language Se...

Страница 23: ...button to select Menu and then press PLAY SEL 4 Press UP button DOWN button to select the preferred language 5 Press PLAY SEL Language Setup Move Select SETUP Quit OSD Menu Audio Subtitle English Chin...

Страница 24: ...UP button DOWN button to select Audio and then press PLAY SEL 4 Press UP button DOWN button to select the preferred language 5 Press PLAY SEL Language Setup Move Select SETUP Quit OSD Menu Audio Subt...

Страница 25: ...DOWN button to select Subtitle and then press PLAY SEL 4 Press UP button DOWN button to select the preferred language 5 Press PLAY SEL Language Setup Move Select SETUP Quit OSD Menu Audio Subtitle Off...

Страница 26: ...ress SETUP to exit or select EXIT from SETUP MENU screen 4 3 Pan Scan Select 4 3 PS for a conventional size TV set Video material formatted using pan scan style is displayed such that a widescreen fil...

Страница 27: ...tton to select Screen Saver and then press PLAY SEL 4 Press UP button DOWN button to select On or Off 5 Press PLAY SEL The waiting time of the screen saver is set to 10 minutes When the player is in t...

Страница 28: ...AUTO if it is a multi TV system that supports both PAL and NTSC Default PAL 1 Press SETUP in the stop mode 2 Press UP button DOWN button to select Screen Setup and then press PLAY SEL 3 Press UP butto...

Страница 29: ...erred digital out setting 5 Press PLAY SEL To go up one menu level Press LEFT button To exit Press SETUP to exit or select EXIT from SETUP MENU screen For your reference If you have a Dolby Digital 5...

Страница 30: ...ss PLAY SEL 3 Press UP button DOWN button to select Analog Out and then press PLAY SEL 4 Press UP button DOWN button to select the preferred analog out setting 5 Press PLAY SEL Audio Setup Move Select...

Страница 31: ...UP button DOWN button to select Parental Ctrl and then press PLAY SEL 4 Enter a 4 digit password before selecting ratings and press PLAY SEL Factory pre set password 0000 You need to enter 0000 to set...

Страница 32: ...to select Password and then press PLAY SEL 4 Enter your old password and then press PLAY SEL Factory pre set password 0000 5 Enter your new password and then press PLAY SEL 6 Re enter your password t...

Страница 33: ...select Angle Mark and then press PLAY SEL 4 Press UP button DOWN button to select On or Off and then press PLAY SEL NOTE Whether the ANGLE MARK is set to On or Off with this setting when you press ANG...

Страница 34: ...t Default and then press PLAY SEL 4 Press RIGHT button to select Read and then press PLAY SEL EXCEPTION The viewer rating and the password setting will NOT be changed even though defaults are selected...

Страница 35: ...FT button or RIGHT button to choose the preferred colour setting To finish the setup operation Press LCD repeatedly until the LCD setting information disappears P P P P Panel anel anel anel anel Nor N...

Страница 36: ...the setup operation Press LCD repeatedly until the LCD setting information disappears Bright 3 Bright 3 Bright 3 Bright 3 Bright 3 Bright 2 Bright 2 Bright 2 Bright 2 Bright 2 Bright 1 Bright 1 Bright...

Страница 37: ...ion or temporarily discontinue use in potentially hazardous situation Even if your headset is an open air type designed to let your hear outside sounds do not turn up the volume so high that you can n...

Страница 38: ...l To guard against this before your hearing adapts set the volume at a low level Declbel Level dB example 30dB quiet library soft whisper 40dB Living room fridge freezer bedroom away from traffic 50dB...

Страница 39: ...sc inside a car under direct sunlight After Playback always remove the disc from the player and return it to the display storage case To clean discs use a dry soft cloth moving the cloth from the cent...

Страница 40: ...ould be unplugged from the household mains supply Do not insert fingers or other objects inside unit Touching internal parts of this unit is dangerous and may cause serious damage to the player Do not...

Страница 41: ...appear This is not a malfunction Completely distorted picture or no color The disc format is not according to the TV set used PAL NTSC in picture Picture is distorted during rapid The picture will be...

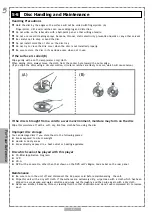
Страница 42: ...are likely to occur which will cause noise A B If the disc is brought from a cold to a warm environment moisture may form on the disc Wipe this moisture off with a soft dry lint free cloth before usin...

Страница 43: ...AL Laser semiconductor laser wavelength 650 nm OUTPUTS Video output 1 0 V p p 75 ohms negative sync Audio output digital audio 0 5 V p p 75ohms Audio output analog audio 2 0 V rms 10 ohms SUPPLIEDACCE...

Отзывы: