Air Conditionin
g
& Heatin
Model TSTATG1100-2
Di
ital Thermostat
Non-Programmable
1-Heat & 1-Cool
Gas/Electric Heat Pump
Battery or System PoweredFahrenheit or Celsius
Fully Electronic
Owner ’s Manual
Thank goodness for Goodman.
TM
Страница 1: ...ing Heating ModelTSTATG1100 2 Digital Thermostat Non Programmable 1 Heat 1 Cool Gas Electric Heat Pump Battery or System Powered Fahrenheit or Celsius Fully Electronic Owner s Manual Thank goodness fo...
Страница 2: ...Old Thermostat Safety Warnings Front Panel Display Normal Operation Preparation Battery Replacement Warranty Test Operation Troubleshooting Wire Connections Jumper Configuration OWNER S MANUAL TSTATG1...
Страница 3: ...The two Alkaline AA batteries must be replaced at least once every 12 months to ensure proper operation The Low Battery icon will appear on the thermostat display when it is time to replace the batte...
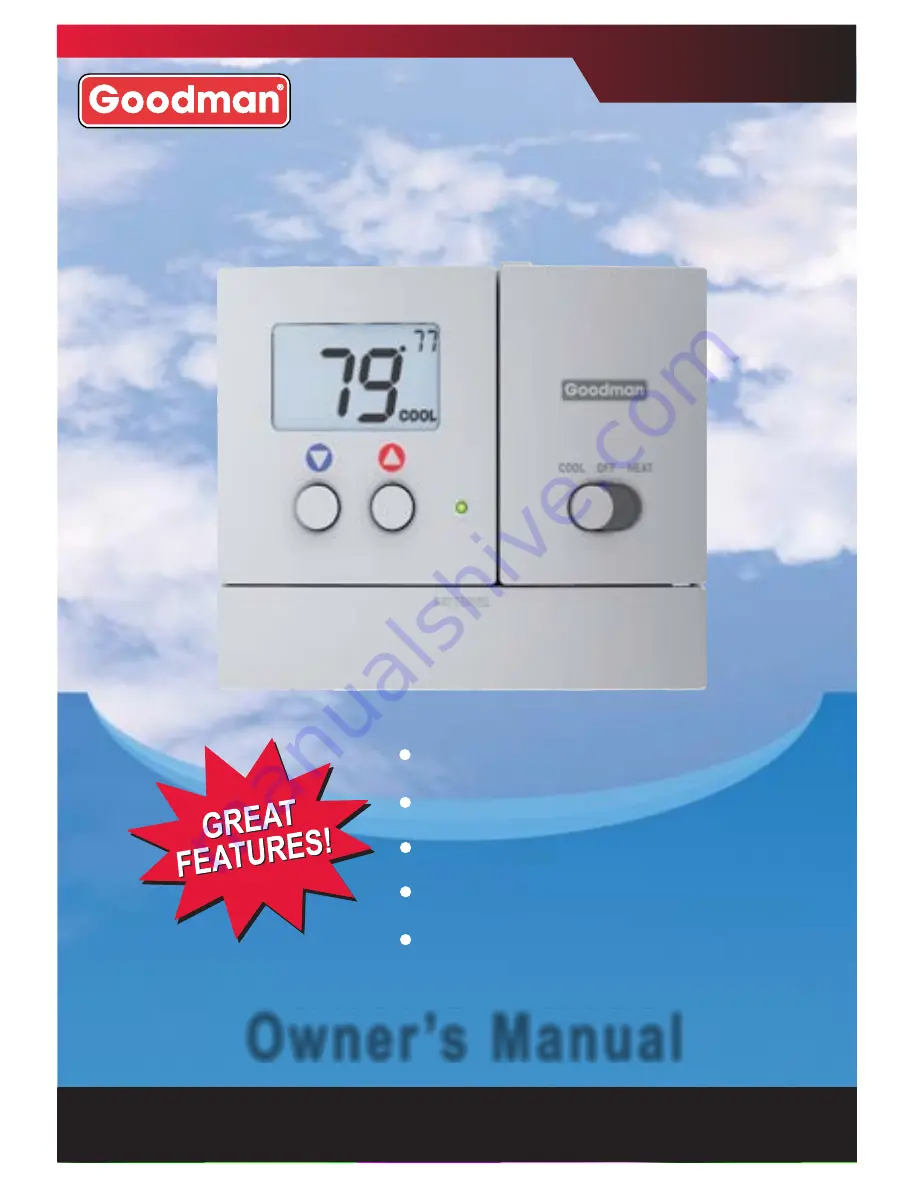
Страница 4: ...N 75 HEAT Page 4 Front Panel OWNER S MANUAL BATTERY DOOR On or Auto FAN SWITCH COOLER WARMER BUTTONS DISPLAY MODE SWITCH Cool Off or Heat TSTATG1100 2 BI COLOR LED Heat or Cool demand indicator when s...
Страница 5: ...When this indicator is on the large numbers represent the desired room temperature Pressing the COOLER or WARMER button during normal operation will cause the large numbers to switch from the current...
Страница 6: ...Auto In Fan Auto the fan will turn on only with a heat or cool demand When Fan On is selected the fan will run continuously Adjust the desired set temperature with the COOLER or WARMER buttons TSTATG...
Страница 7: ...d hold the COOLER and WARMER buttons at the same time until the temperature is displayed in degrees Celsius Repeat this process to display the temperature in degrees Fahrenheit TSTATG1100 2 SET HEAT B...
Страница 8: ...e screws and instructions Turn off the power to the Heating Air Conditioning system at the main fuse panel Most residential systems have a separate breaker for disconnecting power to the furnace Prope...
Страница 9: ...d lift away Disconnect the wires from the old thermostat Tape the ends of the wires as you disconnect them and mark them with the letter of the terminal for easy reconnection to the new thermostat Kee...
Страница 10: ...y slot pull out on the battery door fig 1 and swing down fig 2 Push up on the battery door and snap closed fig 4 FIG 2 Swing down FIG 4 Snap closed Push up The batteries must be replaced immediately w...
Страница 11: ...R M Vr A Power RH Heating Transformer The RC and RH terminals have a factory installed jumper to control single transformer systems Remove this jumper to control dual transformer systems Wire Slots A...
Страница 12: ...is not used the thermostat must be powered by two AA alkaline batteries These batteries must be replaced page 6 each year or when the Low Battery indicator is displayed page 3 4 Wire 1 Stage Cooling 1...
Страница 13: ...stat must be powered by two AA alkaline batteries These batteries must be replaced page 6 each year or when the Low Battery indicator is displayed page 3 Common wire optional Factory installed jumper...
Страница 14: ...stat must be powered by two AA alkaline batteries These batteries must be replaced page 6 each year or when the Low Battery indicator is displayed page 3 Common wire optional Factory installed jumper...
Страница 15: ...by two AA alkaline batteries These batteries must be replaced page 6 each year or when the Low Battery indicator is displayed page 3 Common wire optional Factory installed jumper between RC and RH C...
Страница 16: ...hermostat must be powered by two AA alkaline batteries These batteries must be replaced page 6 each year or when the Low Battery indicator is displayed page 3 Common wire optional Factory installed ju...
Страница 17: ...auge unshielded cable from the thermostat to both sets of equipment COMPRESSOR Y RC POWER COOL Cooling System FAN RH G GAS OR ELECTRIC HEAT W POWER HEAT Heating System If a common wire is used it must...
Страница 18: ...s package units OWNER S MANUAL Jumper 1 J1 should be set for GAS FAN and Jumper 2 J2 should be set for GAS for for typical gas furnace heating with electric cooling Jumper 3 J3 is not used TSTATG1100...
Страница 19: ...parately controlled fan OWNER S MANUAL Jumper 1 J1 should be set for ELEC FAN and Jumper 2 J2 should be set for GAS for for typical electric heating with electric cooling Jumper 3 J3 is not used TSTAT...
Страница 20: ...auxiliary heat Jumper 1 J1 should be set for ELEC FAN Jumper 2 J2 should be set for HP and Jumper 3 J3 should be set for O for typical heat pump operation Note Thermostat does not have Auxiliary Heat...
Страница 21: ...set for ELEC FAN Jumper 2 J2 should be set for HP and Jumper 3 J3 should be set for B for typical heat pump operation Note Thermostat does not have Auxiliary Heat Emergency Heat capability TSTATG1100...
Страница 22: ...he thermostat slide the Mode Switch to COOL Press the COOLER or WARMER buttons until the set temperature is 10 degrees below room temperature The HVAC unit should energize in the cooling mode Page 6 N...
Страница 23: ...SE The cooling setpoint is set too high the Mode Switch is not set for Cool or the batteries are too weak REMEDY Consult the Normal Operation section in this manual to Lower the cooling setpoint Page...
Страница 24: ...rrect the Mode Switch position Page 6 Replace the batteries Page 10 P N 88 841 Rev 2 C c F FOR HOME OR OFFICE USE Tested to Comply with FCC Standards Battery Stat P N TSTATG1100 2 4Z95 OWNER S MANUAL...
Страница 25: ...ntenance as described below The thermostat is warranted for a period of FIVE YEARS except as provided below No warranty continues after the thermostat is removed from the location where it was origina...