


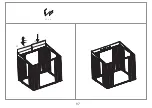

FØR DU STARTER
Brukerhåndbok
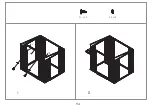
Monteringsinstruksjoner
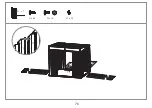
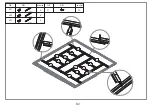
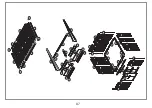
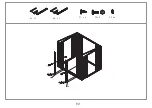
Deler
Kontroller for å være sikker på at du har alle nødvendige deler for bygningen.
Legg opp innholdet i esken etter delenummer etterhvert som du går gjennom delelisten.
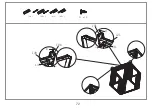
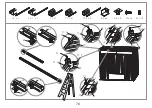
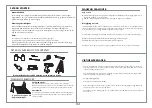
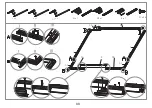
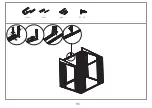
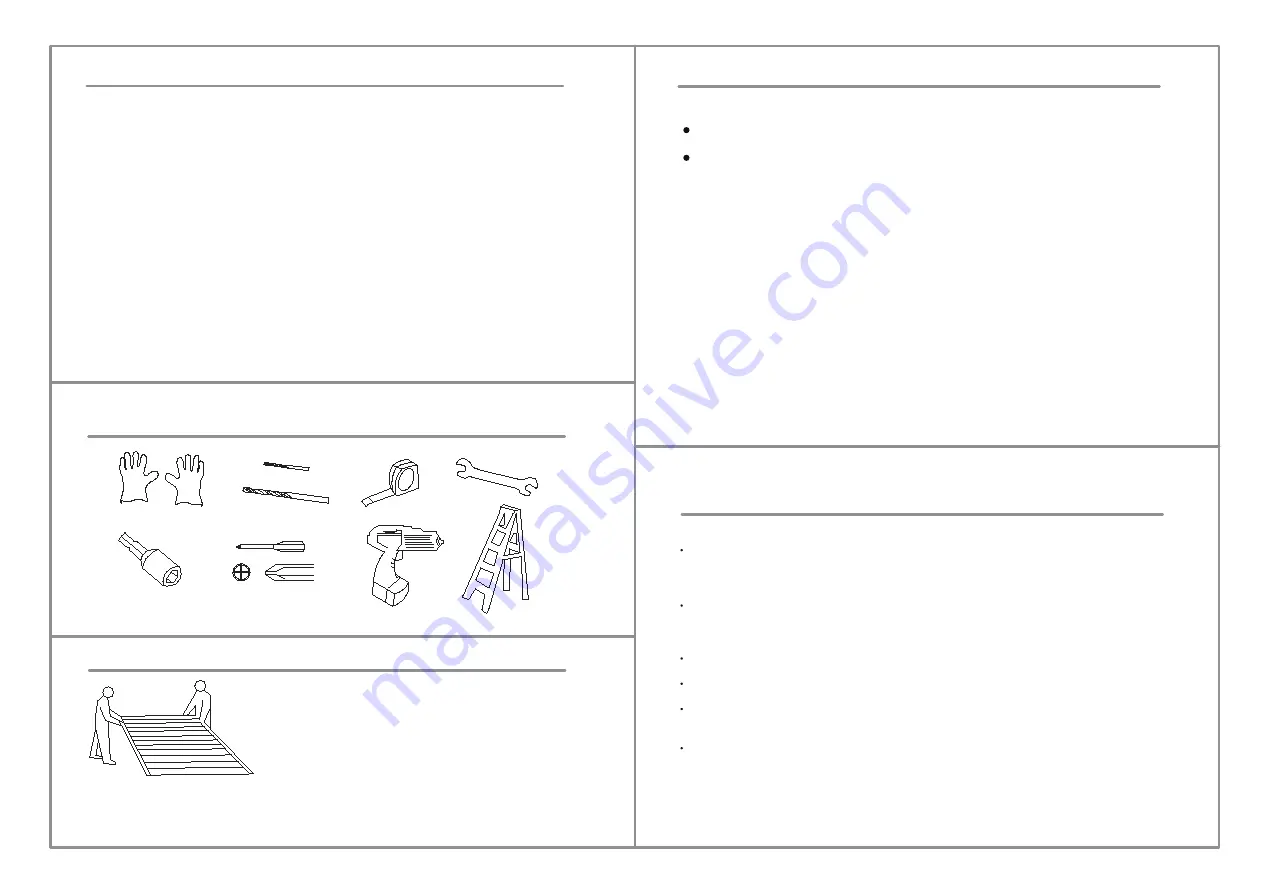
DET KAN VÆRE BEHOV FOR VERKTØY
Bruk arbeidshansker ved håndtering av stålplater og beslag
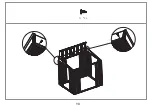
PLANLEGG FRAMOVER
Følg med været:
Vær sikker på at dagen du velger for montering er tørr og vindstille.
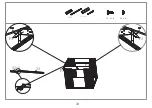
Samarbeid:
Hvis mulig bør to eller flere personer samarbeide for å montere bygningen.
En person kan plassere deler eller paneler mens den andre kan håndtere
festene og verktøy.
Før montering er det viktig at du kontakter dine lokale myndigheter for å finne ut om du trenger
byggetillatelse. Les og forstå denne brukerhåndboken. Viktig informasjon og nyttige tips vil bidra til å
gjøre monteringen enklere og mer behagelig.
Denne håndboken inneholder monteringsinstruksjoner og all relevant informasjon for din modell.
Gå gjennom alle instruksjoner før du starter. Under montering må du følge rekkefølgen på
stegene nøye for korrekt resultat. Vær oppmerksom på følgende: to personer trenger omtrent en hel
dag på å montere denne enheten.
Gjør deg kjent med deler og fester for enklere bruk under bygging. Disse er pakket i esken. Legg
merke til at det følger med ekstra fester for din bekvemmelighet.
IKKE prøv å montere boden når det er vind, det vil medføre risiko for skade på
paneler eller personskade. Utvis forsiktighet ved vått eller gjørmete underlag.
To personer trenger en hel
dag til monteringen
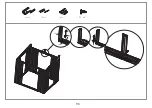
PLANLEGG FRAMOVER
Valg av sted
Små trær, busker eller gjerder i nærheten kan være nyttig, de fungerer som vindskjerm.
Klargjøring av sted
VIKTIGE MERKNADER:
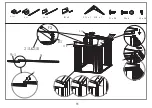
Ha riktig verktøy tilgjengelig.
Verneutstyr som anbefalt i delen ‘Verktøy’.
Betongen eller sementen må få tid til å tørke før man bygger boden på toppen.
Fundament kan også lages av murstein eller monteres på betonggrund.
Unngå overhengende tre i den grad det er mulig ettersom fallende løv vil kreve jevnlig rengjøring og
greiner som brekker er en potensiell fare.
Stedet må klargjøres slik at bodens fundament er jevnt, dette må kontrolleres med vater. Fundamentet kan
være av behandlet treverk eller betong, det skal hindre at fukt trenger inn i boden. Boden er ikke designet
for å stå direkte på gress. I tillegg vil bakken bli gjørmete når det regner.
Hvis det støpes en betongsåle er det viktig at denne heller mot kantene for å forhindre vanninntrenging.
Murstein bør mures på fast og jevn betongsåle og rammen til boden bores og skrues til fundamentet.
Få noen til å hjelpe deg: det er mye enklere med noen til å holde deler, sende verktøy osv. Noen steg
krever også at man er to for å løfte strukturer sammen. Dette er ikke veldig tungt arbeid så det vil passe
for de fleste funksjonsfriske personer.
Ta dere tid: hastverk fører ofte til feil og omgjøring av feilmonteringer. Hvis du aldri har bygd en bod
før kan monteringen ta mesteparten av en dag.
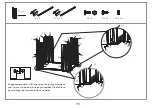
Du bør helst legge utover alle delene og sjekke at alt er der før du starter byggingen. Legg dem på tøy
eller plast hvis det er fare for å ripe opp delene.
Stram alle mutre nøye, ikke gå glipp av noen. Sjekk at rammen er kvadratisk og bruk vater til å sjekke at
den er lodrett.
84
Содержание 502323397
Страница 7: ...F1 x 24 3L x 1 3R x 1 5 x 1 1 x 2 2 x 1 1 1 x 3 5 3R 1 1 3L 1 1 2 1 1 1 1 7...
Страница 11: ...4L x 1 4R x 1 F2 x 2 F1 x 4 S3 x 6 4L 4R F1 F1 F2 F2 1 1...
Страница 12: ...F1 x 2 S3 x 2 6 x 1 7L x 1 7R x 1 F1 7L 7R 6 G2X4 7L 7R G2 x 4 12...
Страница 13: ...F1 x 12 S3 x 12 7L 7R 6 13...
Страница 14: ...F1 x 1 19R x 1 15R x 1 16R x 1 19R 15R 16R 14...
Страница 15: ...F1 x 1 19L x 1 15L x 1 16L x 1 19L 15L 16L 15...
Страница 16: ...P 5 x 2 P5 P5 16...
Страница 17: ...F1 x 20 17...
Страница 18: ...F1 x 12 12L x 1 12R x 1 14L x 1 14R x 1 F1 14R 12R 19R F1 F1 14L 12L 19L F1 18...
Страница 19: ...F1 22 F1 x 6 22 x 2 19...
Страница 20: ...11 11 1 F1 F1 x 14 F1 11x 1 11 1 x 1 F1 F1 F1 S3 x 6 20...
Страница 21: ...19R 19L 11 2 F1 F2 F2 x 4 F1 x 2 11 2 x1 21...
Страница 22: ...P1 x 7 P1 P1 P1 P1 P1 P1 P1 P1 P1 F 1x62 S3 x 72 F2 x 10 22...
Страница 23: ...P2 x 2 P3 x 3 P4 x 1 F1x 46 S3 x 46 P2 P4 P4 P2 P3 P3 P3 P2 23...
Страница 26: ...F3 18 7R G2 F3 x 8 F3 18 7L G2 26...
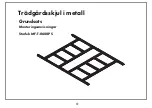
Страница 27: ...Instructions for Assembly Metal Garden Shed Foundation Kit Instructions for Assembly Size MF T 0608PS 27...
Страница 34: ...F1 x 24 3L x 1 3R x 1 5 x 1 1 x 2 2 x 1 1 1 x 3 5 3R 1 1 3L 1 1 2 1 1 1 1 34...
Страница 38: ...4L x 1 4R x 1 F2 x 2 F1 x 4 S3 x 6 4L 4R F1 F1 F2 F2 38...
Страница 39: ...F1 x 2 S3 x 2 6 x 1 7Lx 1 7R x 1 F1 7L 7R 6 G2X4 7L 7R G2 x 4 39...
Страница 40: ...F1 x 12 S3 x 12 7L 7R 6 40...
Страница 41: ...F1 x 1 19R x 1 15R x 1 16Rx 1 19R 15R 16R 41...
Страница 42: ...F1 x 1 19L x 1 15L x 1 16Lx 1 19L 15L 16L 42...
Страница 43: ...P5 x 2 P5 P5 43...
Страница 44: ...F1 x 20 44...
Страница 45: ...F1 x 12 12Lx 1 12R x 1 14L x 1 14R x 1 F1 14R 12R 19R F1 F1 14L 12L 19L F1 45...
Страница 46: ...F1 22 F1 x 6 22 x 2 46...
Страница 47: ...11 11 1 F1 F1 x 14 F1 11x 1 11 1 x 1 F1 F1 F1 S3 x 6 47...
Страница 48: ...19R 19L 11 2 F1 F2 F2 x 4 F1 x 2 11 2 x1 48...
Страница 49: ...P1 x 7 P1 P1 P1 P1 P1 P1 P1 P1 P1 F1x 62 S3 x 72 F2 x 10 49...
Страница 50: ...P2 x 2 P3 x 3 P4 x 1 F1x 46 S3 x 46 P2 P4 P4 P2 P3 P3 P3 P2 50...
Страница 53: ...F3 18 7R G2 F3 x 8 F3 18 7L G2 53...
Страница 61: ...F1 x 24 3L x 1 3R x 1 5 x 1 1 x 2 2 x 1 1 1 x 3 5 3R 1 1 3L 1 1 2 1 1 1 1 61...
Страница 65: ...4L x 1 4R x 1 F2 x 2 F1 x 4 S3 x 6 4L 4R F1 F1 F2 F2 65...
Страница 66: ...F1 x 2 S3 x 2 6 x 1 7Lx 1 7R x 1 F1 7L 7R 6 G2X4 7L 7R G2 x 4 66...
Страница 67: ...F1 x 12 S3 x 12 7L 7R 6 67...
Страница 68: ...F1 x 1 19R x 1 15R x 1 16Rx 1 19R 15R 16R 68...
Страница 69: ...F1 x 1 19L x 1 15L x 1 16Lx 1 19L 15L 16L 69...
Страница 70: ...P5 x 2 P5 P5 70...
Страница 71: ...F1 x 20 71...
Страница 72: ...F1 x 12 12Lx 1 12R x 1 14L x 1 14R x 1 F1 14R 12R 19R F1 F1 14L 12L 19L F1 72...
Страница 73: ...F1 22 F1 x 6 22 x 2 73...
Страница 74: ...11 11 1 F1 F1 x 14 F1 11x 1 11 1 x 1 F1 F1 F1 S3 x 6 74...
Страница 75: ...19R 19L 11 2 F1 F2 F2 x 4 F1 x 2 11 2 x1 75...
Страница 76: ...P1 x 7 P1 P1 P1 P1 P1 P1 P1 P1 P1 F1x 62 S3 x 72 F2 x 10 76...
Страница 77: ...P2 x 2 P3 x 3 P4 x 1 F1x 46 S3 x 46 P2 P4 P4 P2 P3 P3 P3 P2 77...
Страница 80: ...F3 18 7R G2 F3 x 8 F3 18 7L G2 80...
Страница 81: ...Tr dg rdsskjul i metall Grundsats Monteringsanvisningar Storlek MF T 0608PS 81...
Страница 88: ...F1 x 24 3L x 1 3R x 1 5 x 1 1 x 2 2 x 1 1 1 x 3 5 3R 1 1 3L 1 1 2 1 1 1 1 88...
Страница 92: ...4L x 1 4R x 1 F2 x 2 F1 x 4 S3 x 6 4L 4R F1 F1 F2 F2 92...
Страница 93: ...F1 x 2 S3 x 2 6 x 1 7Lx 1 7R x 1 F1 7L 7R 6 G2X4 7L 7R G2 x 4 93...
Страница 94: ...F1 x 12 S3 x 12 7L 7R 6 94...
Страница 95: ...F1 x 1 19R x 1 15R x 1 16Rx 1 19R 15R 16R 95...
Страница 96: ...F1 x 1 19L x 1 15L x 1 16Lx 1 19L 15L 16L 96...
Страница 97: ...P5 x 2 P5 P5 97...
Страница 98: ...F1 x 20 98...
Страница 99: ...F1 x 12 12Lx 1 12R x 1 14L x 1 14R x 1 F1 14R 12R 19R F1 F1 14L 12L 19L F1 99...
Страница 100: ...F1 22 F1 x 6 22 x 2 100...
Страница 101: ...11 11 1 F1 F1 x 14 F1 11x 1 11 1 x 1 F1 F1 F1 S3 x 6 101...
Страница 102: ...19R 19L 11 2 F1 F2 F2 x 4 F1 x 2 11 2 x1 102...
Страница 103: ...P1 x 7 P1 P1 P1 P1 P1 P1 P1 P1 P1 F1x 62 S3 x 72 F2 x 10 103...
Страница 104: ...P2 x 2 P3 x 3 P4 x 1 F1x 46 S3 x 46 P2 P4 P4 P2 P3 P3 P3 P2 104...
Страница 107: ...F3 18 7R G2 F3 x 8 F3 18 7L G2 107...
Страница 108: ...Metall hagebod Fundamentsett Monteringsinstruksjoner St rrelse MF T 0608PS 108...
Страница 110: ...Metallist aiakuur Kasutusjuhend Kiire ja lihtne T 0608PS 1 10...
Страница 115: ...F1 x 24 3L x 1 3R x 1 5 x 1 1 x 2 2 x 1 1 1 x 3 5 3R 1 1 3L 1 1 2 1 1 1 1 1 15...
Страница 119: ...4L x 1 4R x 1 F2 x 2 F1 x 4 S3 x 6 4L 4R F1 F1 F2 F2 1 19...
Страница 120: ...F1 x 2 S3 x 2 6 x 1 7Lx 1 7R x 1 F1 7L 7R 6 G2X4 7L 7R G2 x 4 120...
Страница 121: ...F1 x 12 S3 x 12 7L 7R 6 121...
Страница 122: ...F1 x 1 19R x 1 15R x 1 16Rx 1 19R 15R 16R 122...
Страница 123: ...F1 x 1 19L x 1 15L x 1 16Lx 1 19L 15L 16L 123...
Страница 124: ...P5 x 2 P5 P5 124...
Страница 125: ...F1 x 20 125...
Страница 126: ...F1 x 12 12Lx 1 12R x 1 14L x 1 14R x 1 F1 14R 12R 19R F1 F1 14L 12L 19L F1 126...
Страница 127: ...F1 22 F1 x 6 22 x 2 127...
Страница 128: ...11 11 1 F1 F1 x 14 F1 11x 1 11 1 x 1 F1 F1 F1 S3 x 6 128...
Страница 129: ...19R 19L 11 2 F1 F2 F2 x 4 F1 x 2 11 2 x1 129...
Страница 130: ...P1 x 7 P1 P1 P1 P1 P1 P1 P1 P1 P1 F1x 62 S3 x 72 F2 x 10 130...
Страница 131: ...P2 x 2 P3 x 3 P4 x 1 F1x 46 S3 x 46 P2 P4 P4 P2 P3 P3 P3 P2 131...
Страница 134: ...F3 18 7R G2 F3 x 8 F3 18 7L G2 134...
Страница 135: ...Metallist aiakuur Vundamendikomplekt Kokkupanemisjuhised Suurus MF T 0608PS 135...
Страница 137: ...Manual instructions material Ohjekirjan materiaali Instruktionsmaterial H ndbok instruksjonsmateriale Juhendmaterjal...


