Good Will Instrument GFG-8210A Скачать руководство пользователя страница 9

FUNCTION GENERATOR

USER MANUAL

15

5-2.Triangle, square and sine wave

(1)


First select Function 

8

 , and select Range 

7

 , rotate FREQ 

13

 , to

set the required frequency (read out from display window).

(2)


At this moment, connect Output 

, to oscilloscope for observing

output signal, or connect to other experiment circuit.

(3)


Rotate AMPL 

12

 again to control waveform amplitude.

(4)


If attenuation output signal is required, pull out AMPL 

12

 knob to

obtain 20dB attenuation or press 

 knob for additional 20dB

attenuation.

(5)


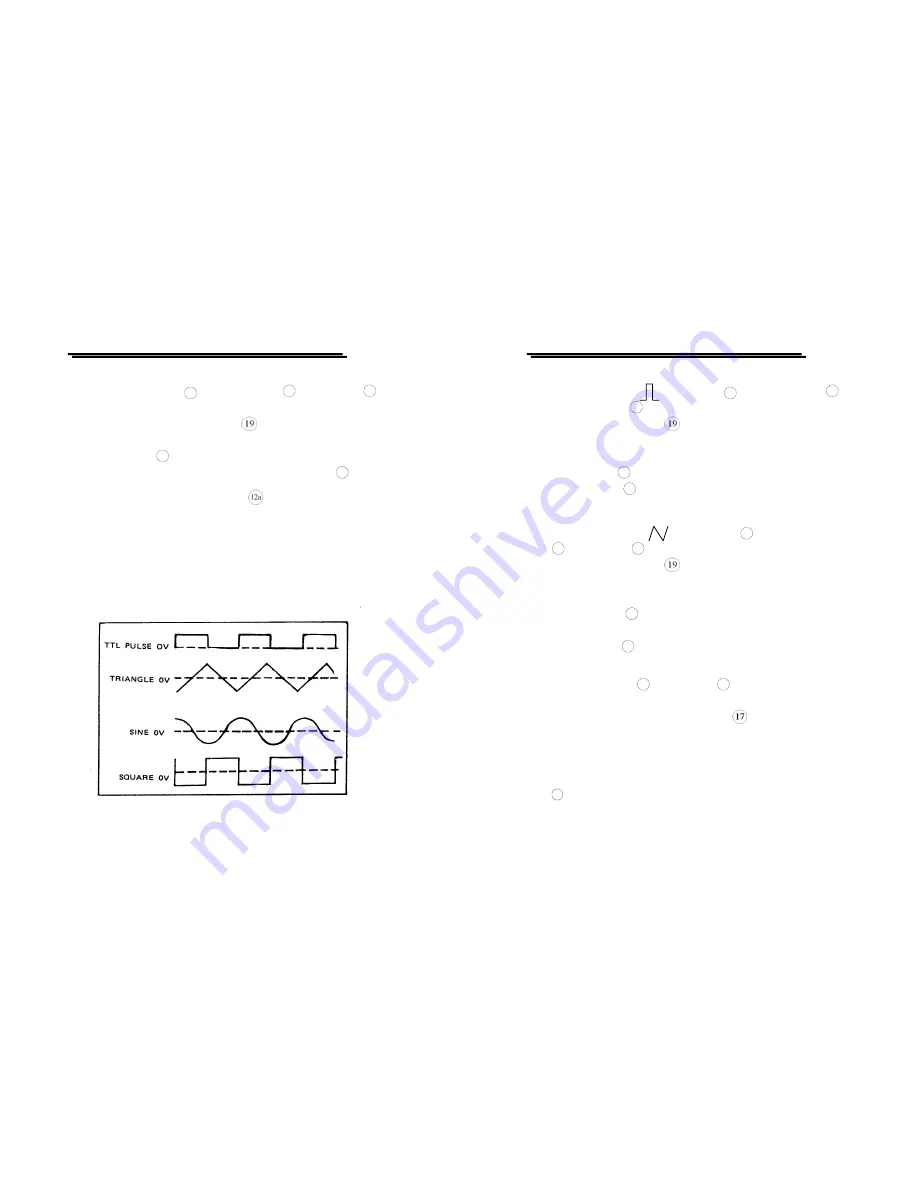
The phase-relation of Output Waveform shown in Figure 1 as

below:

z


Figure 1.

FUNCTION GENERATOR

USER MANUAL

16

5-3. Pulse wave generation

(1) First press the key (     ) of Function 

8

 ; then select Range 

7

 ,

and rotate FREQ 

13

 , to set required frequency range.

(2) Connect output-terminal 

 to oscilloscope for observing output

signal.

(3) Pull out and rotate Duty 

k

 to adjust the width of pulse waveform.

(4) Adjust AMPL 

12

 knob to control pulse amplitude.

(5) Pull out AMPL 

12

 knob to get 20dB attenuation of output.

5-4.Ramp wave generation

(1) First press the key (      ) of Function 

8

  , then select Range

7

 , rotate FEEQ 

13

 switch to set required frequency range.

(2) Connect output-terminal 

 to oscilloscope for observing output

signal.

(3) Pull out and rotate DUTY

k

 to adjust the slope of ramp waveform.

(4) Adjust AMPL 

12

 knob to control output amplitude of ramp

waveform.

(5) Pull out AMPL 

12

 knob to obtain 20dB attenuation of output.

5-5.TTL/CMOS signal output

(1)


First select Range 

7

, rotate FREQ 

13

 to set required frequency

range.

(2)


Connect BNC connector of TTL/CMOS

 to oscilloscope or to

other experiment circuit for observing output signal.

(3)


At this moment, output is square waveform fixing to TTL level;

s

uits for general TTL integrated circuit.

(4)


If square waveform of CMOS level is required, can pull out CMOS

10

 knob to adjust voltage level.

Содержание GFG-8210A

Страница 1: ...owing standards were applied EN 61326 1 Electrical equipment for measurement control and laboratory use EMC requirements 1997 A1 1998 Conducted and Radiated Emissions EN 55011 Group I class A 1998 Ele...

Страница 2: ...to the low voltage installation Measurement category III is for measurements performed in the building installation Measurement category IV is for measurements performed at the source of the low volta...

Страница 3: ...is marked with the letter N or coloured Blue or Black The wire which is coloured Brown must be connected to the terminal marked with the letter L or P or coloured Brown or Red If in doubt consult the...

Страница 4: ...l output in eight decade stages 0 1Hz to 10MHz 3 Adjustable sweep time and sweep width both in linear and logarithmic modes 4 Duty cycle control with signal inversion capability 5 External Voltage con...

Страница 5: ...urce AC115V 230V 15 50 60Hz Operation Environment Indoor use altitude up to 2000m Ambient Temperature 0 to 40 Relative Humidity 80 Maximum Installation category II Pollution Degree 2 Storage temperatu...

Страница 6: ...FUNCTION GENERATOR USER MANUAL 9 z Fig 4 1 FRONT PANEL FUNCTION GENERATOR USER MANUAL 10 z Fig 4 2 REAR PANEL...

Страница 7: ...0k 1M 10M Frequency Range 0 1Hz 1Hz 1Hz 10Hz 10Hz 100Hz 100Hz 1kHz 1kHz 10kHz 10kHz 100kHz 100kHz 1MHz 1M 10M 8 Function Selector Press one of the three push buttons to select the desired output wavef...

Страница 8: ...Output Terminal Main signal output 20 Power Switch 115V and 230V selectable FUNCTION GENERATOR USER MANUAL 14 5 USAGE DESCRIPTION The function generator can provide versatile waveforms of high efficie...

Страница 9: ...output signal 3 Pull out and rotate Duty k to adjust the width of pulse waveform 4 Adjust AMPL 12 knob to control pulse amplitude 5 Pull out AMPL 12 knob to get 20dB attenuation of output 5 4 Ramp wav...

Страница 10: ...equency 13 to perform auto sweep operation 5 Rotate SWEEP TIME 14 and SWEEP RATE to adjust sweep time and rate 6 Pull out press LIN LOG 14 to obtain LOG LIN sweep mode Note The sweep width can only be...

Страница 11: ...ge to rear stage orderly until appear a signal with normal input but with abnormal output B Use as bias source and signal source circuit Utilize the Figure 4 of connecting type which can provide bias...

Страница 12: ...oting and etc Used as signal tracing and signal replacing operation FUNCTION GENERATOR USER MANUAL 22 a Connect the lines as Figure 7 b According to the operation guide in this manual set Square wave...

Страница 13: ...ame as the R1 G Act as automatic test of speaker Because there provide the auto feature in this equipment the output can drive to amplifier for testing the frequency response of speaker a Set Auto Man...

Страница 14: ...FUNCTION GENERATOR USER MANUAL 25 z FIGURE 5 FUNCTION GENERATOR USER MANUAL 26 z FIGURE 6...

Страница 15: ...FUNCTION GENERATOR USER MANUAL 27 z FIGURE 7 z FIGURE 8 FUNCTION GENERATOR USER MANUAL 28 z FIGURE 9 z FIGURE 10...

Страница 16: ...d to do so 7 1 Fuse Rating and type If the fuse blows the FUNCTION GENERATOR will not operate Try to determine and correct the cause of the blown fuse then replace the fuse with the correct rating and...

Страница 17: ...g to the following steps 1 The handle must be turned downward 90 degrees first FUNCTION GENERATOR USER MANUAL 32 2 Pull apart the handle from the Function Generator Please turn the handle left and rig...

Страница 18: ...of rear panel Therefore the upper cover can pull toward the backside In the meantime the upper cover is moved Note If you want to install the upper cover please reverse above steps 7 3 Cleaning To kee...

Отзывы: