


49
6.
Inserire un tassello (W-B) in
ogni foro.
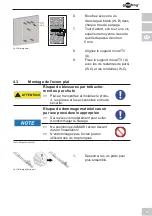
7.
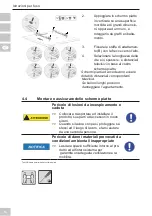
Innanzitutto, trasformare una,
vite
superiore
medio
in
modo
che
sporga
circa
5
mm.
8.
Allineare la staffa a muro per
TV (A).
9.
Fissare la staffa a muro per
Fig. 31:
Installazione su parete
TV (A) con le viti restanti
parete (W A) e le rondelle
(W-C).
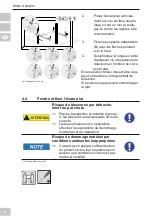
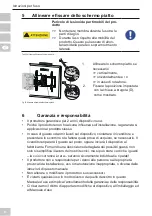
4.3 Installazione dello schermo piatto
Pericolo di lesioni da incespicamento
e caduta
>>
Collocare, trasportare ed installare il
prodotto, sue parti ed accessori in modo
sicuro.
Rischio di danni materiali a causa di
procedure inappropriate
>> Utilizzare solo una forza moderata per
stringere le viti in modo da evitare di dan-
neggiare la filettatura.
>>
>>
Non collocare MAI lo schermo sulla parte
anteriore durante l‘installazione!
Non danneggiare lo schermo piatto con
viti troppo lunghe.
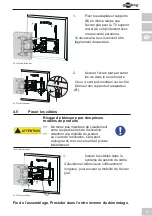
Tab. 42: Installazione dello schermo piatto
1.
Allentare le viti pronto per un
ulteriore
montaggio.
Fig. 32:
Installazione dello schermo piatto 1