5
NOTICE
1. If somehow user cannot get video output, please try to adjust EDID dip switch to
“[pin3, pin4] =[
↑
-
↓
]
”
or
“[pin3, pin4]=[
↓
-
↓
]
” for trouble shooting. Under “[pin3, pin4]=[
↑
-
↓
]
”, there will be video output.
The only requirement is that the display has to support at least Full HD. If default Full-HD EDID still
cannot work, user can switch to
“[pin3, pin4]=[
↓
-
↓
]
” to learn the EDID from output 1 to customize the
EDID information.
(Please note that the display with lowest resolution must be connected to
output 1)
Select to [pin3, pin4]=[
↑
-
↓
] - Full-HD(1080p@60)
– 12bit 3D video & 7.1ch audio
(1) Set the dip switch to
“[pin3, pin4]=[
↑
-
↓
]
”
(2) Power on the device
Select to [pin3, pin4]=[
↓
-
↓
]
– Learning EDID from output 1
(1) Set the dip switch to
“[pin3, pin4]=[
↓
-
↓
]
”
(2) Power on the device
(3) It will automatically learn EDID from output 1
[NOTE]
If the user wants to change EDID mode, please power cycle the device after setting dip switch.
2. Firmware update is proceeded through Micro-USB.
System firmware update
(1) Save the firmware file (.bin) & software in the same folder.
(2) Please try to adjust dip switch [pin1, pin 2]=[
↑
-
↑
]
(3) Connect the Micro-USB cable between PC and device
(4) Open firmware update software and then device will start to update firmware automatically.
(5) After update process is done, software will show
“Success” message and then be closed
automatically.
(6) Power cycle the device
6
System (for audio) firmware update
(1) Please adjust dip switch [pin1, pin 2]=[
↓
-
↑
]
(2) Connect the Micro-USB cable between PC and device
(3) Open the firmware update software
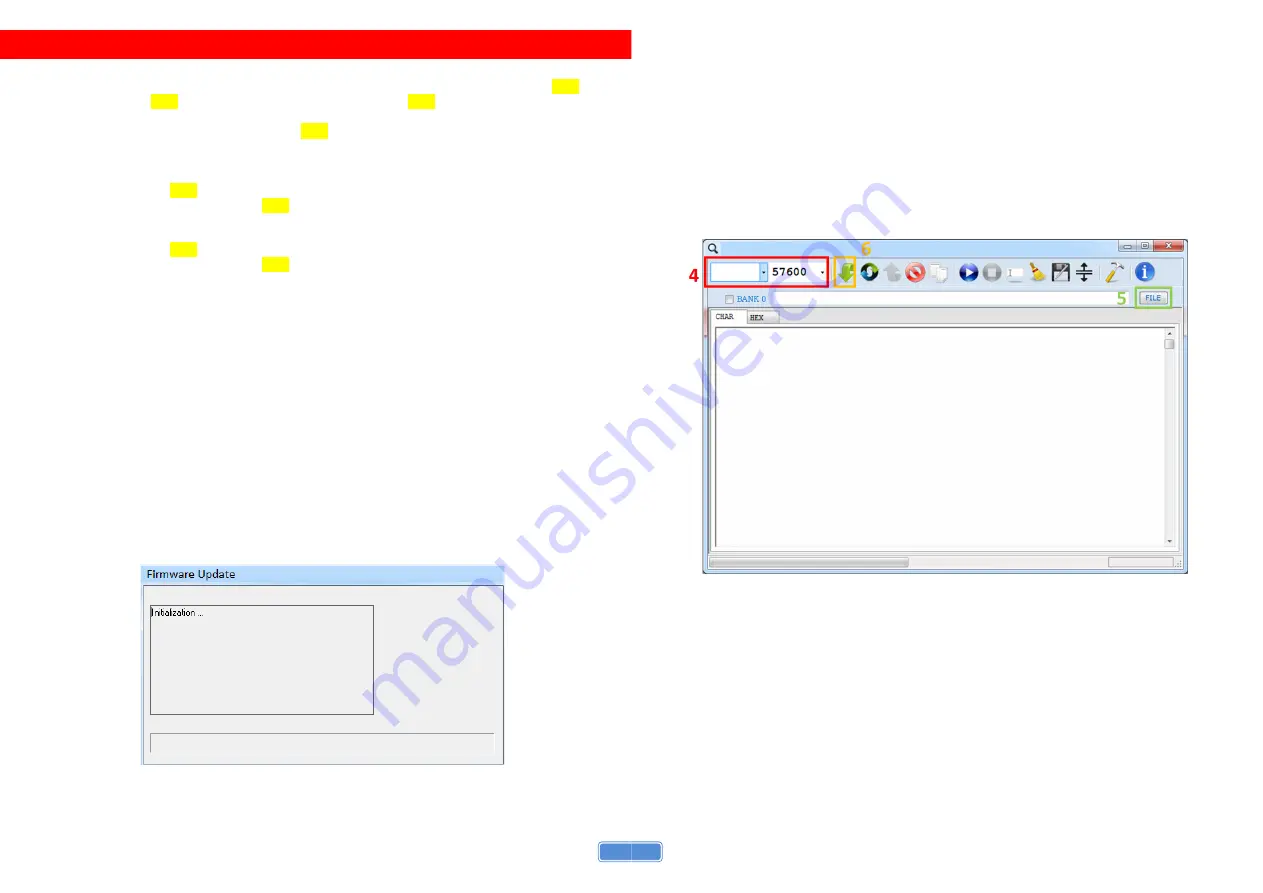
(4) Set the correct COM port and baud rate (57600 is recommended)
(5) Click the FILE button to load firmware file (.hex or .bin file)
(6) Press Program MCU symbol to do firmware update
(7) Once update process is done, please power cycle the device and set the dip switch [pin 1, pin 2] to
[
↓
-
↓
]


