10
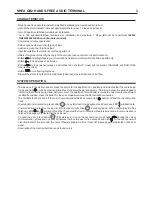
To change the ringtones, press button
for 3 seconds. The LEDs on buttons
and
will blink to indicate that
the terminal is in settings mode.
Setting the ringtones:
To change the ringtone group, press the con
fi
guration button
until the required ringtone group can be heard (up to
3 ringtone groups available in carousel mode).
To change the terminal's ringtones (door panel, intercom and apartment door), press settings button
.
There are three ringtone selection groups and each consists of three
fi
xed tones. The
fi
rst tone of each group heard
during selection corresponds to door panel calls, the second to intercom calls and the third to apartment door calls.
Description
:
Setting and selecting the ringtone group:
The terminal must be in standby to set and select the ringtone group.
NHEA GB2 HANDS-FREE AUDIO TERMINAL
To exit and save the selected ringtone group, press button
and the LEDs on buttons
and
will turn o
ff
.
The terminal exits settings mode after 7 seconds of inactivity and saves the last ringtone group selected.
Make a call to check that the correct ringtone group has been selected.
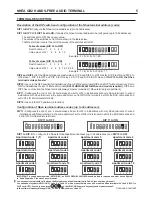
TERMINAL DESCRIPTION:
Intercom function:
Intercom functionality between two points in the same apartment comes as standard with the Nhea GB2 terminal.
The terminal must be in standby to make intercom calls.
To make an intercom call, press button
for 3 seconds. The LED on button
will blink, the LED on button
will
light up and the terminal(s) being called in the apartment will ring to confirm that the call is being made.
The call needs to be answered within 40 seconds.
To establish communication, press button
on the terminal called (or one of the terminals called if there is more than
one slave terminal).
Communication will last for one and a half minutes or until button
is pressed again.
'Do not disturb' mode function:
The terminal must be in standby to activate/deactivate 'Do not disturb' mode.
To activate 'Do not disturb' mode, press button
for 3 seconds. The terminal's status LED will then blink to indicate
that the function is activated. The terminal will not receive door panel, intercom or apartment door calls.
More than one terminal in the same apartment: Activating do not disturb mode in the master terminal will not allow calls
from the door panel to be received in the apartment. If do not disturb mode is activated in a slave terminal (not in the
master terminal), it will allow calls from the door panel to be received in the apartment except in the slave terminal with
do not disturb mode activated.
To deactivate do not disturb mode, press button
for 3 seconds. The terminal's status LED will then light up to indicate
that the function is deactivated. The terminal will now receive door panel, intercom and apartment door calls.
Light activation function:
The terminal must be in standby for light activation (SAR-GB2 and SAR-12/24 modules required).
For light activation (e.g. 'staircase light'), press button
.
Important:
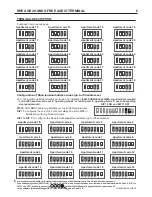
For connections and configuration, see the TSAR-GB2 and TSAR-12/24 manuals.


