background image

17

Charging and servicing the battery 

Important:

 Before using the battery for the first time, it should be charged continuously  

for at least 6 hours. 

   Red lamp = battery charging

   Green lamp = battery charged

  Charge the battery fully as soon as possible after each round of golf, even if there is 

still enough charge left in the battery for further use. Always begin a round of golf 
with a fully charged battery. 

  The battery should be stored flat in a warm place. Once the battery is charged,  

disconnect it from the power supply. 

Important:

 Always ensure the battery  

is charged before storing it. 

  If the battery has not been used for a long period of time, for example over winter, 

connect the battery to the power supply and charge it again. If it is not used for  
more than 3 months, recharge it during this period.

  Only use the charger supplied with the trolley.

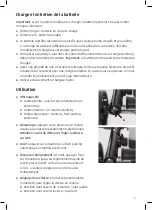
Operating


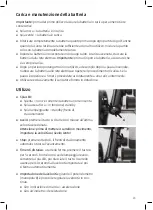
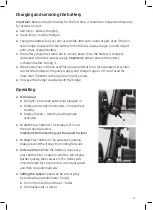
LED display: 

  No light = no power/battery not plugged in 

  Display constantly illuminated = in operation/

standby 

  Display flickers = standby, parking brake  

activated 


To start:

 Press button A. The trolley will run at  

the last speed selected. 


Important:


Before starting, set the speed to slow!


To stop:

 Press button A. The automatic parking  

brake prevents the trolley from rolling forward. 


Distance timer:

 While the trolley is stationary,  

press button A for 3 seconds until the LED display  
flashes quickly, then release it. The trolley will  
move forward for 10 seconds at a constant speed 
and then stop automatically. 


Setting the speed:

 Speed can be set variably  

by turning the potentiometer (cog B). 

  Turn in the direction of travel = faster

  Turn backwards = slower

LED

A

B

Содержание Easy Drive

Страница 1: ...Easy Drive Bedienungsanleitung Manuel d utilisation Manuale d uso User manual...

Страница 2: ......

Страница 3: ...terie Inhalt und Bestandteile 2 Antriebsr der Hinterr der 1 Vorderrad Trolleyrahmen Lithium Ionen Akku 6 6 Ah Batterie Ladeger t Bedienungsanleitung Zubeh rpaket bestehend aus Batteriekorb und schutzh...

Страница 4: ...und in der gew nschten H he durch Anziehen des schwarzen Feststellknaufs fixieren Wenn gew nscht Batteriehalterung K rbchen am Rahmen anschrauben Abb 3 Dazu zuerst die zwei teilige Bride am Rahmen be...

Страница 5: ...se l nger als 3 Monate f hren Sie unbedingt eine Zwischenladung durch Bitte verwenden Sie ausschliesslich das mitgelieferte Ladeger t 5 Bedienung LED Anzeige Kein Licht kein Strom Batterie nicht einge...

Страница 6: ...wahren Sie den Akku an einem trockenen Ort auf und vermeiden Sie extreme Temperaturen Bei langer Nichtbenutzung ber 3 Monate unbedingt Zwischenladung vornehmen Halten Sie Ihren Trolley unter Kontrolle...

Страница 7: ...Contenu et pi ces 2 roues motrices roues arri re 1 roue avant Cadre du chariot Batterie lithium ion 6 6 Ah Chargeur Manuel d utilisation Pack d accessoires Panier de batterie et housse de protection d...

Страница 8: ...doit tre dans le sens de la marche D plier le cadre du caddy et l ajuster la hauteur souhait e en serrant le bouton noir Si souhait visser le support de batterie panier sur le cadre ill 3 Fixer d abor...

Страница 9: ...ur une charge compl te En cas de pause sup rieure 3 mois proc der imp rativement une charge interm diaire Utiliser exclusivement le chargeur fourni Utilisation Affichage LED Diode teinte pas de couran...

Страница 10: ...ervez la batterie dans un endroit sec l abri des temp ratures extr mes En cas de non utilisation prolong e sup rieure 3 mois proc dez imp rativement une charge interm diaire Veillez toujours garder le...

Страница 11: ...componenti 2 ruote motrici ruote posteriori 1 ruota anteriore Telaio del carrello Batteria agli ioni di litio 6 6 Ah Caricatore Manuale d uso Pacchetto accessori comprendente Cestello e involucro pro...

Страница 12: ...prire il telaio del caddy e fissarlo all altezza deside rata tirando il pomello nero di fissaggio Se lo si desidera avvitare il supporto della batteria cestello al telaio fig 3 Per questa operazione f...

Страница 13: ...sa superiore a 3 mesi provvedere assolutamente a una carica intermedia Utilizzare esclusivamente il caricatore fornito in dotazione 13 Utilizzo Spia LED Spenta non c corrente la batteria non inserita...

Страница 14: ...d evitare di esporla a temperature estreme In caso di periodo prolungato di non utilizzo pi di 3 mesi eseguire obbligatoriamente una carica intermedia Tenere il carrello sotto controllo durante la mar...

Страница 15: ...Battery Contents and components 2 drive rear wheels 1 front wheel Trolley frame Lithium ion 6 6 Ah battery Charger Instructions for use Accessory package including Battery holder basket and protectiv...

Страница 16: ...nd secure it at the desired height by tightening the black locking knob If desired screw the battery holder basket onto the frame Fig 3 To do so first attach the two part mounting bracket to the frame...

Страница 17: ...supply and charge it again If it is not used for more than 3 months recharge it during this period Only use the charger supplied with the trolley Operating LED display No light no power battery not p...

Страница 18: ...he battery Store the battery in a dry location away from extreme temperatures If it is not used for a longer period more than 3 months recharge it during this period Keep your trolley under control al...

Страница 19: ......

Страница 20: ...e 32 CH 8800 Thalwil T 41 43 377 99 02 F 41 43 377 99 05 info golfomania ch www golfomania ch G ltig ab Valable d s le Valido da Valid from 1 1 2018 nderungen vorbehalten Sous r serve de modifications...

Отзывы: