


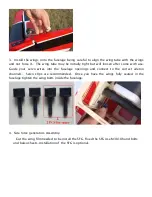

5. Place the servo in the bay and drill holes for the servo screws. Remove the servo and
apply thin cyano to the holes. Refit the servo and screw in place. Fit a metal servo
arm centering with your radio.
6. We recommend using KUZA 1.5” aluminium CNC servo arm (sold separately) for wing
control. Using the pushrods connect the servo arm to the horn. Remember that on
the pushrod one end is reverse threaded.
Use M2.5 screws and nuts to connect the pushrod. Set it so the aileron it level when the
arm is at 90 degrees.
Содержание SLICK540 170E
Страница 1: ...GoldWing RC 77in SLICK540 35CC 170E Giant Scale Aerobatic Aircraft ...
Страница 6: ... Pre hinged control surfaces Removable rudder Side force generators ...
Страница 11: ... Carbon fiber stab tube Scheme A Yellow white black ...
Страница 12: ...Scheme C White blue yellow ...
Страница 13: ...Scheme D White red blue ...
Страница 46: ...3 Fix the battery with both Velcro and straps ...
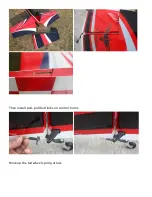
Страница 50: ...Then install pull pull ball links on control horns Hook up the tail wheel spring at last ...
Страница 55: ...For Hitec servo 24T 39mm 1 5in Single No KAG0S72H For JR servo 23T 39mm 1 5in Single No KAG0S72J ...


