background image


User Manual – GOLDMUND Epilogue 2 Signature – 7 

4  

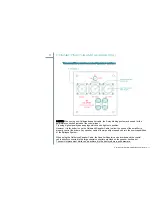
ASSEMBLING

 THE SPEAKER FEET 


NOTE:


This is for users who will NOT use the Epiframe 1. The Epiframe 1 is an external structure holding an 
Epilogue 2 Signature and an Epilogue 1 or Epilogue 1 Signature together. This accessory is sold 
separately.  
 

  First put the speaker on its side on the floor. Use a soft cushion to avoid damaging it. 


  Screw the long pointed bar in the threading accessible in the speaker’s bottom plate after 

removing the big screw used for shipment. Tighten as much as you can.  


  Take the 2 transparent acrylic feet and assemble them to the back of the Epilogue 2 Signature 

speaker, each with 2 washers and screws. Do not over-tighten the screws to avoid cracking 
the acrylic. 


  Lift the Epilogue 2 Signature speaker and put it on its feet. Adjust the leveling screw of each 

acrylic foot to properly level each Epilogue 2S speaker. 


  You will now be ready to put the Epilogue 1 on top of the Epilogue 2 Signature.  

  First use the plastic black covers provided to close the bottom port of the Epilogue 1 or 

Epilogue 1 Signature. 


  Then put the Epilogue 1 or Epilogue 1 Signature on top of the Epilogue 2 Signature.  


  Use the transparent acrylic small blocks to receive the back of the Epilogue 1.  


  The pointed bar assembled previously on the bottom of the Epilogue 1 must be set in the 

gliding row engraved on the top silver plate of the Epilogue 2 Signature. 


NOTE:


The short pointed bar is for mounting 
on the bottom of the Epilogue 1. You 
have to assemble it to the bottom of 
the Epilogue 1. 


Содержание EPILOGUE 2 SIGNATURE

Страница 1: ...USER MANUAL GOLDMUND EPILOGUE 2 SIGNATURE Bass Speaker System...

Страница 2: ...o the accurate reproduction of sound and image At Goldmund we strive to lead in the creation development and manufacture of the industry s most advanced technologies including audio and video systems...

Страница 3: ...Only careful installation and use can provide the satisfaction you are expecting The installation instructions must be scrupulously carried out and the mentioned precautions taken to get the expected...

Страница 4: ...2 Signature 4 CONTENTS INTRODUCTION 2 1 PRELIMINARIES 5 2 UNPACKING 5 3 SELECTING THE SPEAKERS LOCATION 6 4 ASSEMBLING THE SPEAKER FEET 7 5 CONNECTING THE AMPLIFIER S 8 6 RUNNING IN 12 7 CLEANING 12...

Страница 5: ...UNPACKING Two persons are necessary to install the Epilogue 2 Signature since the speakers are extremely heavy and some handling steps necessitate a lot of care Open the two cartons and remove the spe...

Страница 6: ...provide the most rigid possible coupling with the floor Solid coupling is essential and if your support is standing on a suspended floor optimal result requires that you arrange the support to have a...

Страница 7: ...rews Do not over tighten the screws to avoid cracking the acrylic Lift the Epilogue 2 Signature speaker and put it on its feet Adjust the leveling screw of each acrylic foot to properly level each Epi...

Страница 8: ...ssover for the Epilogue 2 Signature drivers In all other above cases leave this switch to STD ATTENTION Each Epilogue 2 Signature Speaker is delivered with two gold plated jumpers on the bottom 5 way...

Страница 9: ...can be tighten in position However it is far better to use the Goldmund Speaker Cable to allow the speed of the amplifier to properly control the drivers Any speaker cable of lower quality or speed ca...

Страница 10: ...hich can be tighten in position However it is far better to use the Goldmund Speaker Cable to allow the speed of the amplifier to properly control the drivers Any speaker cable of lower quality or spe...

Страница 11: ...be tighten in position However it is far better to use the Goldmund Speaker Cable to allow the speed of the amplifier to properly control the drivers Any speaker cable of lower quality or speed can ru...

Страница 12: ...st hours can be very frustrating for a demanding listener Do not hesitate to let them play quite loud some time before attempting any real system tuning or position adjustment 7 CLEANING To clean the...

Страница 13: ...utoff 200 Hz DRIVERS o 2 x 25 cm drivers mounted in push pull with front speaker mounted backwards CROSSOVER o 120 specially selected components per crossover o Crossover switch STD OFF DIRECT BASS LO...

Отзывы: