background image

9

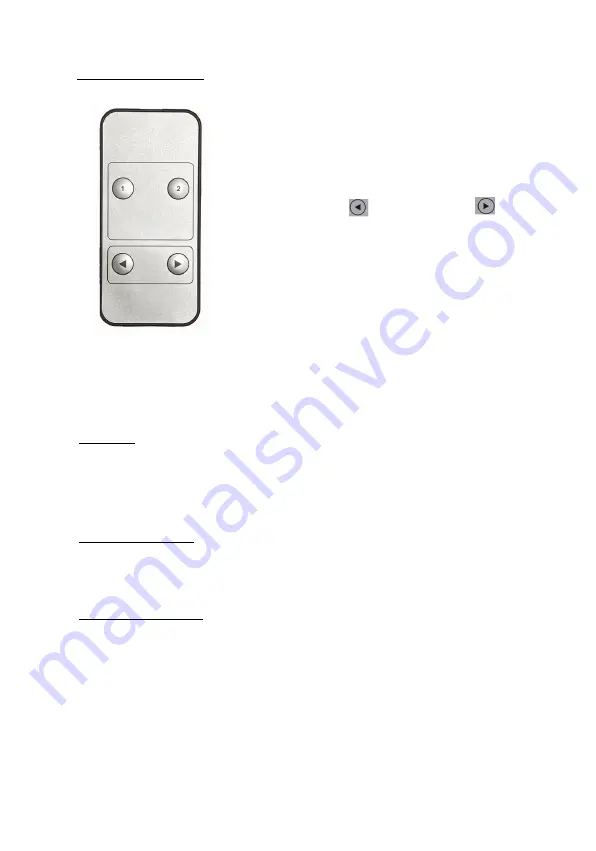
Remote Control

Press button 1, 2 to select between

the connected PCs.

Press the back        or forward
button to switch PCs in sequence

order: PC1 > PC2

Special Functions

Mouse

Place the mouse cursor on the far right of the display then

move the cursor to the right for 2 seconds, the KVM

switches to the next PC.  Switching order: PC1 > PC2.

USB Detection

When a PC is connected the KVM's USB-B port the KVM

automatically switches to it.

Auto Switching
When the current active PC is powered off, the KVM

automatically switches to the next active PC.

Содержание KVMHD2-2P

Страница 1: ...2 Port 4K HDMI KVM with USB 3 0 User s Guide G4 0126A P N KVMHD2 2P ...

Страница 2: ...n Please pay close attention to all warnings and hints for this device Do not expose this unit to rain heavy moisture or liquid Do not put any items into the device or attempt to modify its operation Do not repair the device or open the enclosure without professional guidance to avoid electric shocks Doing so may void your warranty Keep the product in a well ventilated location to avoid damage fro...

Страница 3: ...up to 4K 3840x2160 4096x2160 60Hz HDR 3D Includes a 2 port USB 3 0 hub KVM Switching IR remote push buttons and keyboard hotkeys Simple plug n play installation without additional driver installation InstallationRequirements HDMI computers HDMI display HDMI cables not included USB A to B cables included Audio cables not included Microphone cables not included PackageContents 2 Port 4K HDMI KVM USB...

Страница 4: ...Cis selected Blinks Auto switching mode is enabled Online LED PC1 PC2 On when USB port is connected to the corresponding PC 4 IR Ext Connects to the included IR Receiver cable Receives signals from the included remote control 5 IR Receiver Receives signals from the included remote control 6 Microphone Input Connects to your Microphone 7 Audio Output Connect to speakers or headphones 8 USB 3 0 Port...

Страница 5: ... speakers or headphones Microphone jack Connect to your Microphone HDMI Out Connect to an HDMI display 10 PC1 Inputs Connects to PC1 s HDMI output USB 3 0 port microphone input jack audio output jack 11 PC2 Inputs Connects to PC2 s HDMI output USB 3 0 port microphone input jack audio output jack 12 PowerJack Connectstotheincludedpoweradapter ...

Страница 6: ...ing IR signals Rear Panel Connection 1 Connect your HDMI display to the corresponding videooutputconnector HDMIcablenotincluded 2 Connectyourkeyboardandmousetothekeyboard and mouse USB ports of the KVM 3 Plug the HDMI microphone and speaker connectors of the KVM into their corresponding sockets on PC1 cables not included 4 Plug the included USB cable between the KVM and PC1 5 Repeat steps 3 and 4 ...

Страница 7: ...7 ConnectionDiagram The application diagram shows the most typical input and output devices used with the KVM ...

Страница 8: ...n keyboard hotkey and IR remote control Manual Push Button Press the front panel switch button to switch between the connected computers Keyboard Hotkey Works with PC keyboard connected to USB A ports on the back panel Note Mac keyboards do not support keyboard hotkey function due to lack of Scroll Lock key ...

Страница 9: ...e Place the mouse cursor on the far right of the display then move the cursor to the right for 2 seconds the KVM switches to the next PC Switching order PC1 PC2 USB Detection When a PC is connected the KVM s USB B port the KVM automatically switches to it Auto Switching When the current active PC is powered off the KVM automatically switches to the next active PC ...

Страница 10: ...10 Specifications ...

Страница 11: ...ers TM and may be omitted on the user s guide The pictures on the user s guide are just for reference and there may be some slight differences with the actual products We reserve the right to make changes without prior noticetoaproductorsystemdescribedhereintoimprove reliability function or design ...

Страница 12: ...Thank you for choosing gofanco www gofanco com ...

Отзывы: