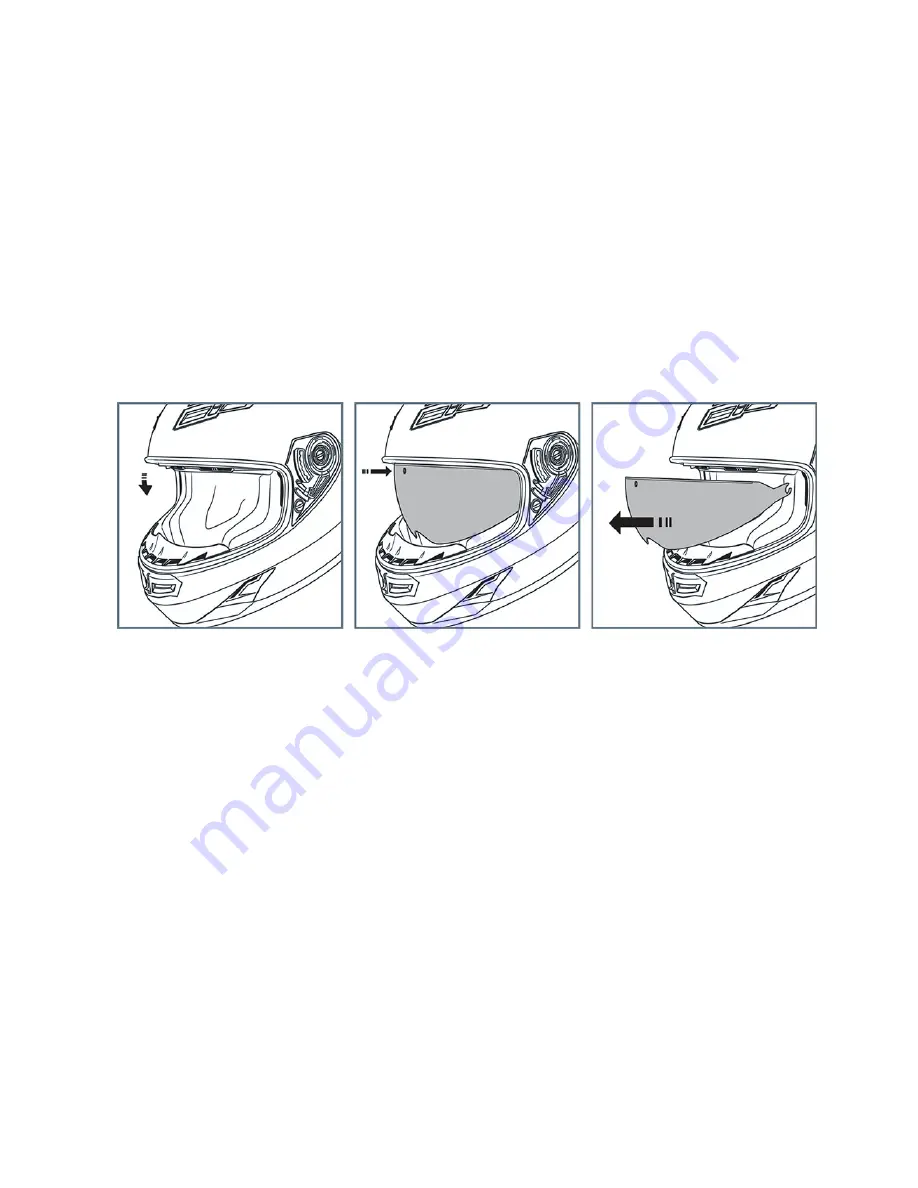
completely forward into the “service position”.
2. The service position is achieved by pushing on the rearward part of the slider button and
sliding it forward over and past the molded in channel that it rides in.
3. When in the service position, the attachment arm that connect to the inner shield will be
visible.
4. Take a small, thin, round tool, and push on the attachment arm pin to disengage the arm
from the inner shield.
5. When the center attachment arm is free from the inner shield, grasp and pull straight out
from the helmets eye port on each side of the inner shield to remove.
To install the outer shield: reverse the removal process.
Note:
The sides of the inner shield are simply snapped into place. No tools are needed to remove or
install.
Models
•
GM32
Inner Sun Shield Removal
Removal
1. Turn the button to let the shield on open position.
2. Pull the inner sun shield out to remove the shield.
Installation
1. Make sure the side button is in the open position, and put the inner sun shield into the
groove and push the inner sun shield until hear the click.
2. Try to open / close the inner sun shield and make sure it is installed correct.


