background image

 3   |  Countertop P400 Quick Start Guide 

WARNINGS

• 

Do not use liquids near your device. Spilling liquids onto your device may damage it and make it unsafe to use. 

• 

Do not use thinner, trichloroethylene, or ketone-based cleaning products to clean your device; they can  
corrode the plastic and rubber parts. 

• 

Do not spray cleaning products directly onto your device.

• 

Use only the cables we provide for your device. 

• 

Do not plug your power adapter into an outdoor power outlet.

• 

Do not disconnect power to your device while you are running a transaction.

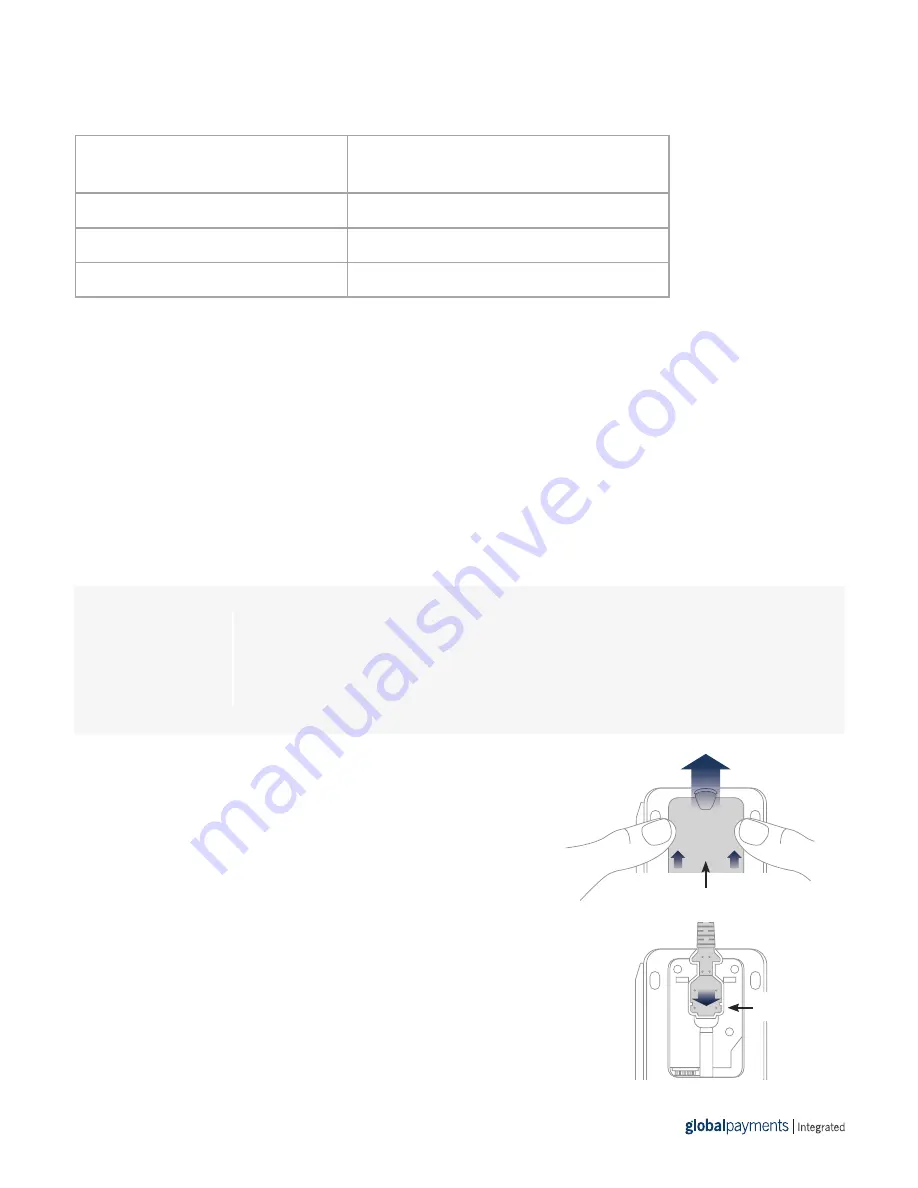
STEP 1: ATTACH THE UTILITY CABLE

1. Turn your device upside–down and place it on a flat, stable surface.

2. Remove the rear cover by sliding it up and lifting it off.

3. Attach the utility cable to your device.  

Push the connector straight down so that you don’t bend the pins. 

BEFORE  
YOU  
BEGIN

Find your Merchantware credentials. We sent these in an email with 
“Merchantware Credentials” in the subject line.

Make sure your internet connection is working correctly and that your router 
or switch has a free Ethernet port.

SPECIFICATIONS

Power

5-12 V DC, 4.8-5.2 W power consumption, 
power over USB 5 V, 500 mA

Operating temperature

32°F to 122°F (0°C to 50°C)

Storage temperature

-4°F to 140°F (-20°C to 60°C)

Relative humidity

5% to 90%, non-condensing

Remove the rear cover

Attach the 

utility cable

Содержание Countertop P400

Страница 1: ...Follow the steps in this guide to set up your P400 to work with your POS Countertop P400 Quick Start Guide...

Страница 2: ...rnet cable Utility cable 12V power adapter Contactless reader Chip card slot Enter button Magnectic stripe reader Cancel button Full color display Back button THE PLATFORM HOW IT WORKS 7 PRST UV SP WX...

Страница 3: ...LITY CABLE 1 Turn your device upside down and place it on a flat stable surface 2 Remove the rear cover by sliding it up and lifting it off 3 Attach the utility cable to your device Push the connector...

Страница 4: ...cable into an available port on your router or switch 2 Insert the other end of the Ethernet cable into the Ether port on the utility cable STEP 3 ATTACH THE POWER ADAPTER 1 Insert the 12V DC power a...

Страница 5: ...passcode is 9416557 3 Check that there is an IP address next to the IP address field Run a gateway connection test 1 From the home screen use the keypad to press 000 2 Use the keypad to type the passc...

Страница 6: ...Tap Static 6 Use the keypad to type the static IP settings provided by your network administrator 7 Tap Save NOTE IP addresses must be 12 digits in length For IP addresses with a value less than 12 d...

Страница 7: ...number 1 From the home screen use the keypad to press 000 2 Use the keypad to type the passcode then tap OK The default passcode is 9416557 3 Note the number next to the Serial Number field Your Merc...

Отзывы: