5
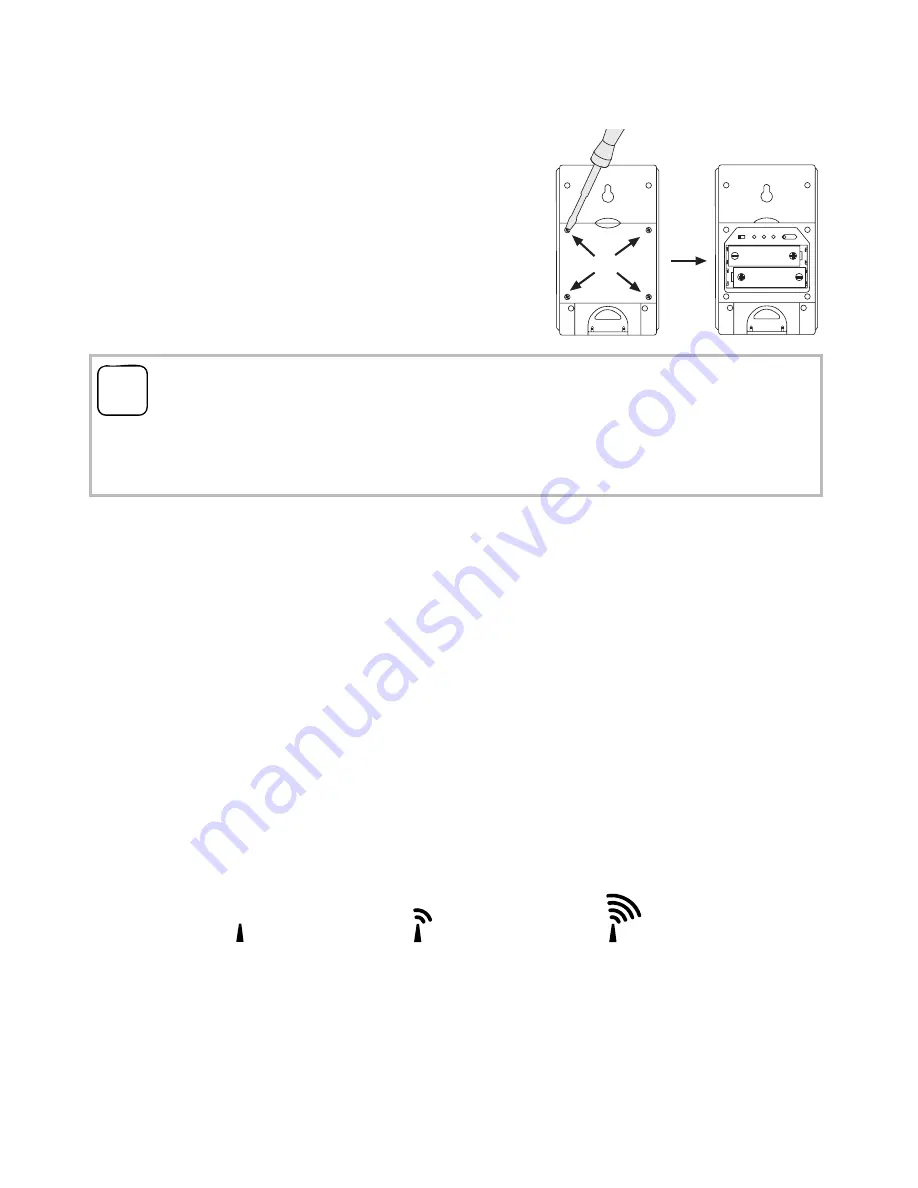
On the back of the radio sensor:
1. Loosen and remove screws on battery
compartment.
2. Set a radio channel (slider switch,
ch. 1 - 5). Different radio channels
must be set if several radio sensors
are used.
3. Specify radio controlled clock signal format (slider switch EU/UK).
EU= Europe, UK= Great Britain.
4. Insert batteries (2 x UM-3 (AA) 1.5 V). Note the polarity shown
in the battery compartment.
5. Specify the temperature display unit (°C or °F) with the
°C/°F button
(applies only for the display of the radio sensor).
6. Press the
Reset
button until the display goes out.
7. When the display appears again, press the
Search button
until
the antenna symbol flashes in the display.
✓
The radio sensor now searches for the radio controlled clock sig-
nal. This process may last up to 10 minutes. It is complete when
the antenna symbol continuously displays the reception quality:
no signal:
weak signal:
strong signal:
If no radio controlled clock signals were received, relocate the
radio sensor and press the
Search button
again.
If a radio controlled clock signal is still not received, set clock
manually (see Page 20).
8. Close battery compartment and screw in screws.
i
Outside sensor on channel 1
An outside sensor must be connected to channel 1 for the "snow"
indicator in the forecast area.
EU UK
CH
SEARCH °C/°F RESET
1 2 3 4 5
Содержание 0334 Series
Страница 1: ...Operating instructions Radio weather station 0334...
Страница 27: ...27...


