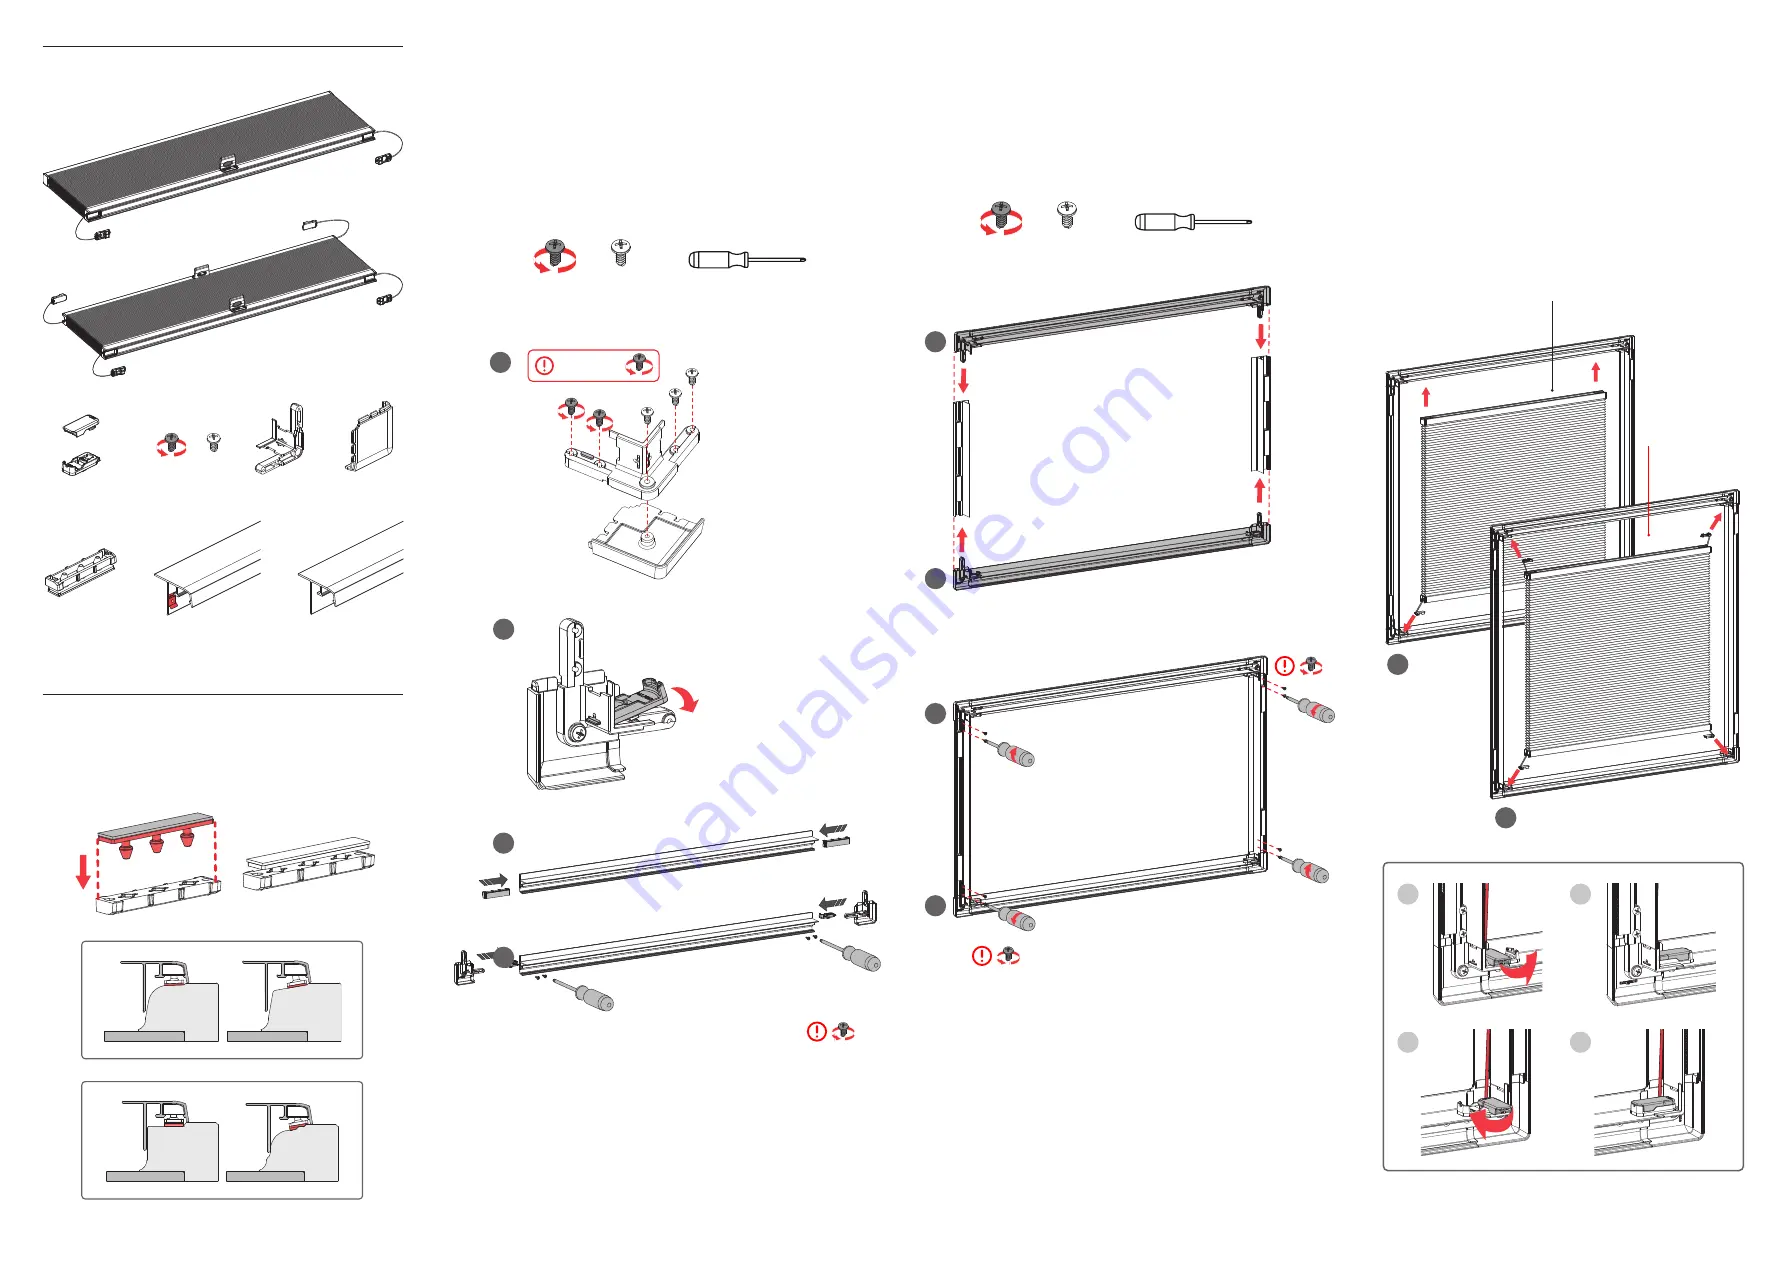
Insert the piece with adhesive into the piece shown, applying pressure.
2.1 Attach the interior angle to the angle.
2.2 Place the shown half of the thread clip in position.
2.3 Insert two clips into the profile groove as shown, with the same dimensions
in the two profiles, equivalent to the height of the window. And one in the
remaining profile.
2.4 Place the angles at both ends and attach them to the uneven profile, using 8
normal screws and 4 left-hand screws.
3.1 Position the lateral profiles, joining the previously assembled bottom profile
to the Stor box.
3.2 Attach the assembly using the left-hand screws. Screw them diagonally into
the angles.
3.3 Repeat the operation with the remaining screws.
Starting with side A
4.1 With the other half of the clip, clamp the thread
4.2 Place the clip perpendicular to the plane of the Stor. Rotate and hold the
clip as shown.
Model 111
4.3 Repeat the same process on the other side.
4.4 Fix on the upper frame with the ceiling bracket.
Model 140
4.3
Repeat the same process on the other 3 sides, tightening the thread.
1. Clip profiles
2. Bottom profile
3. Product assembly
4. Thread tension
Components
Model 111
Model 140
5x Clip frame
3x
Perfil marco
4x Profile
frame
1x Upper profile
with ceiling support
2x Clip cuerda
4x Clip cuerda
4x Interior
antgle
Screws
8x
12x
4x Angle
Product assembly
x4
x8
Star screwdriver
Gira a izquierda
1
2
5x
4x
3
4
x4
x4
Star screwdriver
2
1
4
3
1
3
2
4
A
A
Model 140
Model 111
Turn left


