WPA-PSK encryption:
Use WPA-PSK (Preshared Key) for WPA-PSK encryption (TKIP
and AES).
The system will read the Key with different types of encryption according to the length of
Preshared Key.
1. Enter Preshared Key. Please enter 64
hexadecimal digits
or 8~63 ASCII digits.
2. Click “OK to save these settings.
3-1-2-2. 802.1X Authentication
Click
“Use 802.1X Authentication”
and then
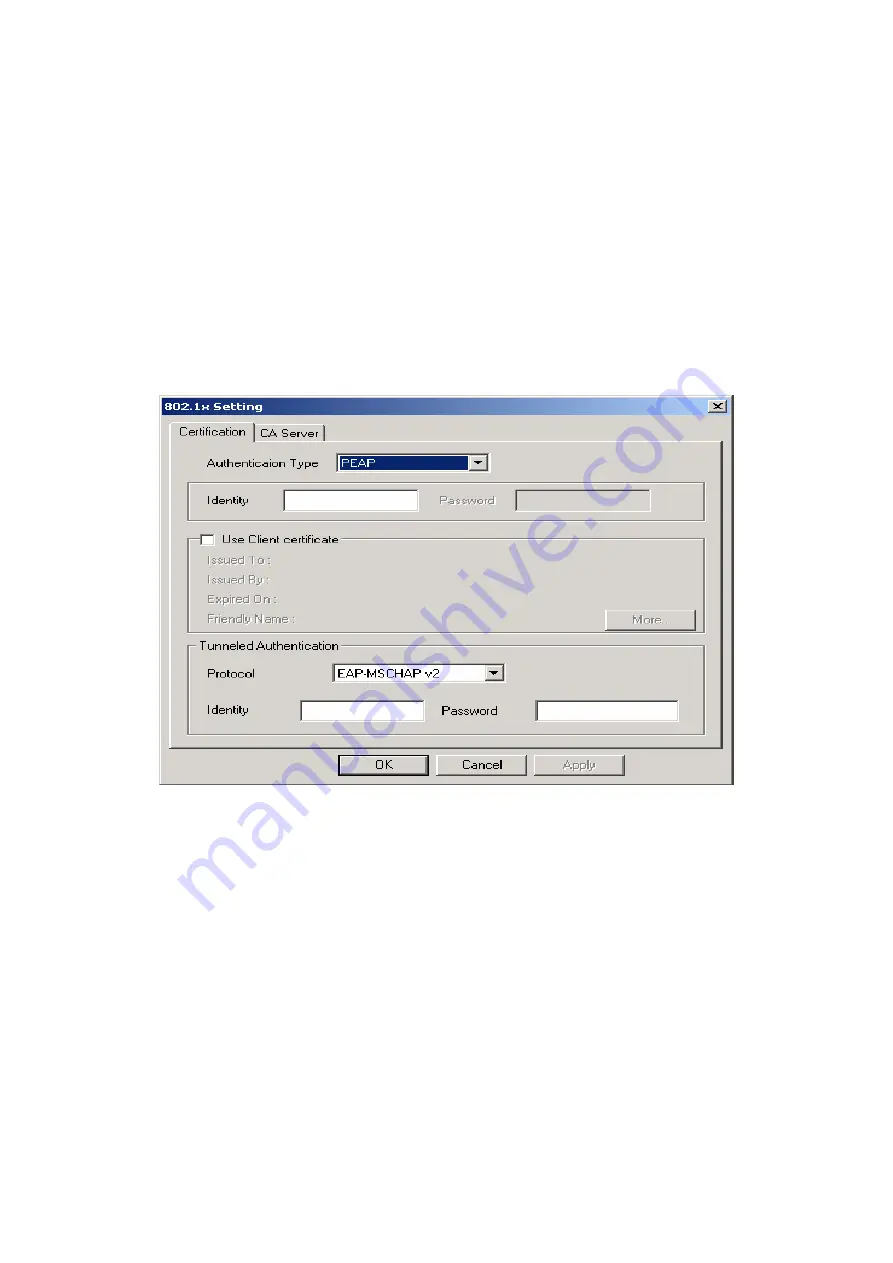
“Enter 802.1X configuration”
. When you
select this option, you may configure information about authentication, such as Tunnel
Protocol, ID and Password and Client Certificate or Certificate Chain.
(see Figure 3-6 and
3-8)
Figure 3-6.
802.1X Authentication
Description of items in
Figure 3-6
is as follows:
Authentication type:
PEAP, TLS/Smart Card, TTLS, LEAP and MD5-Challenge.
Identity:
Users’ accounts.
Password:
Passwords for users’ accounts can be used when LEAP and MD5-Challenge
are selected as authentication types.
Use Client Certificate:
This certificate is necessary for TLS and an option for PEPA and
TTLS. Check “Use Client Certificate” to confirm if the Client Certificate is correct in the
authentication process. Click “More” when selecting a Client Certificate (shown in
Figure
3-7
). Users can select one suitable certificate as Client Certificate.
Tunnel Authentication:
PEPA and TTLS use two-step authentication method. The first
step is that Server sets up a Tunnel with its authentication. No option is need to be set for
Station with WLAN card. The second step is to confirm the validity of Station with assigned
25
Содержание GN-WI01GT
Страница 8: ...Step 4 Click Next Step 5 Click Next 5 ...
Страница 12: ...Step 4 Click Next Step 5 Click Next 9 ...
Страница 13: ...Step 6 Click OK Step 7 Click Finish Step 8 To install 802 1X authentication function click Browse the CD 10 ...
Страница 16: ...Step 4 Click Next Step 5 Click Next 13 ...
Страница 17: ...Step 6 Click OK Step 7 Click Finish 14 ...
Страница 18: ...Step 8 Click Yes Step 9 To install 802 1X authentication function click Browse the CD 15 ...
Страница 21: ...Step 4 Click Next Step 5 Click Next 18 ...
Страница 22: ...Step 6 Click Finish Step 7 To install 802 1X authentication function click Browse the CD 19 ...
Страница 37: ...Chapter 5 Specification 34 ...


