


- 111 -
Appendix
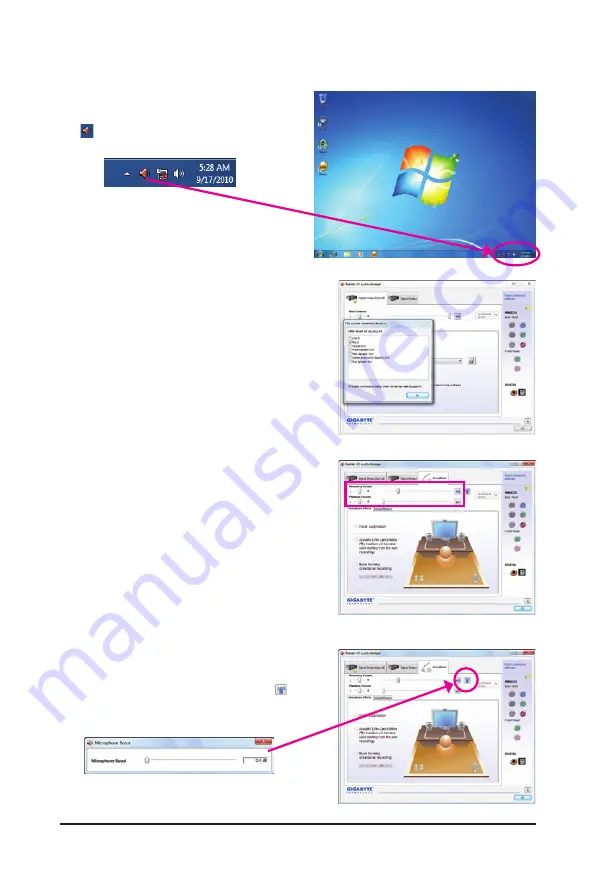
5-2-4 Configuring Microphone Recording
Step 2:
Connect your microphone to the Mic in jack (pink) on
the back panel or the Mic in jack (pink) on the front
panel. Then configure the jack for microphone function-
ality.
Note: The microphone functions on the front panel and
back panel cannot be used at the same time.
Step 3:
Go to the
Microphone
screen. Do not mute the record-
ing volume, or you'll not be able to record the sound.
To hear the sound being recorded during the recording
process, do not mute the playback volume. It is recom-
mended that you set the volumes at a middle level.
Step 1:
After installing the audio driver, the
HD Audio Manager
icon will appear in the notification area. Double-click
the icon to access the
HD Audio Manager
.
Step 4:
To raise the recording and playback volume for the
microphone, click the
Microphone Boost
icon on
the right of the
Recording Volume
slider and set the
Microphone Boost level.
Содержание GA-P67A-UD7
Страница 2: ...Motherboard GA P67A UD7 Nov 8 2010 Nov 8 2010 Motherboard GA P67A UD7...
Страница 34: ...34 Hardware Installation...
Страница 62: ...BIOS Setup 62...
Страница 86: ...Unique Features 86...
Страница 123: ...123 Appendix...
Страница 124: ...Appendix 124...
Страница 125: ...125 Appendix...
Страница 126: ...Appendix 126...


