background image

- 16 -

BIOS (Basic Input and Output System) records hardware parameters of the system in the CMOS on the 

motherboard. Its major functions include conducting the Power-On Self-Test (POST) during system startup, 

saving system parameters and loading operating system, etc. BIOS includes a BIOS Setup program that allows 

the user to modify basic system configuration settings or to activate certain system features.

When the power is turned off, the battery on the motherboard supplies the necessary power to the CMOS to 

keep the configuration values in the CMOS.

To access the BIOS Setup program, press the <Delete> key during the POST when the power is turned on.

To upgrade the BIOS, use either the GIGABYTE Q-Flash or @BIOS utility.


Q-Flash allows the user to quickly and easily upgrade or back up BIOS without entering the operating system.


@BIOS is a Windows-based utility that searches and downloads the latest version of BIOS from the Internet 

and updates the BIOS.

Chapter 2  BIOS Setup


Because BIOS flashing is potentially risky, if you do not encounter problems using the current 

version of BIOS, it is recommended that you not flash the BIOS. To flash the BIOS, do it with 

caution. Inadequate BIOS flashing may result in system malfunction.


It is recommended that you not alter the default settings (unless you need to) to prevent system 

instability or other unexpected results. Inadequately altering the settings may result in system's 

failure to boot. If this occurs, try to clear the CMOS values and reset the board to default values. 

(Refer to the "Load Optimized Defaults" section in this chapter or introductions of the battery/clear 

CMOS jumper in Chapter 1 for how to clear the CMOS values.)

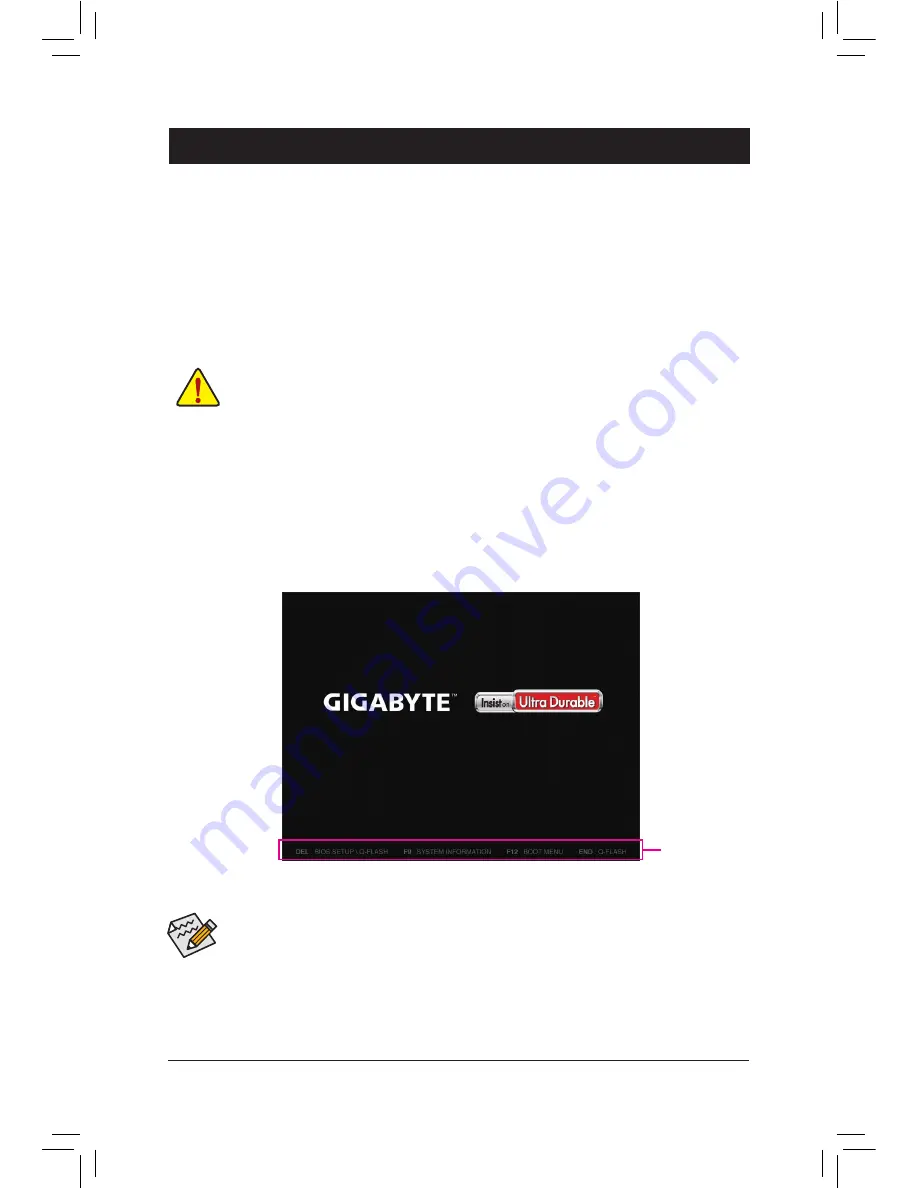
2-1  Startup Screen

The following startup Logo screen will appear when the computer boots.

(Sample BIOS Version: F1)

Function Keys

On the main menu of the BIOS Setup program, press arrow keys to move among the items and press <Enter> 

to accept or enter a sub-menu. Or you can use your mouse to select the item you want.


When the system is not stable as usual, select the 

Load Optimized Defaults

 item to set your system to its defaults.


The BIOS Setup menus described in this chapter are for reference only and may differ by BIOS version.

Содержание GA-C1037UN-LA

Страница 1: ...GA C1037UN LA User s Manual Rev 1001 12ME C1037LA 1001R ...

Страница 2: ...ransmitted or published in any form or by any means without GIGABYTE s prior written permission In order to assist in the use of this product carefully read the User s Manual For product related information check on our website at http www gigabyte com Identifying Your Motherboard Revision The revision number on your motherboard looks like this REV X X For example REV 1 0 means the revision of the...

Страница 3: ...ns 6 1 2 Product Specifications 7 1 3 Installing the Memory 9 1 4 Back Panel Connectors 9 1 5 Internal Connectors 11 Chapter 2 BIOS Setup 16 2 1 Startup Screen 16 2 2 M I T 17 2 3 System Information 19 2 4 BIOS Features 20 2 5 Peripherals 23 2 6 Power Management 25 2 7 Save Exit 26 Chapter 3 Drivers Installation 27 Regulatory Statements 28 Contact Us 32 3 ...

Страница 4: ...and the actual items shall depend on the product package you obtain The box contents are subject to change without notice 4 KB_MS SYS_FAN Intel Celeron 1037U AUDIO DDR3_2 DDR3_1 BAT ATX_12V Intel NM70 CODEC PCIe to PCI Bridge B_BIOS M_BIOS COM iTE Super I O USB_LAN GA C1037UN LA F_PANEL F_USB1 F_USB2 SATA2 3 2 USB_HDMI ATX VGA LPT CI F_AUDIO CLR_CMOS 0 SATA3 CPU_FAN PCI Realtek GbE LAN SATA2 1 SPD...

Страница 5: ...woofer Speaker Out Line In Rear Speaker Out PS 2 KB Mouse Intel Celeron 1037U CPU DMI CPU CLK 100 MHz Dual BIOS DDR3 1600 1333 MHz Dual Channel Memory LPC Bus LPT Intel NM70 8 USB 2 0 1 1 PCI Express Bus PCIe CLK 100 MHz COM iTE Super I O 1 SATA 6Gb s x1 LAN RJ45 Realtek GbE LAN D Sub HDMI x1 1 PCI PCI CLK 33 MHz PCIe to PCI Bridge 3 SATA 3Gb s S PDIF Out CODEC 5 ...

Страница 6: ...ory If you do not have an ESD wrist strap keep your hands dry and first touch a metal object to eliminate static electricity Prior to installing the motherboard please have it on top of an antistatic pad or within an electrostatic shielding container Before unplugging the power supply cable from the motherboard make sure the power supply has been turned off Before turning on the power make sure th...

Страница 7: ...t 1 x HDMI port supporting a maximum resolution of 1920x1200 Support for HDMI 1 4 version Maximum shared memory of 1 GB Audio Realtek ALC887 codec High Definition Audio 2 4 5 1 7 1 channel To configure 7 1 channel audio you have to use an HD front panel audio module and enable the multi channel audio feature through the audio driver LAN Realtek GbE LAN chip 10 100 1000 Mbit Expansion Slots 1 x PCI...

Страница 8: ... BIOS 2 6 ACPI 2 0a Unique Features Support for BIOS Support for Q Flash Support for Xpress Install Support for EasyTune Available functions in EasyTune may differ by motherboard model Support for Smart Recovery 2 Support for Auto Green Support for ON OFF Charge Bundled Software Norton Internet Security OEM version Intel Smart Connect Technology Operating System Support for Windows 8 1 8 7 XP Form...

Страница 9: ... called a printer port Serial Port Use the serial port to connect devices such as a mouse modem or other peripherals D Sub Port The D Sub port supports a 15 pin D Sub connector Connect a monitor that supports D Sub connection to this port USB 2 0 1 1 Port The USB port supports the USB 2 0 1 1 specification Use this port for USB devices such as a USB keyboard mouse USB printer USB flash drive and e...

Страница 10: ... RJ 45 LAN Port The Gigabit Ethernet LAN port provides Internet connection at up to 1 Gbps data rate The following describes the states of the LAN port LEDs When removing the cable connected to a back panel connector first remove the cable from your device and then remove it from the motherboard When removing the cable pull it straight out from the connector Do not rock it side to side to prevent ...

Страница 11: ...f the devices and your computer Unplug the power cord from the power outlet to prevent damage to the devices After installing the device and before turning on the computer make sure the device cable has been securely attached to the connector on the motherboard 1 ATX_12V 2 ATX 3 CPU_FAN 4 SYS_FAN 5 SATA3 0 6 SATA2 1 2 3 7 BAT 8 F_PANEL 9 F_AUDIO 10 F_USB1 F_USB2 11 SPDIF_O 12 CLR_CMOS 13 CI 8 2 12...

Страница 12: ...lies power to the CPU If the 12V power connector is not connected the computer will not start 3 4 CPU_FAN SYS_FAN Fan Headers The motherboard has a 3 pin CPU fan header CPU_FAN and a 4 pin system fan header SYS_FAN Most fan headers possess a foolproof insertion design When connecting a fan cable be sure to connect it in the correct orientation the black connector wire is the ground wire The speed ...

Страница 13: ...MOS values may not be accurate or may be lost You may clear the CMOS values by removing the battery 1 Turn off your computer and unplug the power cord 2 Gently remove the battery from the battery holder and wait for one minute Or use a metal object like a screwdriver to touch the positive and negative terminals of the battery holder making them short for 5 seconds 3 Replace the battery 4 Plug in t...

Страница 14: ... on the chassis front panel Press the reset switch to restart the computer if the computer freezes and fails to perform a normal restart NC No connection 1 2 9 10 NC PLED PW PLED PW HD RES HD RES Message Sleep LED Power Switch Hard Drive Activity LED Reset Switch 9 F_AUDIO Front Panel Audio Header The front panel audio header supports Intel High Definition audio HD andAC 97 audio You may connect y...

Страница 15: ...udio output from your motherboard to your graphics card if you wish to connect an HDMI display to the graphics card and have digital audio output from the HDMI display at the same time For information about connecting the S PDIF digital audio cable carefully read the manual for your expansion card Pin No Definition 1 SPDIFO 2 GND 1 12 CLR_CMOS Clear CMOS Jumper Use this jumper to clear the BIOS co...

Страница 16: ...tentially risky if you do not encounter problems using the current version of BIOS it is recommended that you not flash the BIOS To flash the BIOS do it with caution Inadequate BIOS flashing may result in system malfunction It is recommended that you not alter the default settings unless you need to to prevent system instability or other unexpected results Inadequately altering the settings may re...

Страница 17: ... alter the clock ratio for the installed CPU CPU Frequency Displays the current operating CPU frequency Advanced CPU Core Features CPU Clock Ratio CPU Frequency The settings above are synchronous to those under the same items on the Advanced Frequency Settings menu CPU Core Enabled Allows you to determine whether to manually enable disable CPU cores Auto lets the BIOS automatically configure this ...

Страница 18: ...ts good performance level Default Extreme Lets the system operate at its best performance level DRAM Timing Selectable Quick and Expert allows the Channel Interleaving Rank Interleaving and memory timing settings below to be configurable Options are Auto default Quick Expert Channel Interleaving Enables or disables memory channel interleaving Enabled allows the system to simultaneously access diff...

Страница 19: ...according to the system temperature You can adjust the fan speed with EasyTune based on your system requirements Default Silent Allows the system fan to run at slow speeds Manual Allows you to control the system fan speed under the Slope PWM item Disabled Allows the system fan to run at full speeds Slope PWM Allows you to control the system fan speed This item is configurable only when System Fan ...

Страница 20: ...tallation disk and is prefixed with UEFI string System Time Sets the system time The time format is hour minute and second For example 1 p m is 13 0 0 Use Enter to switch between the Hour Minute and Second fields and use the Page Up or Page Down key to set the desired value Access Level Displays the current access level depending on the type of password protection used If no password is set the de...

Страница 21: ...isabled All USB devices are disabled before the OS boot process completes Full Initial All USB devices are functional in the operating system and during the POST Partial Initial Part of the USB devices are disabled before the OS boot process completes Default This item is configurable only when Fast Boot is set to Enabled This item is disabled when Fast Boot is set to Ultra Fast PS2 Devices Suppor...

Страница 22: ...t to Always Storage Boot Option Control Allows you to select whether to enable the UEFI or legacy option ROM for the storage device controller Disabled Disables option ROM Legacy Only Enables legacy option ROM only Default UEFI Only Enables UEFI option ROM only Legacy First Enables legacy option ROM first UEFI First Enables UEFI option ROM first This item is configurable only when CSM Support is s...

Страница 23: ...you to decide whether to configure the SATA controller integrated in the Chipset to AHCI mode IDE Configures the SATA controller to IDE mode Default AHCI Configures the SATA controllers to AHCI mode Advanced Host Controller Interface AHCI is an interface specification that allows the storage driver to enable advanced Serial ATA features such as Native Command Queuing and hot plug USB2 0 Controller...

Страница 24: ...ices Displays a list of connected USB mass storage devices This item appears only when a USB storage device is installed OnBoard LAN Controller Enables or disables the onboard LAN function Default Enabled If you wish to install a 3rd party add in network card instead of using the onboard LAN set this item to Disabled Super IO Configuration This section provides information on the super I O chip an...

Страница 25: ...tton Instant Off Press the power button and then the system will be turned off instantly Default Delay 4 Sec Press and hold the power button for 4 seconds to turn off the system If the power button is pressed for less than 4 seconds the system will enter suspend mode Internal Graphics Standby Mode Allows you to determine whether to let the onboard graphics enter standby mode to decrease power cons...

Страница 26: ...ar the password settings Power On By Mouse Allows the system to be turned on by a PS 2 mouse wake up event Note To use this function you need an ATX power supply providing at least 1A on the 5VSB lead Disabled Disables this function Default Move Move the mouse to turn on the system Double Click Double click on left button on the mouse to turn on the system ErP Determines whether to let the system ...

Страница 27: ... the BIOS settings First select the profile you wish to load and then press Enter to complete You can select Select File in HDD USB FDD to input the profile previously created from your storage device or load the profile automatically created by the BIOS such as reverting the BIOS settings to the last settings that worked properly last known good record Chapter 3 Drivers Installation Before instal...

Страница 28: ...reatment collection recycling and disposal of electric and electronic devices and their components Under the Directive used equipment must be marked collected separately and disposed of properly WEEE Symbol Statement The symbol shown below is on the product or on its packaging which indicates that this product must not be disposed of with other waste Instead the device should be taken to the waste...

Страница 29: ...more of the following measures Reorient or relocate the receiving antenna Increase the separation between the equipment and receiver Connect the equipment into an outlet on a circuit different from that to which the receiver is connected Consult a dealer or experienced TV radio technician for help Canada Industry Canada IC Notices Canada avis d Industry Canada IC This Class B digital apparatus com...

Страница 30: ... 30 ...

Страница 31: ... 31 ...

Страница 32: ... ggts gigabyte com tw WEB address English http www gigabyte com WEB address Chinese http www gigabyte tw You may go to the GIGABYTE website select your language in the language list on the top right corner of the website GIGABYTE Global Service System To submit a technical or non technical Sales Marketing question please link to http ggts gigabyte com tw Then select your language to enter the syst...

Отзывы: