background image

En

glis

h

23

turn off the power and keep all the devic-
es away from any electronic part.
 
Note:
It is strongly recommended that all 
coolant is drained from the liquid cool-
ing system prior to transportation of the 
computer system to prevent leakage if 
it is dropped or damaged. Although this 
has already been tested before the prod-
uct is dispatched from the factory, the 
chassis is not designed to be transport-
ed with coolant inside the liquid cooling 
system.

Warning:
Use only GIGABYTE liquid coolant; any 
damage arising from the use of other 
liquid products is not covered by war-
ranty. Leakage of liquid coolant due to 
improper installation may damage the 
system and is not covered by warranty.

4-13-8 Draining out all the coolant.
a. Please make sure that all the power is 

turned off.

b. Prepare an empty container with a 

cross screwdriver.

c. Place the chassis on a table or higher 

platform and put the empty container 
on the floor next to the chassis.

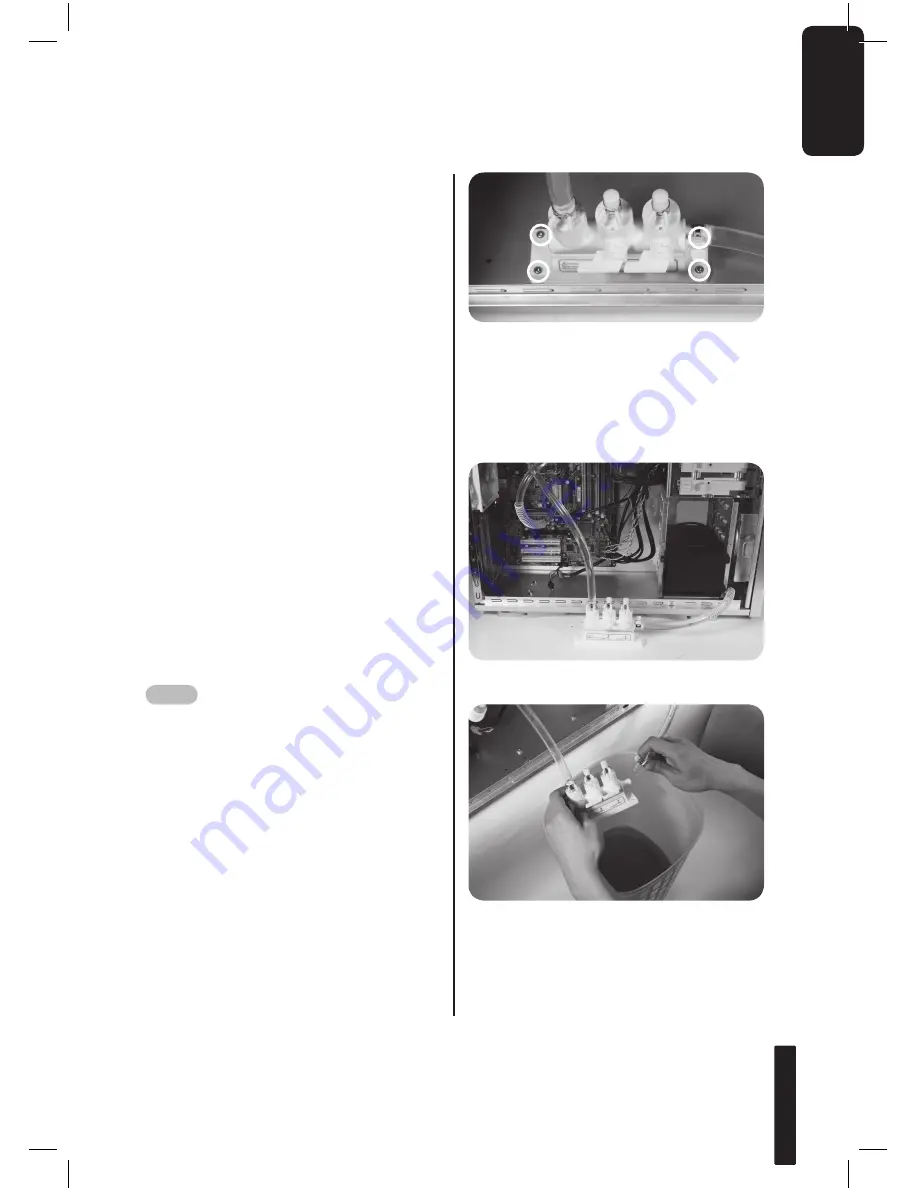
d. Using the screwdriver, remove the 

bottom 4-way splitter valve from the 
chassis.

e. Place the 4-way splitter valve outside 

of the chassis (Fig A), remove the 
right tube (Fig. B) and let the cool-
ant drain into the bucket/barrel (Fig. 
C). Turn on power to let water in tank 
drain out.


Fig. A

Fig. B

Содержание 3D Mercury

Страница 1: ...3D Mercury English User s Manual GZ FW1CA AJS AJB...

Страница 2: ...e to interference from other devices 4 Unapproved modification of the product 5 Consequential damage to other objects due to the product s fault 6 Malfunction arising from natural hazards e g earthqua...

Страница 3: ...on Card 12 4 4 Installation of Front Multi Media I O Ports 13 4 5 Connection of Fan Power Cables 14 4 6 Installation of 5 25 Front Device Bay 15 4 7 Installation of 3 5 Front Device Bay 15 4 8 Instal...

Страница 4: ...and off x 12 b Power Extension Cable x 2 c 3 5 device Securing Runner x 10 d Key x 2 e Wire clamp x 2 f Motherboard Secur ing Screw x 12 g Power Supply Secur ing screw x 4 h AM2 Water block bracket i...

Страница 5: ...Panel a USB 2 0 x 2 b Audio HD AC97 c IEEE1394 Multi connectors d 3 Pin Fan Connector e Power SW Reset SW HDD LED Connector f Motherboard 2 pin connec tor and 4 pin connector to power supply Side Gril...

Страница 6: ...sign Gigabyte Tech top class full tower thermal solution casing Lightweight aluminum alloy with hair line brush anodized finishing Full open aluminum side panel door design with hair line brush anodiz...

Страница 7: ...y splitter valve for easy upgrading Only a few easy steps to complete installation System Security Viewing window at the front of the chassis to see the coolant level in tank Automobile standard tubes...

Страница 8: ...0mm nickel plated SECC 1 0mm Net weight 12KG 5 25 drive bay external 4 Controller 3 5 drive bay external 2 3 5 drive bay internal 5 PCI slot 7 Motherboard size ATX Micro ATX Mini ATX E ATX CEB System...

Страница 9: ...screw x 4 4 1 1 Remove the thumb screws of the left side panel and detach the left panel by unlatching the side panel 4 1 2 Remove the thumb screws of the power supply retainer plate at the back of th...

Страница 10: ...ss screwdriver will be needed for this procedure 4 1 7a Remove the thumb screws of the side panels and detach both side panels 4 1 7b Remove the thumb screws of the power retainer plate at the rear of...

Страница 11: ...ed please use the extended power supply retainer plate and secure with the extended screws 4 1 7i Reverse the steps to reassemble the parts 4 2 Installation of Mother board 3D Mercury can support ATX...

Страница 12: ...board at the back wall of the case sup plied by the motherboard manufacturer 4 2 5 Use the motherboard screws to secure the motherboard onto the back wall of the case refer to your mother board manua...

Страница 13: ...y The front panel includes 1 4 x USB 2 0 1 x IEEE 1394 and HD or AC 97 audio jack depending on the motherboard 2 Basic casing power switch control cable kit Required Tools None 4 4 1 Insert the USB 2...

Страница 14: ...L 5 Line Out R 10 NC AC 97 Connector Color Reset SW Green White Power SW Red White H D D LED Brown White 4 4 3 Insert the Audio connector into the corresponding socket on the mother board 4 4 4 Basic...

Страница 15: ...Refer to the figure for installation procedure 4 7 Installation of 3 5 Front Device Bay Installation of the 3 5 front device is the same as the 5 25 front devices Please refer to step 4 6 4 8 Install...

Страница 16: ...f your HDD 4 9 Application of Secu rity Lock 3D Mercury includes a safety lock on the side panel Insert the key into the lock and rotate it 90 degrees according to the diagram to lock and unlock it 4...

Страница 17: ...clamps and re move the mesh grid d Take the transparent side panel win dow out from the carton box and remove the plastic protection layer e Screw the transparent side panel win dow onto the side pan...

Страница 18: ...te installation direction Fig b c 4 12 2 Intel Pentium LGA775 bracket installation 4 12 2 1 Place the water block on top of the Intel Pentium LGA775 CPU Fig a and adjust to the desired direction Fig b...

Страница 19: ...ed on the CPU 4 12 4 AM2 Clip Cover Installation 4 12 4 1 Replace the clip cover on the water block to the AMD AM2 clip cover Align the AMD AM2 clip to the raised points on the CPU 4 12 4 2 Fasten the...

Страница 20: ...ease remove the lid on the top of the chassis and check the coolant level gauge on the front panel of the chassis Fill the tank to 80 full and close the lid Turn on the power until all the coolant dra...

Страница 21: ...st splitter on the 4 way splitter valve 1 and connect the other side to the inlet of the VGA Blue Eye and fasten with tube clips 4 13 3 Cut a tube into suitable size con nect one side of the tube with...

Страница 22: ...6 Before turning on the power please make sure all tube clips are fastened tightly such as Fig a b c and open the valves on the 4 way splitter valves such as Fig d and e Fig a b and c Fig d and e 4 1...

Страница 23: ...g from the use of other liquid products is not covered by war ranty Leakage of liquid coolant due to improper installation may damage the system and is not covered by warranty 4 13 8 Draining out all...

Страница 24: ...coolant secure the lid back on 4 14 2 If pump makes strange noises please make sure that there is no air inside the tubes You will need tools for this Please prepare a cross screwdriver and cloth to c...

Страница 25: ...g screws g Remove the cables from the cable holder h Remove the 2 screws that secure the funnel and then remove the funnel and the coolant level measurer for the LWP alarm i Remove the plate that secu...

Страница 26: ...side panels b Release the plastic clamps that hold the front panel onto the chassis and remove the front panel c Take out the fan holder and separate the fan holder from the fan d After cleaning the...

Отзывы: